Tiny Home Layouts That Make Small Living Feel Effortless

The biggest mistake people make when planning a tiny home is treating it like a regular house that just got smaller. A tiny home is its own kind of space with its own rules, and the layout you choose will shape everyday life more than any paint color or piece of furniture ever could. The right floor plan can make 300 square feet feel open, generous, and full of light. The wrong one can make that same space feel cramped and impossible to move around in.
What makes tiny home layouts interesting is that there is no universal right answer. Some people thrive in open studio plans where everything flows into everything else. Others need clearly defined zones with walls or dividers to feel calm. Some want a loft above their head with the bed tucked away, while others cannot stand stairs and prefer everything on one level. The trick is figuring out which approach fits your daily routine and how you actually live.
This article walks through 19 different tiny home layouts grouped into five themes, so you can see how each approach handles space, light, storage, and movement. Whether you are building from scratch, shopping for a pre-built model, or rethinking the home you already have, the goal is to give you real, usable ideas rather than vague advice. Some of these layouts are bold and unusual. All of them work when matched to the right person.
Open and Airy Layouts for a Spacious Feel
Open layouts are the most popular approach in tiny home design for good reason. By removing interior walls and letting one zone flow into the next, even a small footprint can feel surprisingly generous. The four layouts below lean on openness, sightlines, and natural light to make compact living feel anything but tight. They work especially well for solo dwellers, couples, and anyone who values flow over rigid room separation.
1. The Single-Room Open Plan
This is the most stripped-down tiny home layout you can build. The entire main floor is one continuous space where the kitchen, living area, and dining nook share the same room without any walls or partitions. Only the bathroom is enclosed, usually tucked into a back corner. A single-room open plan works best in footprints between 200 and 350 square feet, since going larger makes the lack of zones feel awkward.
Lean into furniture that pulls double duty. A bench by the window can hold storage underneath and seat people for meals, while a round dining table feels less intrusive than a rectangular one. Run the kitchen along one wall in a galley setup, leaving the other walls free for a sofa or a small desk. Use light wood floors, warm cream walls, and one large window at the end to make the eye travel the full length of the room. Add a wool rug under the seating area and pendant lights over the dining table for warmth. This layout is budget friendly because you save on framing, doors, and dividing materials.

2. The L-Shaped Open Plan
If a straight rectangular layout feels too predictable, an L-shaped footprint creates two natural arms of space that meet at a corner. One arm holds the kitchen and dining area, while the other holds the living room and a small workspace. This shape works best for tiny homes on permanent foundations, since trailers usually need to stay rectangular for legal towing widths.
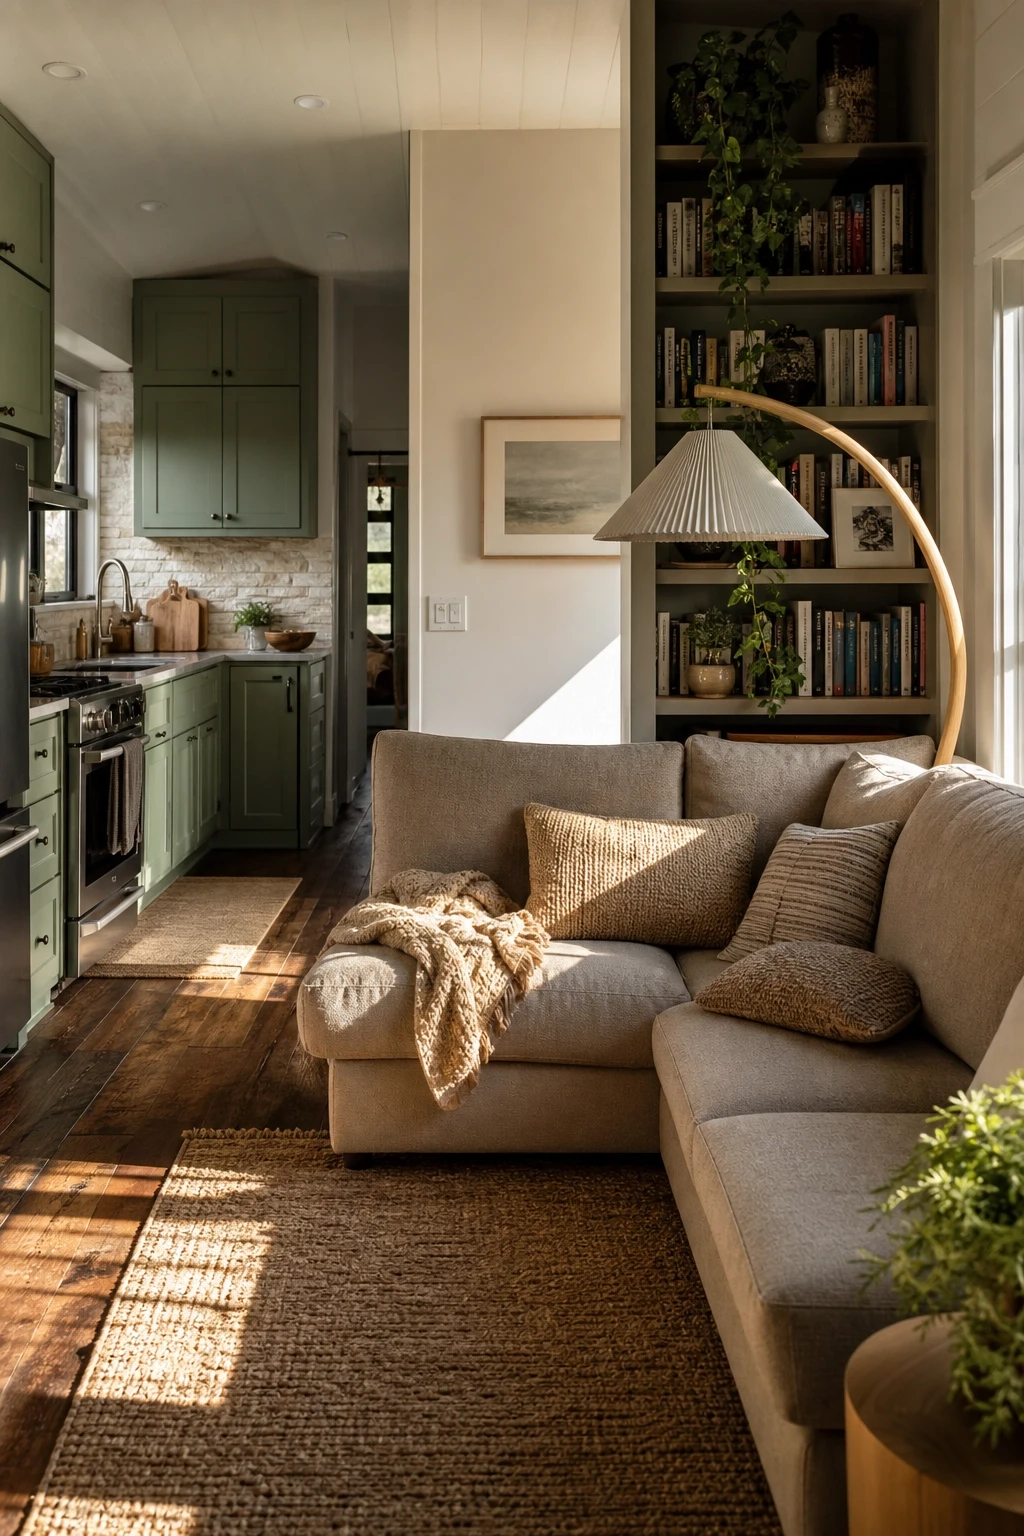
A corner sofa fits perfectly into the inside angle of the L, giving more seating than a regular couch would in the same footprint. In the kitchen arm, run base cabinets and counters along the outer wall with a small peninsula instead of a full island. For lighting, each arm deserves its own primary source, like a pendant cluster over the dining table and a floor lamp by the sofa. The corner where the arms meet calls for something sculptural, such as a large arched floor lamp or a feature wall in stone or wood. Painting one arm in a slightly warmer tone than the other subtly signals when you have moved between zones.
3. The Galley-Style Open Plan
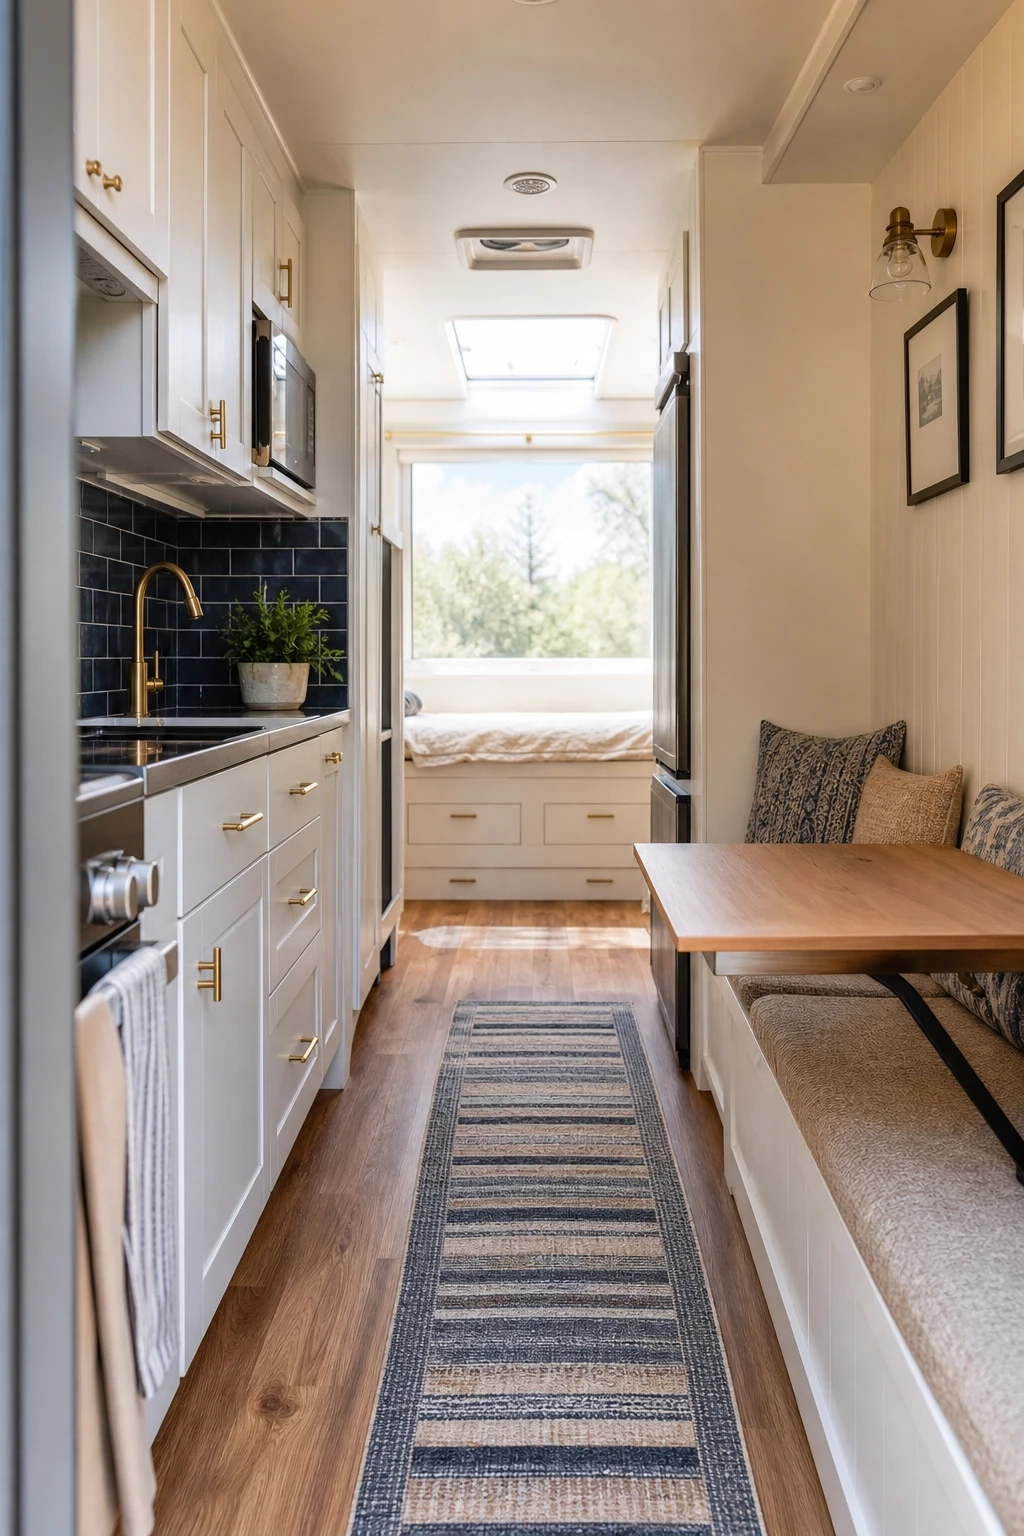
Galley layouts borrow from boat and train design, with two parallel runs of cabinetry or furniture and a central walkway between them. In a tiny home, this means putting the kitchen on one long wall and a combination of seating and storage on the opposite wall. The main door usually opens at one end, with the bathroom or bedroom at the other. Every inch of wall does work, and the central path keeps the space feeling navigable.
Furniture should hug the walls. A built-in bench with a wall-mounted fold-down table replaces a traditional dining set, and a daybed-style sofa runs along the wall to double as guest sleeping. Use upper kitchen cabinets all the way to the ceiling to maximize storage. A narrow runner rug down the central walkway adds warmth and signals movement. Light blues, soft greens, or pale warm grays work beautifully on the long walls, and a skylight at the far end pulls natural light deep into the space, preventing that tunnel feel.
4. The Studio Layout with a Floating Bed
In this layout, the bed is the centerpiece of the main floor rather than hidden in a loft. The entire home is one open studio, with the bed roughly in the middle of the long axis. Living zone on one side, kitchen and dining on the other. It sounds unusual but works beautifully for people who do not want to climb into a loft and who like the visual statement of a bed in plain view.
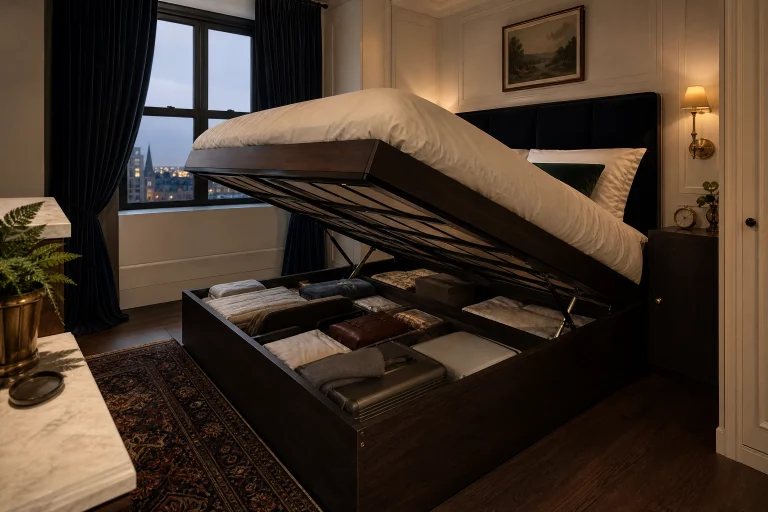
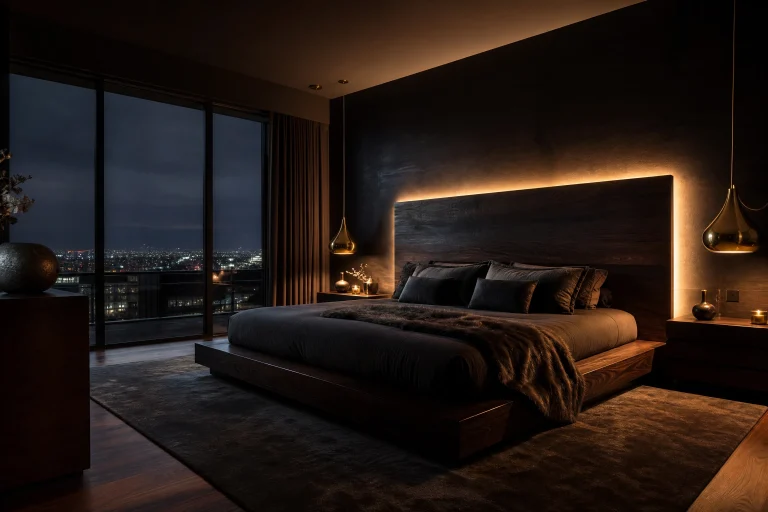
Use a low platform bed with built-in drawers underneath for storage. A long, low console behind the headboard divides the bedroom zone from the living area without blocking light. Place the sofa facing away from the bed so the two zones feel separate even though there is no wall. Curtains hung from a ceiling track can be pulled across at night for privacy when guests visit. Choose linen or brushed cotton bedding so the bed reads as part of the decor, and layer wall sconces, table lamps, and a floor lamp to create different pools of warm light that define each zone.

Loft-Centered Layouts for Vertical Living
Lofts are the most iconic feature of tiny home design, and for good reason. By moving the sleeping area upstairs, you free up the entire main floor for living, cooking, and gathering. The four layouts below explore different ways to use a loft, from the classic single platform to clever twin lofts and walkway designs. These plans work especially well in tiny homes with steep roof pitches, since the loft depends on enough headroom in the upper portion of the structure.
5. The Classic Sleeping Loft
This is the layout most people picture when they hear the words tiny home. A single sleeping loft sits above one end of the main floor, accessed by a ladder or stairs. The space under the loft is around 6 to 7 feet tall and houses the kitchen or a sitting area, while the loft itself has just enough headroom for sitting up in bed. The opposite end of the main floor stays full height for your tallest furniture and main living zone.
The loft should hold the mattress, a slim built-in shelf for books and a lamp, and not much else. For climbing access, a storage staircase beats a ladder if you have the floor space, with each step doubling as a hidden drawer. Paint the loft ceiling a slightly lighter color than the main ceiling to make the lower headroom feel less oppressive. A soft wool rug, a reading sconce, a string of warm LED lights along the edge, and at least one small window for ventilation make the loft genuinely livable rather than cave-like.

6. The Split Twin Lofts Layout
Instead of one big loft, this layout puts a smaller loft at each end of the home. One becomes the main sleeping loft, and the other can be a guest bed, an office, or a reading nook. The advantage is that two people can have private spaces without needing a wall between them on the main floor. Couples with different schedules love this layout, as do families with one child.
Both lofts should be similar in size, around 8 by 8 feet, so neither feels inferior. Below the lofts, the main floor has two full-height end walls and a soaring center where the living area sits. Access can be a single central staircase with a catwalk connecting the two lofts, or separate ladders. Give each loft its own personality: one cozy with deep navy walls and warm wood, the other bright with white walls and pale linens. This layout works best in tiny homes longer than 28 feet, since shorter footprints do not give enough end space for two comfortable lofts.
7. The Catwalk Loft Layout
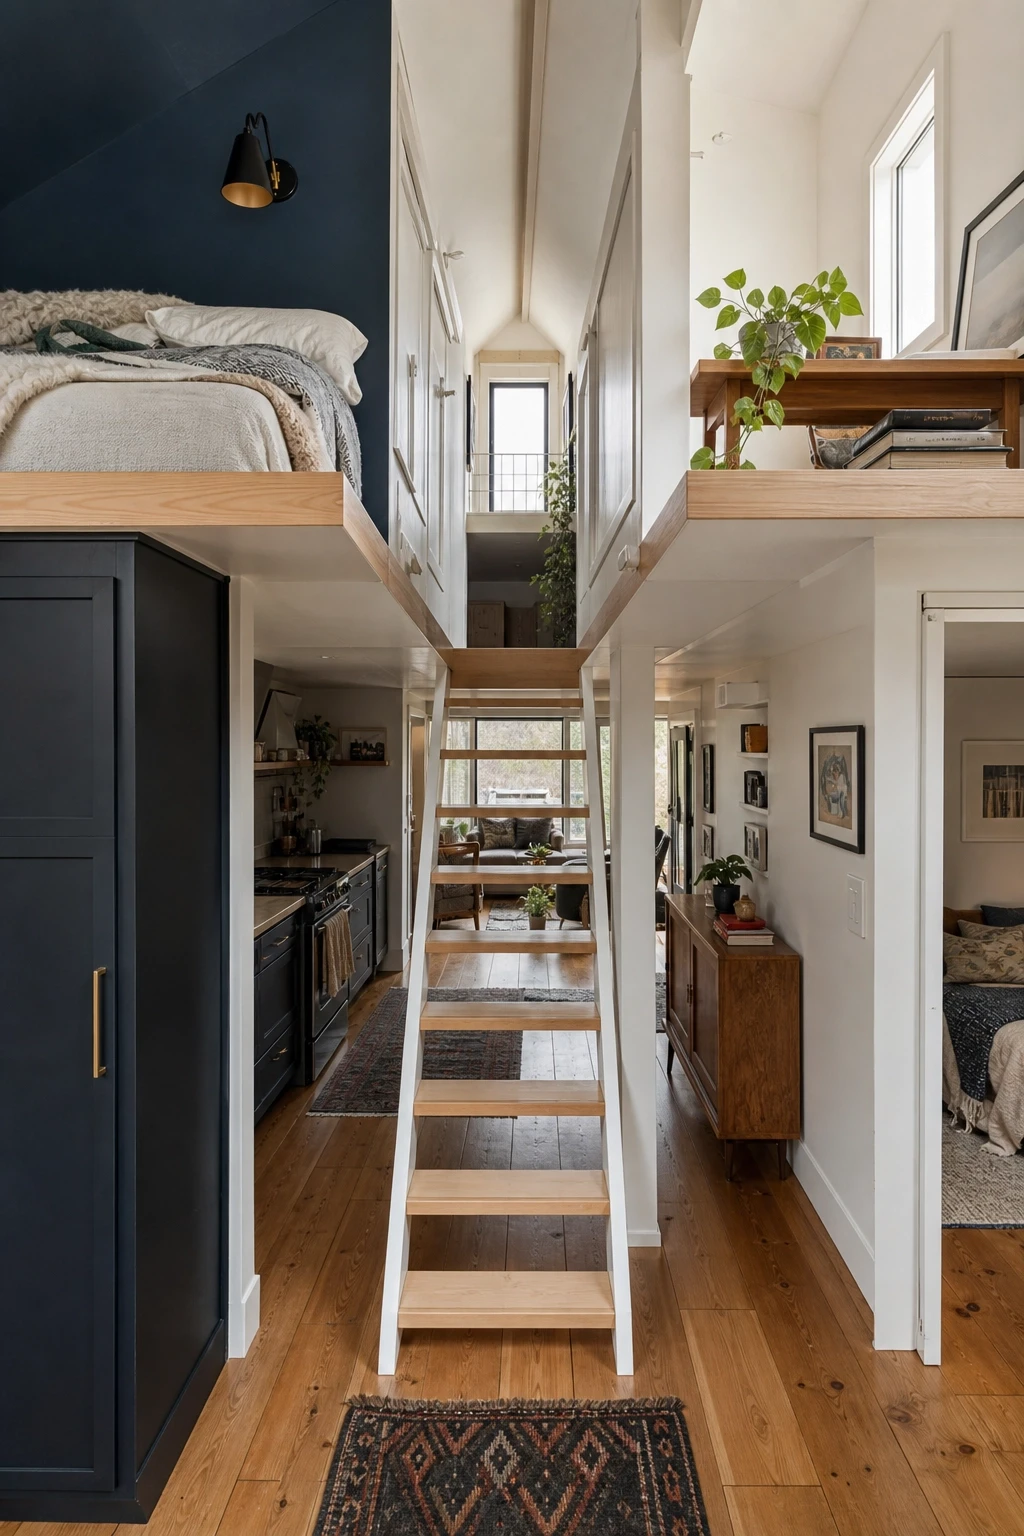
A catwalk loft runs along one long side of the tiny home rather than sitting at one end. It is essentially a narrow upstairs walkway with a bed at one end and an open railing along the inner edge, with the full main floor visible below. This creates a dramatic vertical feel, almost like a small interior balcony, and feels far less boxed in than a traditional end loft.
The catwalk itself should be at least 36 inches wide for comfortable walking. Use a glass panel railing to keep the open feel and let light flow through. The bed sits at one end, and the rest of the upper level holds a slim built-in dresser and maybe a small reading chair. Run the same flooring up the stairs and across the catwalk for visual continuity. Add a tall floor lamp in the double-height area, pendants over the kitchen, and small reading sconces along the catwalk. This layout costs more because of structural support and railing work, but the spatial payoff is huge.

8. The Storage Loft and Sleeping Loft Combo
This setup uses two lofts that serve very different purposes. One is for sleeping over the bathroom or back end, with a normal mattress and bedding. The other is dedicated to storage over the entry or kitchen, holding bins, off-season clothes, and suitcases. Smart for people who own more than the minimalist tiny home dream usually allows.
The storage loft does not need tall headroom, so you can run it under a lower section of roof and save the full headroom for the sleeping loft. Outfit it with sturdy plywood floors, labeled clear bins, and a simple pull-down ladder that tucks away. Paint the storage loft in a darker, utilitarian color so it visually recedes, while keeping the sleeping loft in soft, calming tones. Add a curtain or sliding panel across the storage opening so it does not clutter the living space below. One of the most practical layouts for full-time tiny home dwellers because it solves the storage problem without forcing minimalism on every front.

Zone-Based Layouts with Defined Rooms
Some people simply do not feel comfortable in fully open layouts. They need separation between cooking and sleeping, between work and rest. The four layouts in this category use creative dividers to define zones without sacrificing openness. Excellent for introverts, people who work from home, and anyone who shares their tiny home with another person and needs occasional privacy.
9. The Half-Wall Divider Layout
Instead of a full wall, this layout uses a half wall around 4 feet tall to separate the bedroom from the main living area. Light and air flow freely above the wall, so the home does not feel chopped up. The top becomes a useful surface for plants and books, and the back side serves as a built-in headboard. This is the perfect compromise between fully open and fully closed off.
On the bedroom side, use the half wall as a headboard with small built-in nightstands on each side. On the living room side, place a sofa or low sideboard with its back to the half wall, creating a natural conversation seating area. Use shiplap, vertical wood paneling, or smooth painted finish on the wall itself, capped with a wood ledge to look intentional. Run continuous flooring across both sides to maintain visual flow. Budget friendly because you save the cost of a full wall, door, and the framing they require, while still getting most of the privacy benefits.

10. The Bookshelf Partition Layout
Here, a tall open bookshelf doubles as the wall between two zones, separating the bedroom from the living area or the office from the kitchen. The open sides let light pass through, but the contents block direct sightlines. It functions as a divider, storage, and decor feature all at once, which is the kind of triple duty that makes tiny home layouts succeed.
Choose a bookshelf at least 6 feet tall that stops short of the ceiling to preserve visual openness above. It should be deep enough, around 12 to 14 inches, to hold real items rather than just trinkets. Anchor it to the floor and ceiling for safety. Mix open shelves, woven baskets, and closed cubbies so it manages clutter instead of displaying it. Paint it the same warm white as the walls to disappear, or go deep navy for a striking focal point. Add under-shelf LED strips for ambient light. Easy to retrofit if you already live in a small space and want more zone definition.

11. The Sliding Barn Door Zone Layout
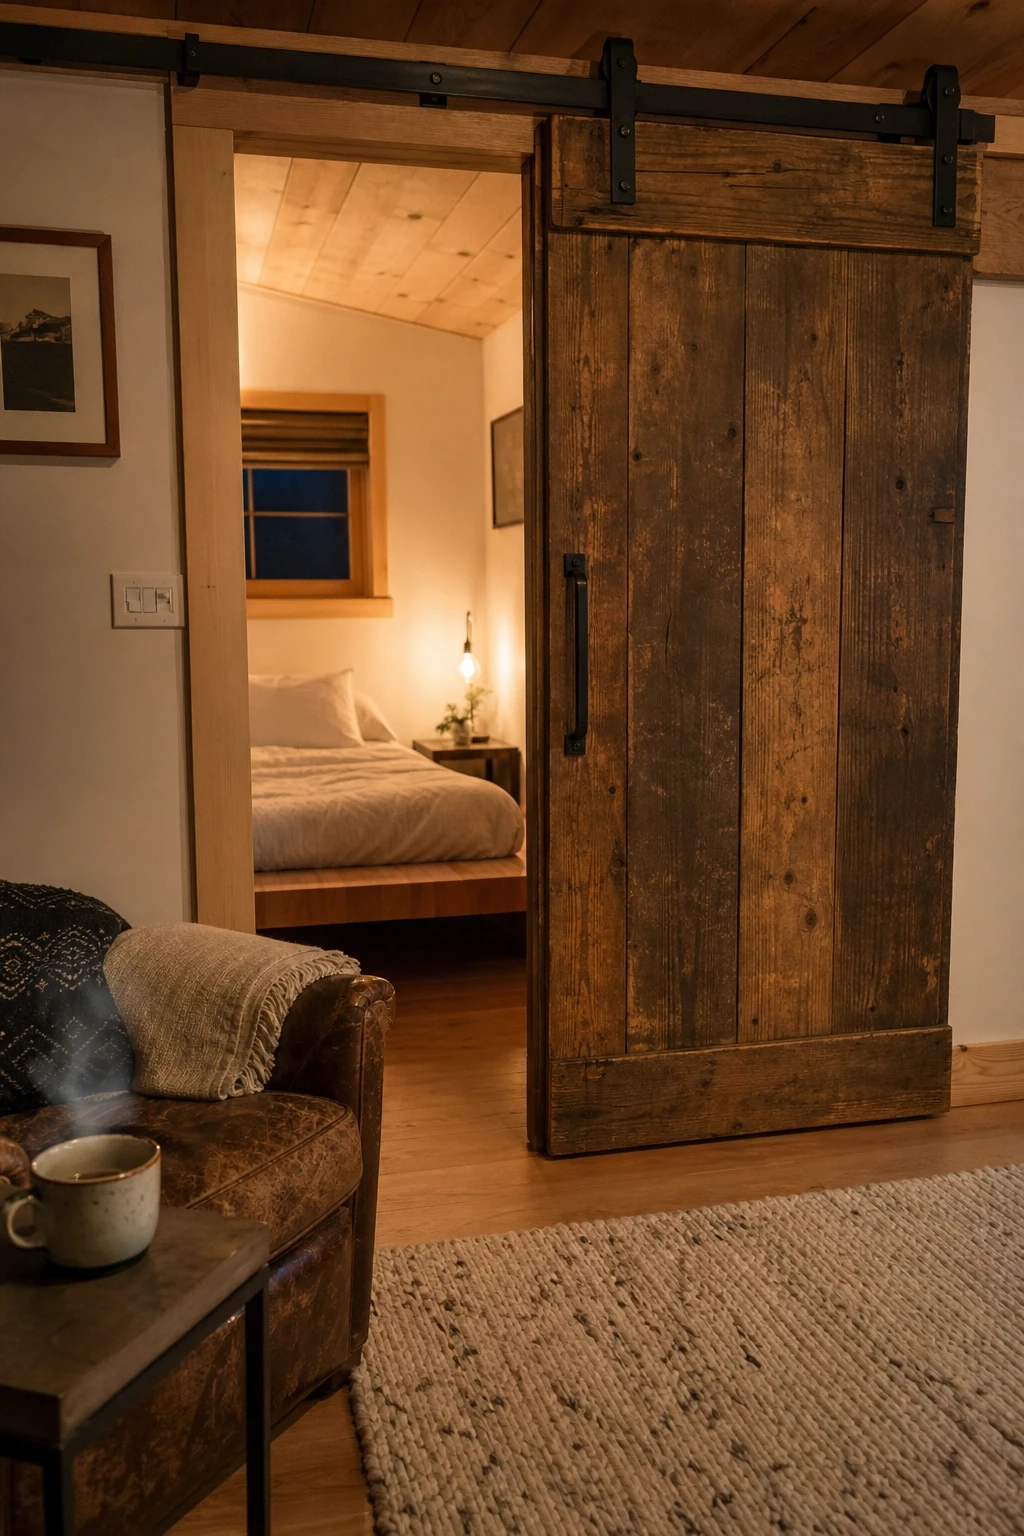
Sliding barn doors are the secret weapon of tiny home layouts that need real privacy without the space hog of a swinging door. In this layout, the bedroom or bathroom sits behind a sliding door that can be fully open during the day to keep the space large, or fully closed at night for total privacy. The door becomes part of the wall when open.
Use a heavy-duty top-mounted track to handle the door’s weight, and choose a door style that matches the rest of the home, whether rustic reclaimed wood or sleek modern panel. Add a sound-dampening felt strip along the back edge for better privacy, since barn doors do not seal as tightly as traditional ones. Thick rugs and soft fabrics in the bedroom absorb sound. Lighting in each zone should be independent, with a bedside lamp reachable without leaving bed and main lights controllable from a switch near the door. Works in any size tiny home and gives you the flexibility to live open or closed depending on mood.
12. The Sunken Living Zone Layout
This is one of the more unusual tiny home layouts, but it pays off when done well. The main floor splits into two levels: a slightly sunken living area sitting 12 to 18 inches lower than the rest, and a raised platform holding the kitchen, dining, and entryway. The visual height change creates strong zone separation without any walls, and stepping down feels like entering a different room.
A built-in bench seat that wraps two or three sides of the sunken area gives a conversation pit feel, with seat lids that lift for hidden storage. A low upholstered ottoman in the center finishes the look. On the raised side, the kitchen runs along the wall with a small counter overlooking the sunken zone almost like a stage view. Use warm wood floors throughout but add a deep rug only in the sunken area. Paint the lower zone in a warmer or slightly darker tone for that cozy den effect. Best for tiny homes on permanent foundations, since the structural floor change is hard to engineer on a trailer.

Vertical and Multi-Level Layouts for Maximum Square Footage
When you cannot grow outward, grow upward. The three layouts in this category use multi-level designs to stretch usable square footage well beyond the footprint. Some involve true second stories, while others use clever pop-ups and split levels to gain height where it matters most. These layouts require more structural planning and a taller overall build, but often produce tiny homes that feel almost full-size.
13. The Mezzanine Bedroom Layout
A mezzanine differs from a loft because it has full standing headroom, often 7 feet or more. In this layout, the main floor holds the living, kitchen, and bathroom, while a second level with a true mezzanine holds the bedroom and a small reading area. You can walk around freely upstairs, not just sit on the bed. Requires a tall overall tiny home, usually 13 to 14 feet at the peak.
The mezzanine should be reached by a proper staircase, not a ladder, because the goal is to make the upper level feel like a real room. The bedroom can hold a full bed frame, two nightstands, a small dresser, and even a chair by a window. A waist-high railing keeps openness while making the space feel secure. Use real bedside lamps, framed art, and curtains so it feels like a proper bedroom. A thick area rug is more comfortable than bare wood for this barefoot zone. One of the most expensive tiny home options because of the taller structure, but also one of the most comfortable for full-time living.

14. The Split-Level Floor Plan
Split-level tiny homes use small changes in floor height throughout to create distinct zones without walls. A plan might have three or four different levels: entry at ground level, kitchen two steps up, living area at ground level, and bedroom three or four steps up at the back. Each level feels like its own room thanks to the height change, but the entire home stays visually open.
Stairs between levels should be wide and shallow, more like deep steps than a true staircase. Each platform can hide storage underneath, which is huge in a tiny home. Built-in benches at the edges give seating and additional storage. Use a single continuous flooring material throughout for visual flow, and add subtle LED strip lighting under each step edge for safe nighttime navigation. Works beautifully in narrow, longer tiny homes where you cannot create depth but can create a clear path through varying heights. A sophisticated layout that requires careful planning, but the result feels much larger than the footprint.
15. The Pop-Up Roof Loft Layout
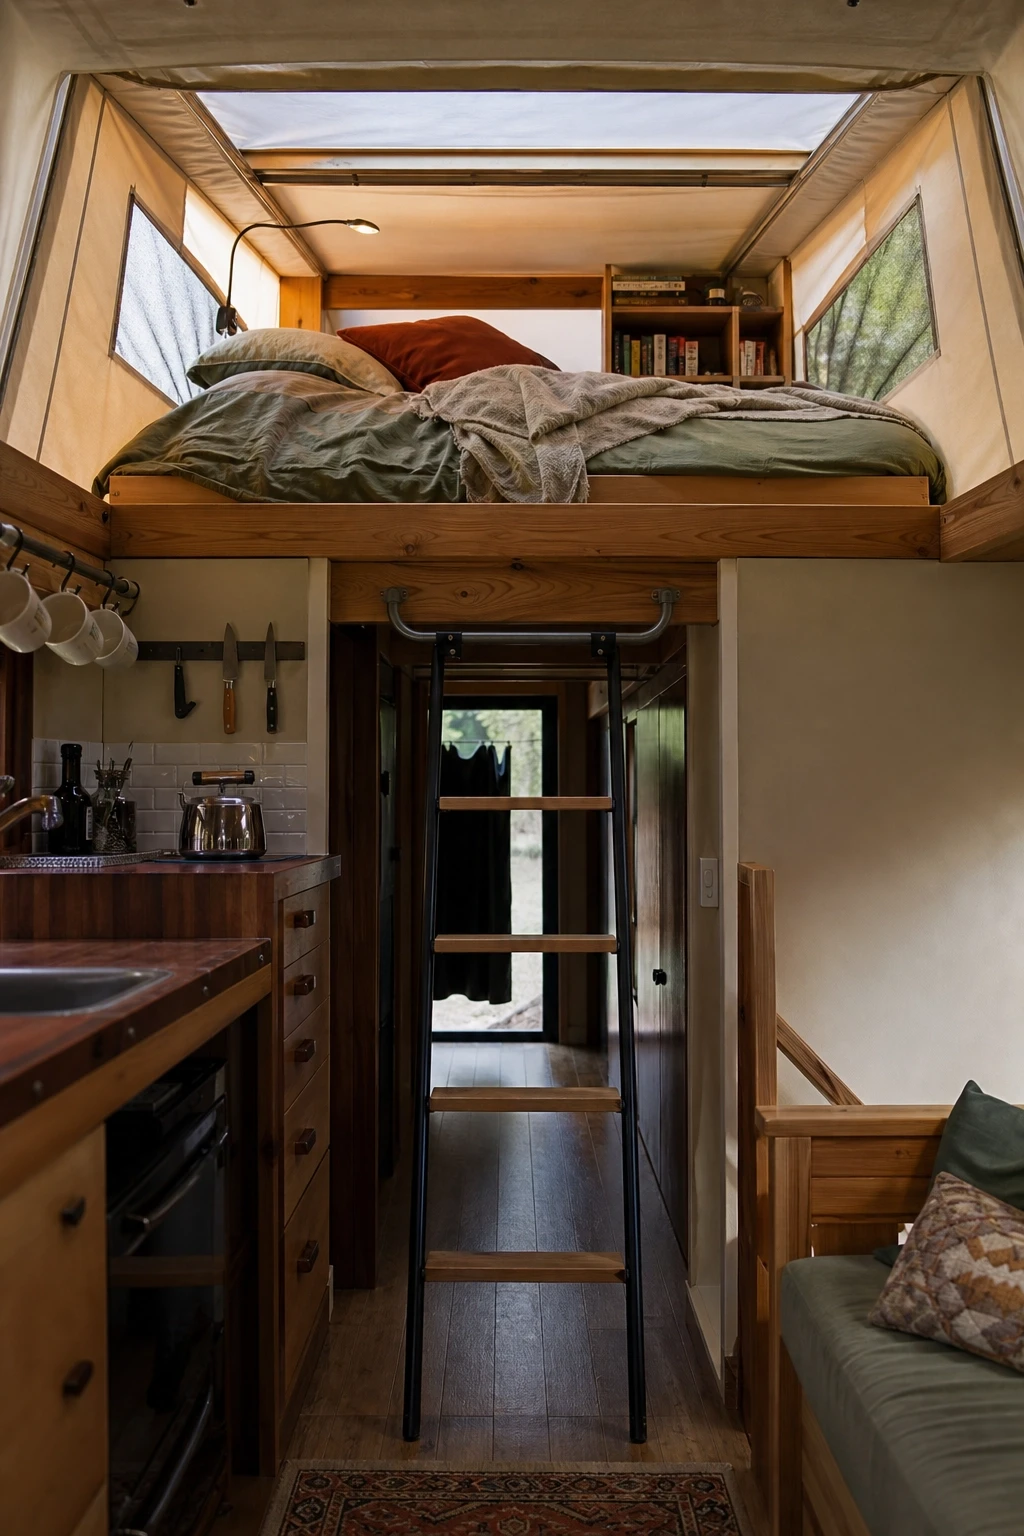
Borrowed from camper van design, the pop-up roof allows a tiny home to have a low travel profile and a tall living profile at the touch of a switch. A section of the roof above the sleeping area lifts 2 to 3 feet when parked, giving the loft full standing headroom or close to it. When you are ready to move, the roof drops back down for easy towing under bridges and low clearances.
The pop-up section is usually made of canvas or vinyl side panels that fold accordion-style when lowered. Inside the lifted area, you can fit a real bed with sit-up headroom, a small dresser, and even small mesh windows in each canvas wall for cross ventilation. The mechanism is electric or hydraulic and adds significant cost, but the flexibility is unmatched. Keep furniture lightweight and low so the center of gravity stays manageable. Use all LED lighting on a separate battery circuit. Not for everyone, but for people who want true mobility without giving up the bed-in-the-air feel, one of the most practical designs available.
Outdoor-Connected Layouts That Borrow Space from Outside
The smartest tiny homes treat the outdoor area as an extension of the interior. By blurring the line between inside and outside, the usable square footage effectively doubles in good weather. The four layouts below use porches, decks, courtyards, and bi-fold doors to make the most of the surrounding landscape. Best in mild climates or seasonal use, though clever insulation can make them work almost anywhere.
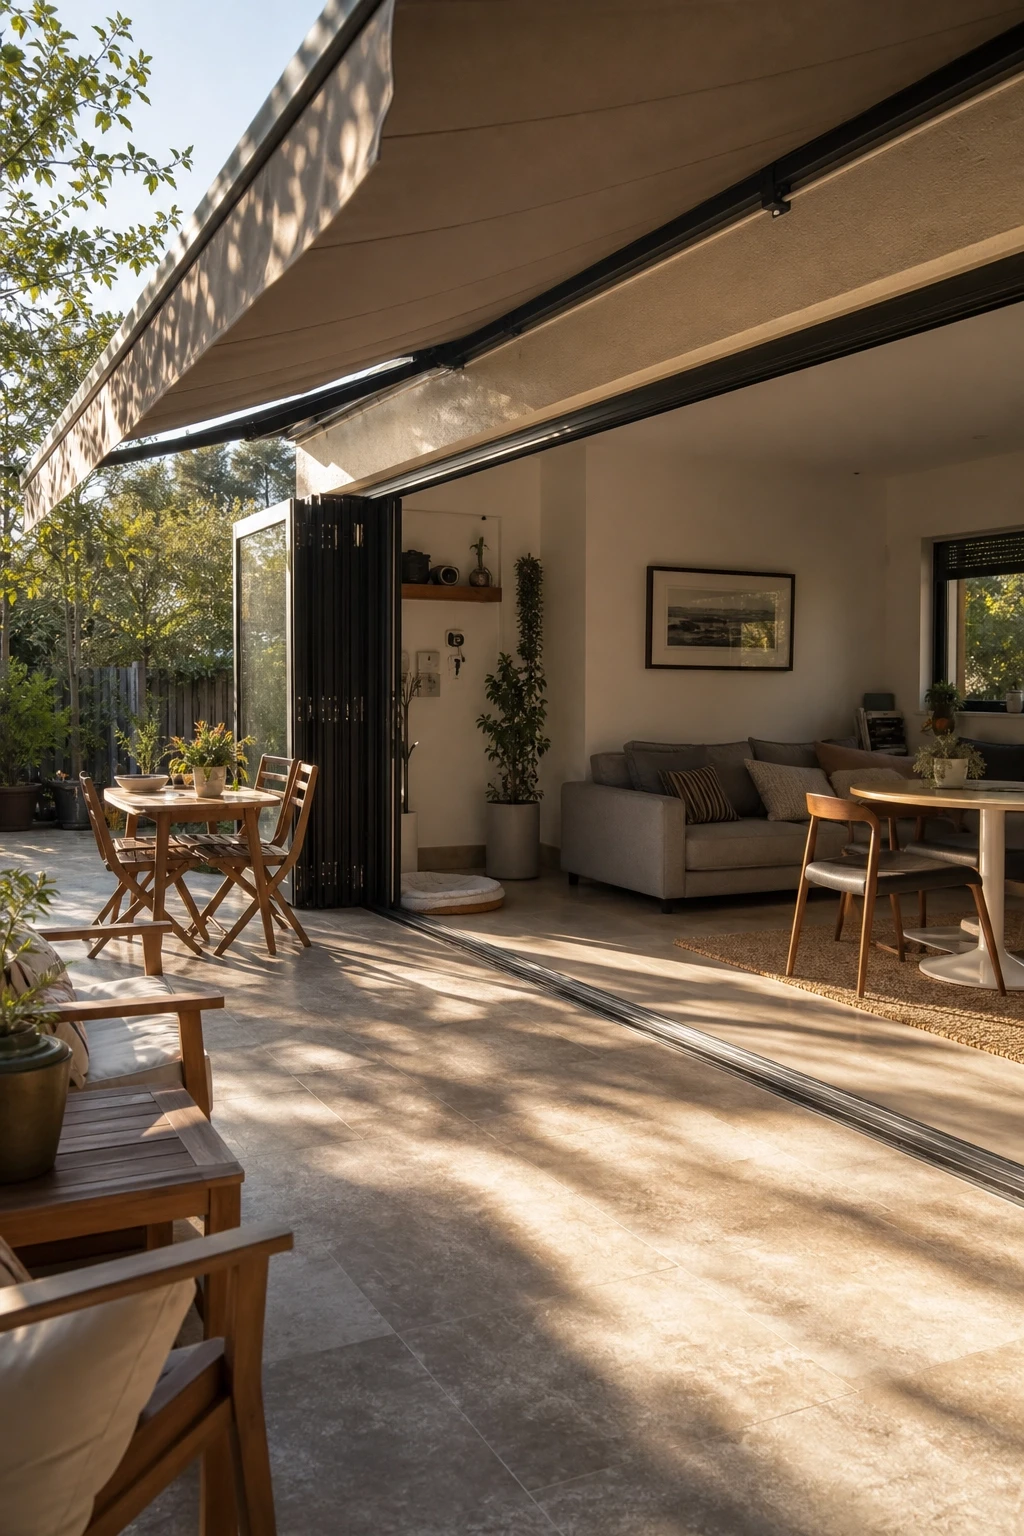
16. The Bi-Fold Door Patio Layout
In this layout, one entire long wall of the tiny home is made of bi-fold or accordion-style glass doors that open completely to a deck or patio. When closed, the wall looks like a stretch of tall windows. When open, the living area and the deck become one continuous space. The tiny home suddenly feels twice as big because half of it is the great outdoors.
The interior side should hold the living area and dining zone for direct flow onto the deck when the doors fold back. The deck should be roughly the same width as the indoor zone, with outdoor furniture that mirrors the indoor pieces in scale. A retractable awning or pergola provides shade and rain protection, extending usability across more weather. Use the same flooring inside and out, such as porcelain tile that mimics wood. The bi-fold door track sits flush with the floor for a seamless look. Expensive because bi-fold door systems are pricey, but the spatial gain is dramatic and worth it for the right climate.
17. The Wraparound Porch Layout
Some of the most charming tiny homes look small inside but feel enormous because of a generous porch wrapping two or three sides. The interior is a simple rectangular plan with a kitchen, living area, bathroom, and small sleeping loft. The real magic is outside, where a covered porch with a swing, a small dining table, and potted plants becomes the favorite room in good weather.
The porch should be at least 6 feet deep to allow real furniture, not just a chair or two. Run it along the front of the home and continue down one long side, with the side porch holding outdoor dining and the front porch holding the relaxing zone. A french door or large slider connects the living room directly to the porch. Add a porch swing with cushions, rocking chairs, weather-resistant furniture, outdoor rugs that handle moisture, and lots of plants. String lights, lanterns, and a small wall-mounted heater extend porch use into cool evenings. Best for permanent foundations in regions with mild seasons.

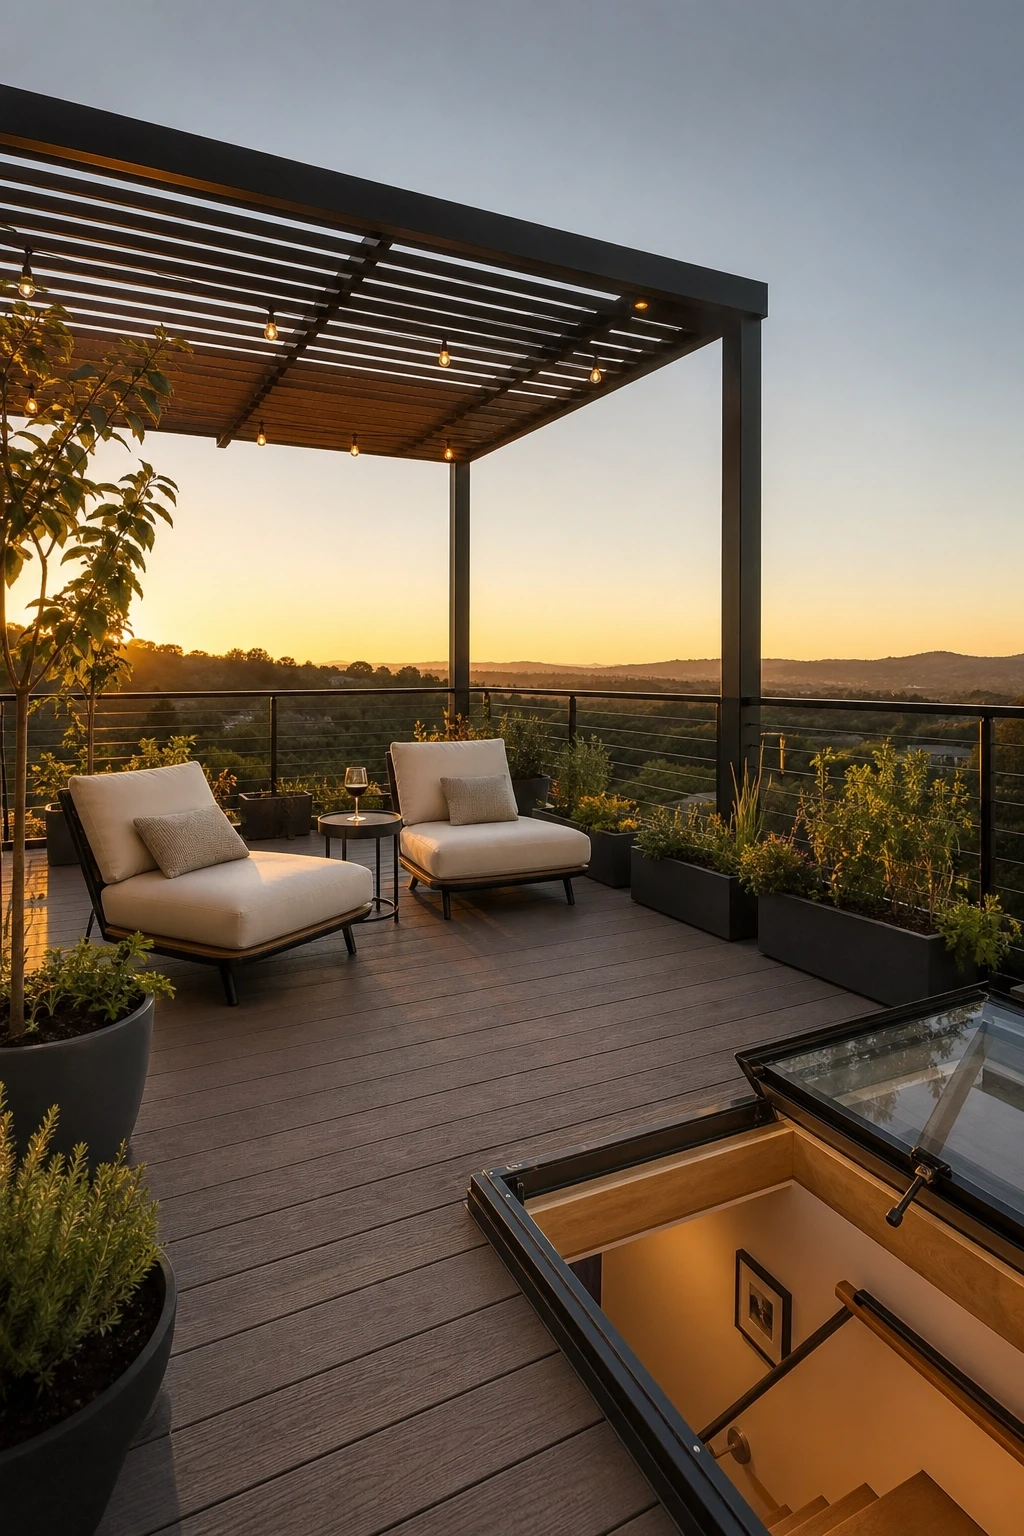
18. The Rooftop Deck Layout
If your tiny home sits on land with good views, building a rooftop deck on top of the home effectively doubles your living space. The flat or low-pitched roof becomes a deck with a railing, outdoor seating, planters, and even a small bar. Access is via an external staircase, a ladder, or a hatch with pull-down stairs. The view often makes the entire tiny home feel like a luxury experience.
The interior below must accommodate the structural roof, usually meaning heavier framing and a flat ceiling rather than vaulted. Pair this layout with a single-room open interior or a simple bedroom-living split. Choose composite decking that resists fading, install a sturdy code-compliant railing, and add a small canopy or pergola for shade. Built-in deck lights, a small string light setup, and a portable lantern handle the lighting. Add planters around the perimeter for greenery and a bit of windbreak. Fantastic in coastal areas, mountain settings, or anywhere with a view worth elevating yourself to see.
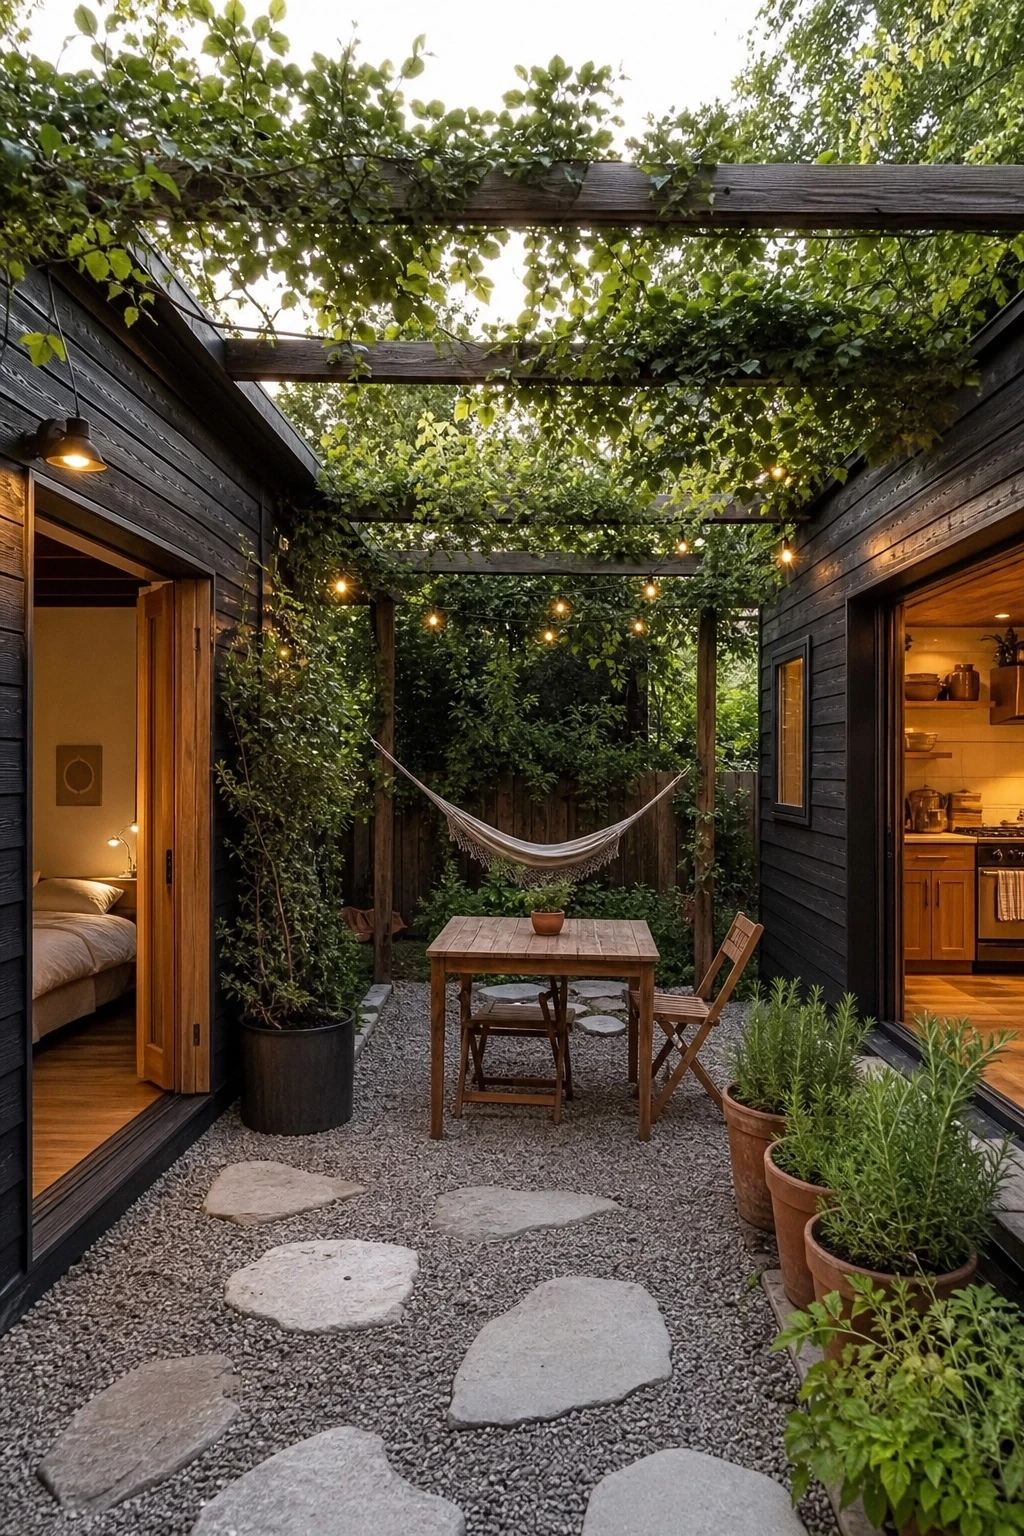
19. The Courtyard Tiny Home Layout
This unusual but striking layout splits the home into two small structures connected by a covered or open courtyard. One structure holds the bedroom and bathroom, the other holds the kitchen and living area, and the courtyard between them serves as a third outdoor room. You walk through the courtyard between zones, which sounds inconvenient but is actually delightful in good weather.
Each structure can be 100 to 150 square feet, focused on a single purpose. The courtyard between them, ideally 8 to 12 feet wide, can hold an outdoor dining table, a hammock, a fire pit, or a small garden. Cover it with a pergola or retractable shade so it stays usable in rain or strong sun. Tie the structures together with matching exterior siding, roof material, and window styles so it reads as one home. Inside, you can play with different moods: cocoon-like dark walls in the bedroom, bright open white walls in the living structure. Best in warm or dry climates where the outdoor walk between zones is a feature rather than a burden.
Choosing the Layout That Actually Fits Your Life
There is no universally best tiny home layout. The right one depends on how you live, what you own, who you live with, and where you plan to put your home. A solo writer who works from bed will thrive in a single-room open plan. A couple with different sleep schedules will love split twin lofts. A retiree who wants to travel will want a pop-up roof. A garden-loving cook will adore a courtyard layout with herbs growing between zones. Match the layout to the life, not the other way around.
One of the best things you can do before committing is spend time in tiny homes that use the layout you are considering. Many companies offer tours or short stays, and even a single weekend teaches more than weeks of looking at floor plans online. Whichever layout you pick, build flexibility into it. Modular furniture, removable partitions, and adjustable shelving make it easy to refine your space over time. When the layout works, the tiny home stops feeling tiny altogether.
Frequently Asked Questions
What is the most popular tiny home layout?
The classic sleeping loft layout remains the most popular because it makes the best use of a small footprint by lifting the bed off the main floor. It works in tiny homes as small as 150 square feet and scales up beautifully. Most pre-built tiny home models use this layout as their default. That said, popularity does not always mean it is right for you. If you have trouble with ladders, or if you simply prefer single-level living, other layouts may suit you better.
How small is too small for a tiny home layout?
Most people find that anything under 150 square feet becomes hard to live in full-time. Below that, you start sacrificing essential things like a real kitchen, a proper bathroom, or any kind of storage. Around 200 to 300 square feet is the sweet spot for solo dwellers, while couples often prefer 300 to 400 square feet. Vacation tiny homes can go smaller because the bar for daily livability is lower. Try to spend a full weekend in any layout before committing, since a plan that looked perfect online may feel different in person.
Are open layouts better than zone-based layouts?
Neither approach is objectively better. Open layouts feel more spacious and let light flow freely, which is why they dominate tiny home design. Zone-based layouts give you privacy and clearer separation between activities, which matters more if you work from home or live with someone whose schedule differs from yours. The right choice depends on your lifestyle. Many people end up with a hybrid, using half walls, bookshelves, or sliding doors to get partial separation without fully closing things off.
Do I need a loft in my tiny home layout?
Not at all. While lofts are iconic, plenty of excellent tiny home layouts skip them entirely. Single-level designs work well for people who do not like climbing, for older adults, and for anyone who finds loft ceilings claustrophobic. The trade-off is that without a loft, your bed takes up main floor space, which can make the home feel smaller. If you choose a no-loft design, look for clever main-floor sleeping solutions like a Murphy bed, a daybed that converts at night, or a sliding door that hides a real bedroom.
Can I change my tiny home layout after it is built?
Some changes are easier than others. Cosmetic and furniture changes are simple. Moving non-load-bearing walls is doable but messy. Changing the position of plumbing, the staircase, or any structural element is expensive and sometimes not worth the cost in such a small footprint. The best approach is to plan thoroughly before building or buying. If you do need changes later, focus on modular solutions like sliding partitions, multi-functional furniture, and removable shelving that let you reconfigure without major construction.
What layout is best for a tiny home that travels often?
Travel-friendly layouts keep the center of gravity low and balanced, avoid heavy materials like stone or full glass walls, and secure everything so it does not shift in transit. Single-room open plans with built-in furniture work well, as do classic loft designs in homes under 24 feet. Pop-up roofs are excellent for clearance and storage during travel. Avoid layouts with bi-fold glass walls, rooftop decks, or wraparound porches if you plan to move frequently, since these features add weight and complexity that does not travel well.