Walk-In Closet Organization Ideas That Will Change How You Get Dressed
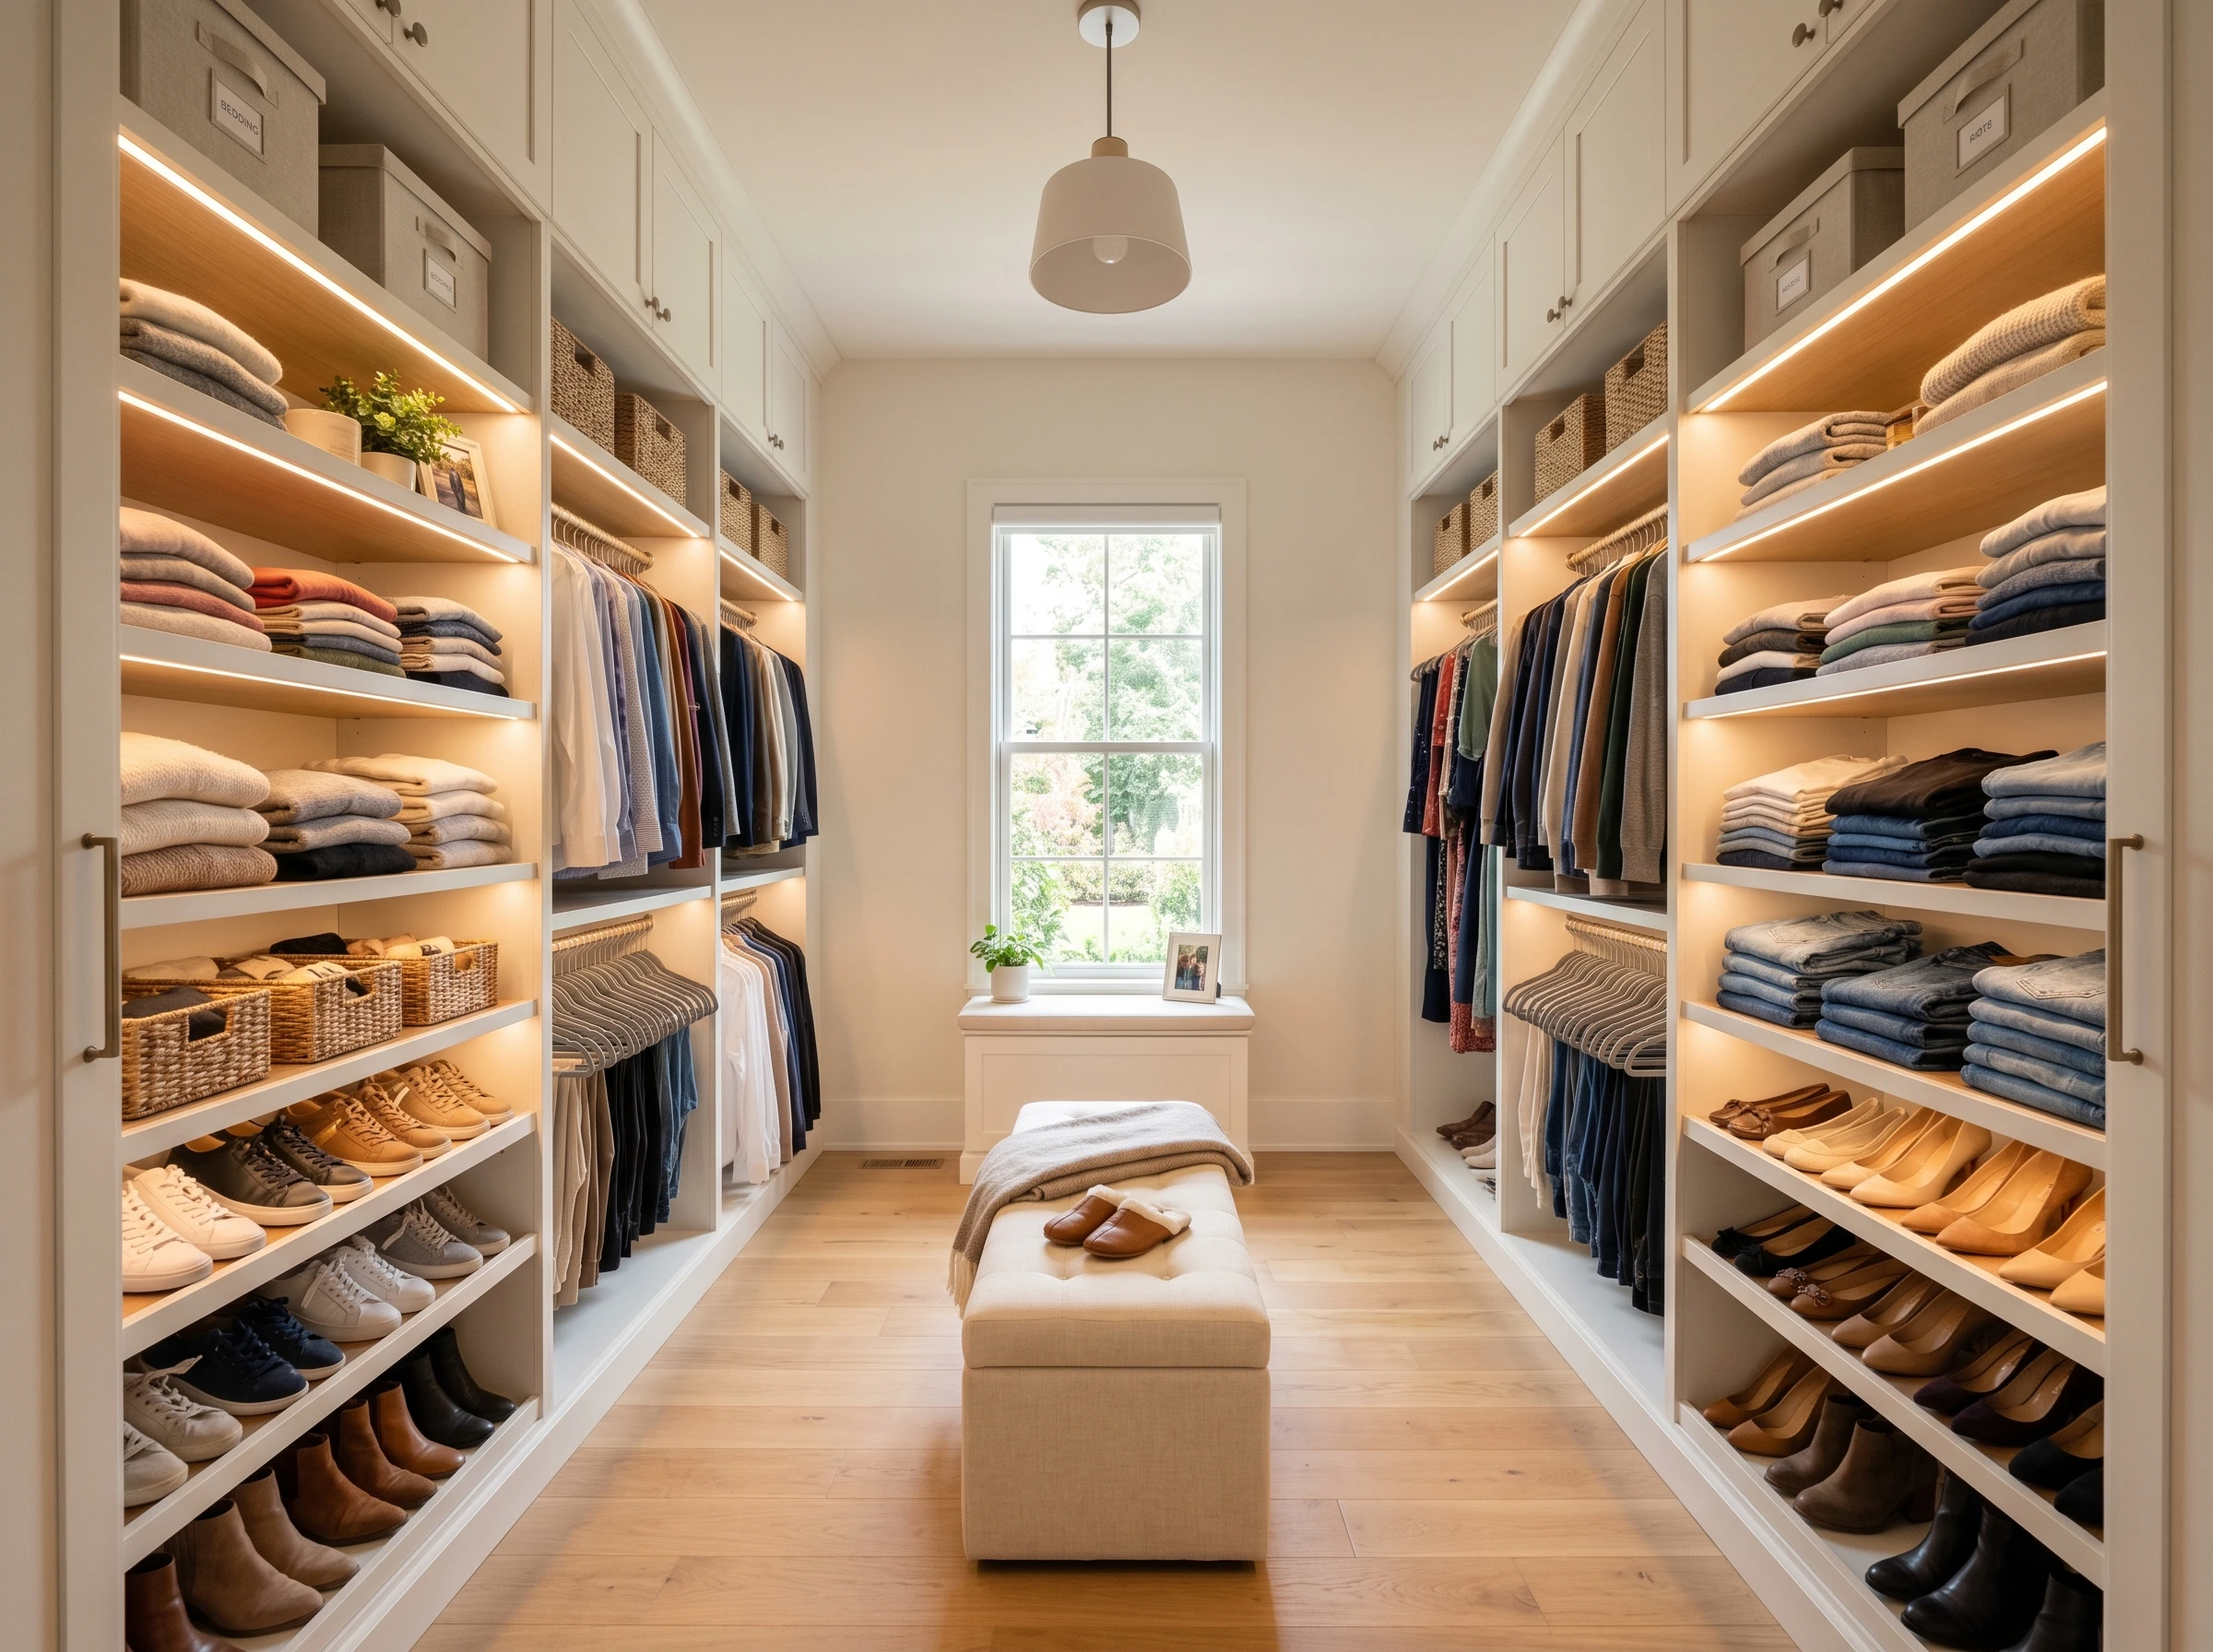
There is something deeply satisfying about opening a closet and knowing exactly where everything is. No digging through piles, no losing track of that one blazer you swore you hung up, no starting your morning already frustrated before you have even had coffee. A well-organized walk-in closet has that effect. It does not just store your clothes. It changes your whole routine.
The thing is, most walk-in closets are not set up the way they should be. They are either crammed with random shelving from a decade ago, or they have one long rod and a single shelf that does almost nothing for all the space available. And even when people do try to organize, they often focus on buying storage products before thinking about how the space should actually work for them.
This article is different. Instead of throwing products at the problem, we are going to look at real, practical ideas that approach organization from every angle, including layout zones, drawer systems, lighting choices, shoe storage methods, accessory displays, and small finishing touches that make a big difference in how a closet feels and functions day to day.
Whether your walk-in is a generous dedicated room or a compact rectangular space tucked off the bedroom, these ideas can be adapted to fit what you have. The goal is a closet that works with your actual habits, not against them. Read through, pick what applies, and get ready to rethink how your wardrobe lives.
Layout and Zoning Ideas
1. Plan Around Zones, Not Just Rods
The single biggest mistake in walk-in closet design is treating the whole space like one big hanging area. Zones are what separate a functional closet from a chaotic one. The basic idea is simple: group things by how you use them. Your work clothes go in one area, your casual weekend wardrobe in another, and formalwear somewhere it can breathe without getting crushed.
Start by standing in your closet and thinking about your actual morning routine. If you grab workout clothes first thing, they should be the most accessible items in the space. If you dress for an office five days a week, your work zone should be front and center. The daily-use zone belongs at eye level and within easy reach. Less-used items, like seasonal coats or special occasion pieces, can move toward the back or onto higher shelves.
Color-coding within each zone is optional, but it does help visually. Even if you only do it within one section, like arranging your casual tops from light to dark, it makes getting dressed noticeably faster. Zones work best when you commit to them and put things back in the right place every time.
Designer Advice: Use small labeled dividers or shelf labels to keep zones clearly marked, especially in a shared closet. It removes the daily guesswork and makes the system easy for everyone to follow.
2. Double Up Your Hanging Rods
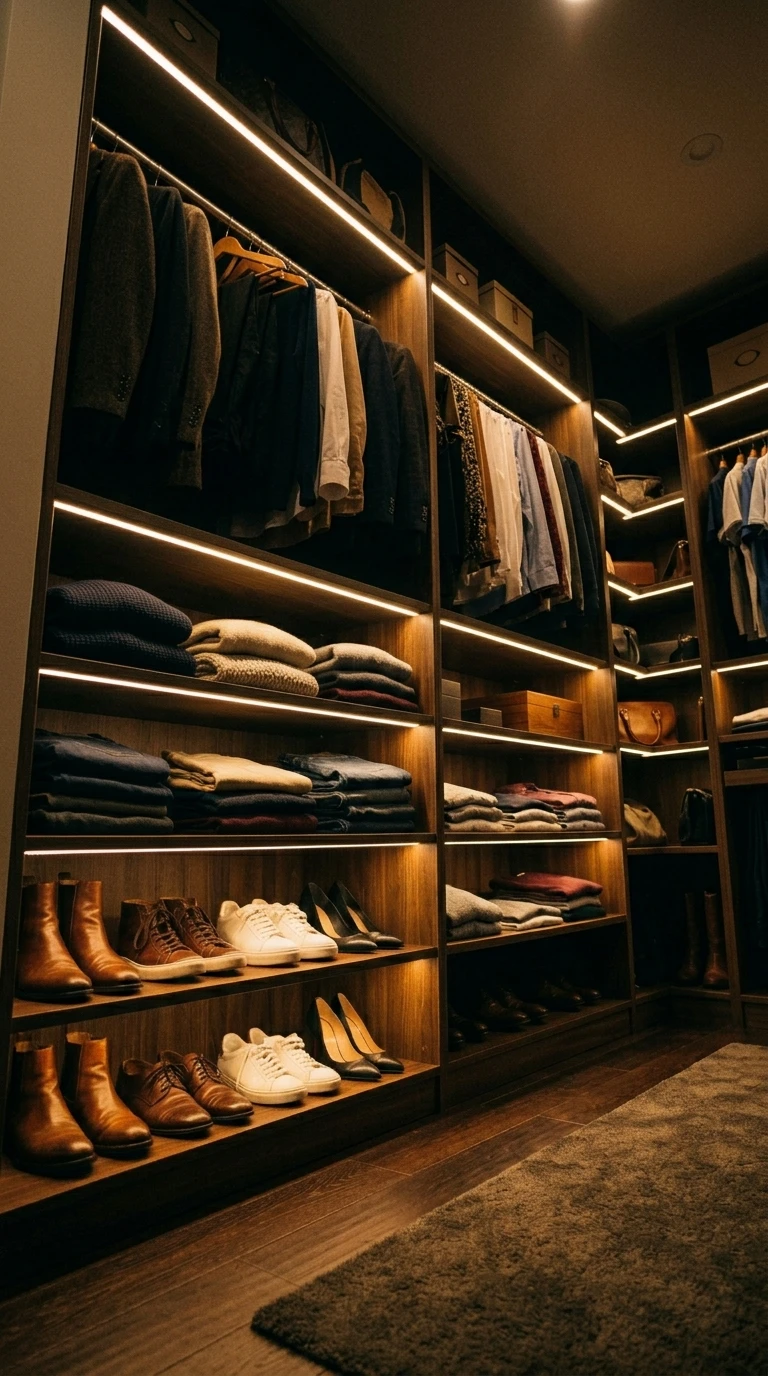
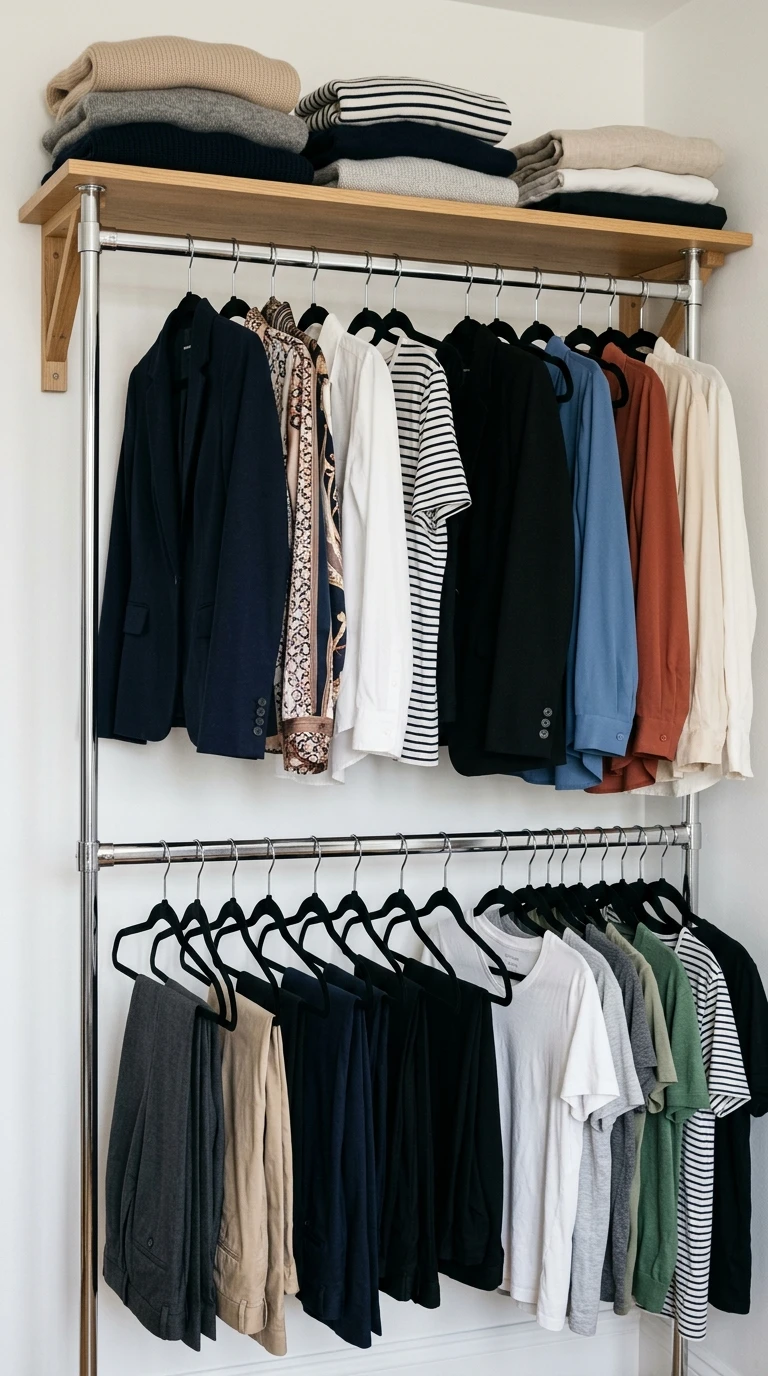
If your closet currently has one long rod running the length of a wall, you are leaving a significant amount of usable space empty. Most hanging clothes, especially shirts, jackets, blazers, and folded pants, only use the top half of the available height. Everything below the hem is wasted vertical space. Adding a second rod underneath turns one hanging section into two, effectively doubling your hanging capacity without touching the footprint of your closet.
The key is to be intentional about what goes where. Shorter items like tops, folded trousers, and jackets work well on a double rod setup. Dresses and long coats still need a single full-length rod section, so reserve one portion of wall for that. You can find adjustable second rods that attach below the first, and they typically take less than twenty minutes to install with basic tools.
The visual result is also really satisfying. Double rods look orderly and purposeful, like a proper boutique wardrobe. Pair them with matching hangers for a clean, uniform look that makes the whole closet feel more pulled together.
Designer Advice: Match the height of the lower rod to your shortest hanging item. If your shortest piece is a button-down shirt, the rod below should sit just a few inches lower than the hem so nothing bunches on the shelf beneath it.
3. Use Corner Shelving Instead of Wasting the Angles
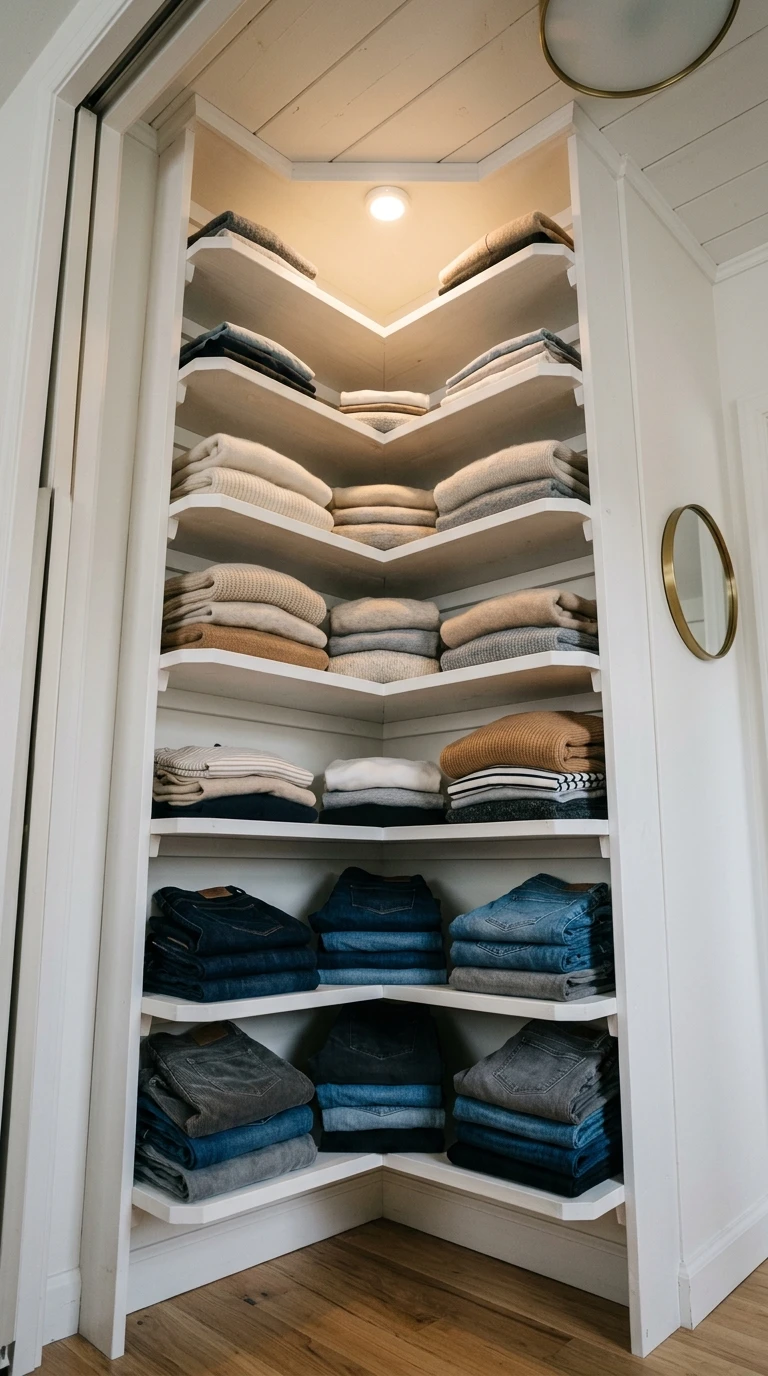
Corners in walk-in closets are some of the most wasted real estate in the home. Most people either ignore them entirely or shove a random basket there that becomes a catch-all for things they do not know where else to put. Corner shelving systems, particularly angled units or rotating shelf inserts, take that dead space and make it genuinely useful.
Angled corner shelves are great for folded items like jeans, sweaters, and workout sets. A rotating lazy Susan style corner shelf works beautifully for shoe storage, allowing you to spin items forward instead of digging behind other pairs. If your corner is on the deeper side, a pull-out corner drawer unit means nothing gets buried or forgotten.
Lighting matters especially in corners, since they tend to be the darkest spots in a closet. A small battery-powered LED strip or a puck light tucked under the shelf above makes a massive difference in visibility and makes those shelves actually usable instead of just theoretical storage.
Designer Advice: Mount a small round mirror on the corner wall just above the corner shelf. It bounces light into the space and gives you a quick check point when pulling together accessories in that area.
4. Build a Dedicated Dressing Zone
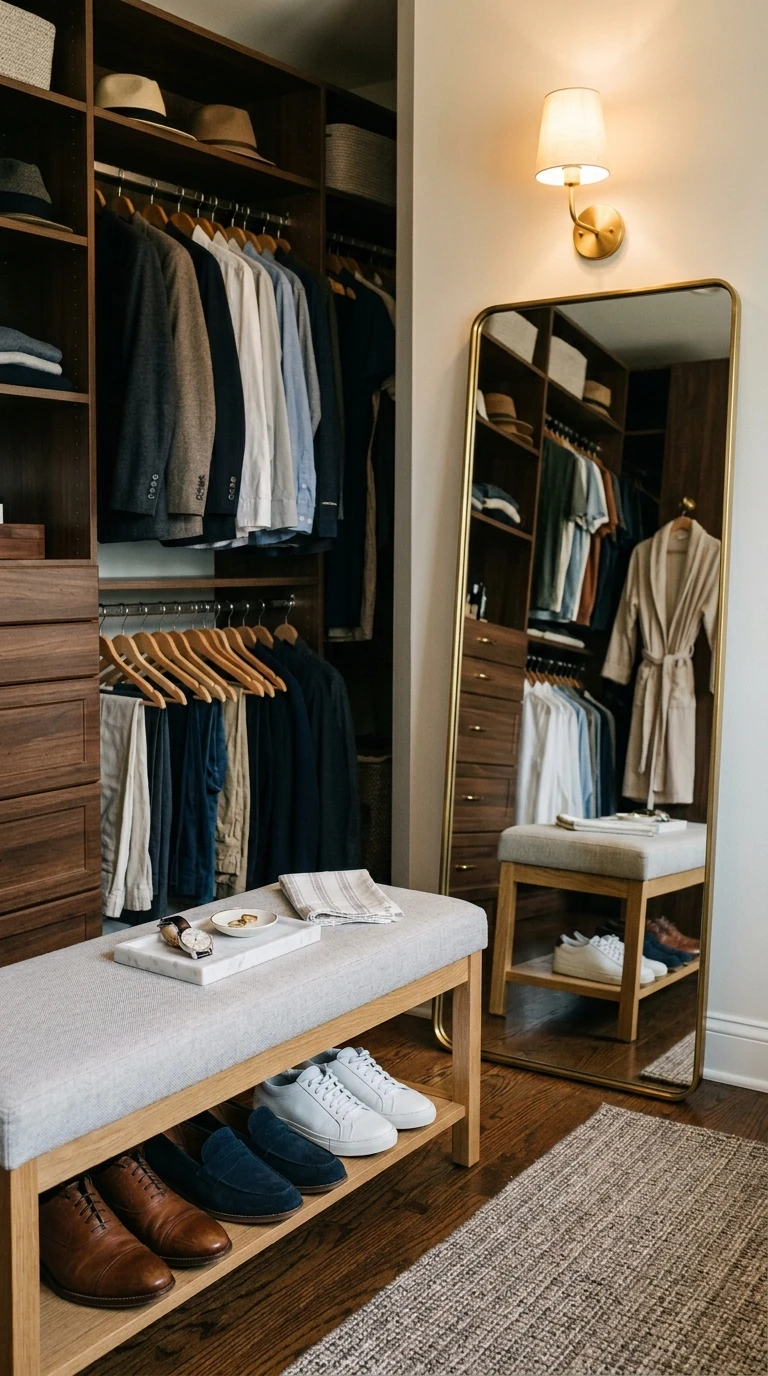
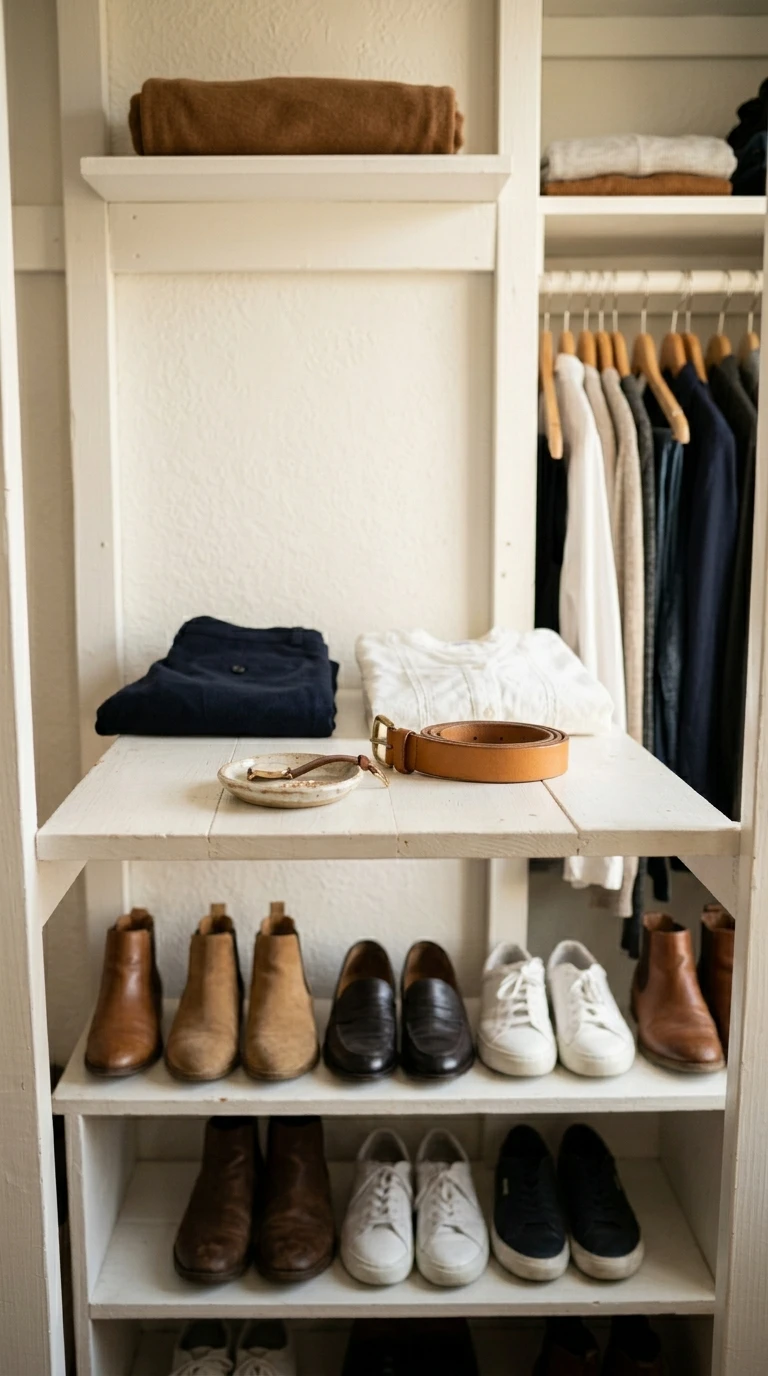
A dressing zone is a small area within your closet that serves as a mini staging area. It does not need to be elaborate. Even in a compact walk-in, a small bench or a padded stool, a mirror, and a surface for laying out the next day’s outfit can change your whole morning flow. The idea is to have a spot where you actually get dressed rather than bouncing between your closet and the bedroom.
A narrow bench runs well along one wall and can double as storage underneath, either with open shelving for shoes or with a pull-out drawer built into the base. Position it opposite the longest mirror you can fit, and you have a proper dressing station. Some people add a valet rod to this zone, which is a small pull-out rod specifically for staging outfits the night before.
The dressing zone also keeps clutter from piling up on bedroom furniture. When you have a designated spot to drop tomorrow’s outfit or hang something you tried on and are not putting back yet, the bedroom stays cleaner by default. It is one of those small organizational moves that has outsized impact on daily life.
Designer Advice: Add a small tray or dish to the dressing zone surface for keys, a watch, and other daily-carry items. It acts as a landing zone so you are not frantically searching for things on your way out the door.
Shoe and Accessory Storage Ideas
5. Give Shoes a Proper Display
Shoes piled on the floor or crammed into a single deep shelf are one of the fastest ways to make an otherwise organized closet feel chaotic. Shoes deserve real display space, not just because they look great when they are visible, but because you are far more likely to actually wear a pair you can see. Out of sight really does mean out of mind, and a lot of people end up wearing the same five pairs on rotation simply because those are the ones they can find.
Graduated shelving, where each shelf is tilted at a slight forward angle, lets shoes face outward so you see the whole pair at once. Flat shelves work too, but they work best when shoes are placed toe-out rather than heel-out. For a smaller collection, clear stackable shoe boxes let you see what is inside while keeping dust off and protecting the shape of the shoe.
A dedicated shoe wall, if your closet is large enough, is one of those details that makes a closet feel genuinely luxurious. Floor-to-ceiling shelves, each sized to fit exactly one row of shoes, give every pair a home and create a visual display that is both organized and genuinely impressive to walk into.
Designer Advice: Store frequently worn shoes at eye level and occasion or seasonal shoes on the highest or lowest shelves. Rotating your display at the start of each season keeps the most relevant pairs front and center.
6. Create an Accessories Boutique Corner
Earrings that disappear into the back of a drawer, scarves balled up on a shelf, handbags that have migrated from one surface to another over the years: accessories are the category most likely to become a mess in an otherwise organized closet. The fix is giving them a dedicated corner that feels intentional and curated, almost like a small store display within your own space.
Acrylic drawers work brilliantly for jewelry because everything stays visible without opening anything. A wall-mounted pegboard with hooks and small shelves can hold bags, belts, and hats in a way that takes up vertical space rather than shelf depth. Handbags do especially well when stored upright on individual shelves rather than stacked, which prevents shape distortion and makes each one easy to grab.
Scarves and belts can be rolled and stored in shallow basket bins, or hung on a multi-hook bar inside a cabinet door. The goal is that every accessory has a fixed home it can be found in and returned to without effort. Once that system is in place, getting dressed becomes noticeably faster because the finishing touches are just as organized as the main wardrobe.
Designer Advice: Group accessories by frequency of use, not by category. The things you reach for daily, like your everyday earrings and the belt you wear most, should sit at eye level and within arm’s reach. Special occasion pieces can live higher up or deeper in.
7. Add a Jewelry Display That Doubles as Decor
Jewelry is one of those categories where the storage solution can actually become part of the visual appeal of the closet. A wall-mounted jewelry organizer with hooks for necklaces, small trays for rings, and clear compartments for earrings does functional work while also looking genuinely beautiful when mounted in the right spot. Think of it less as organization and more as display.
Necklaces in particular need to hang individually to prevent tangling. A row of small brass or gold hooks mounted on a strip of wood is a simple DIY solution that looks elegant and costs very little. For earrings, a small framed mesh or perforated acrylic panel lets you see every pair at a glance and thread hooks directly through the surface.
A mirrored jewelry armoire is another option for those who prefer everything contained. It mounts flat to the wall, opens to reveal compartments and hooks inside, and looks like a simple mirror when closed. It is one of the more clever storage solutions because it hides a lot of jewelry without taking up any floor space or shelf depth.
Designer Advice: Wrap your most delicate necklaces around a velvet display roll when storing them. It keeps chains separate, prevents kinks, and makes packing for travel much faster when you can just roll it up and go.
8. Sort Handbags by Size on Individual Shelves
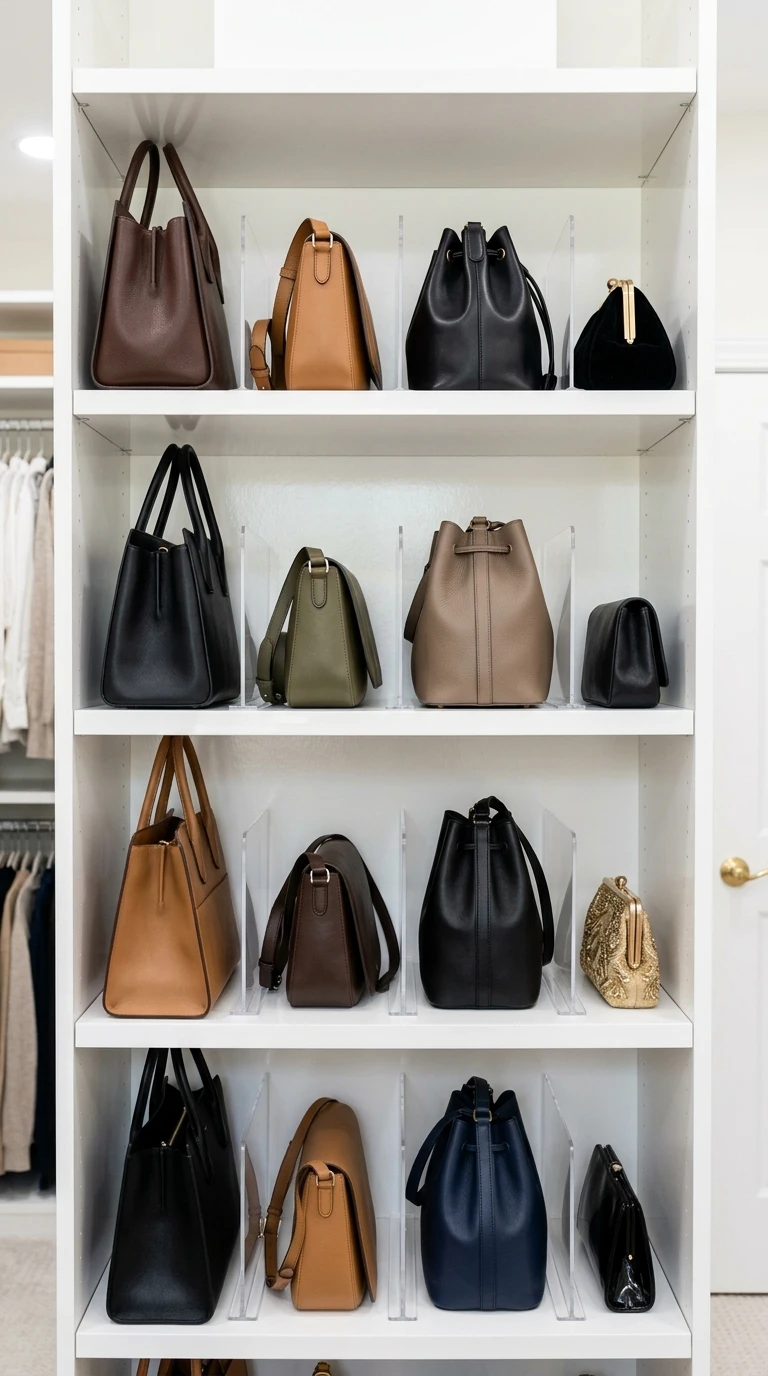
Stacking handbags is one of the worst things you can do for their shape and longevity. The bag at the bottom of the stack gets compressed, the one on top tends to slide, and finding the one you actually want involves dismantling the whole pile. Individual shelves, sized to fit each bag upright, are far better both functionally and visually.
If you have deep shelves, stuff bags lightly with tissue paper or a small pillow insert to help them hold their shape. Arrange them by size, with smaller clutches and pouches together and larger totes on separate, wider shelves. For bags you use very rarely, clear dust bags let you see the style without exposing the material to air and light over time.
Acrylic shelf dividers between bags on a single shelf can also prevent them from leaning into each other, which is a small detail that makes a noticeable difference in how tidy the display looks over time. If you have a collection of bags you love, this kind of thoughtful shelving genuinely turns them into a display you enjoy looking at every day.
Designer Advice: Store structured bags upright and unstructured bags flat. Forcing a soft clutch or fabric tote into an upright position can warp the lining, while keeping a structured leather bag flat compresses the sides and distorts the frame.
Drawer and Shelf Organization Ideas
9. Use Drawer Dividers for Everything Folded
Drawers without dividers are where folded clothes go to die. Within a week of putting things away neatly, the whole drawer becomes a jumbled pile that you rifle through every morning trying to find the one shirt you want. Drawer dividers are a genuinely simple fix that changes this completely. They create individual compartments that keep everything in its lane.
The Marie Kondo folding method, where items are stored vertically rather than stacked flat, works especially well with dividers. When clothes stand upright in rows, you can see everything at once without disturbing the rest. This works for T-shirts, jeans, leggings, socks, and underwear. It takes a little more time when putting laundry away, but morning decisions become dramatically faster.
Adjustable dividers are the most flexible option since they can be repositioned as your wardrobe changes. Bamboo or acrylic versions look clean and are easy to wipe down. For a more polished look, lining drawer bottoms with a subtle velvet or linen fabric before adding dividers gives the drawers a finished feel that makes the whole closet look intentional.
Designer Advice: Dedicate one drawer entirely to your most-reached-for items: your everyday underwear, your go-to socks, and your most worn basics. Having that one drawer fully stocked and organized means most mornings you only need to open one thing to get started.

10. Fold Sweaters on Open Shelves, Never Hang Them
Hanging sweaters is one of the most common closet mistakes, and the damage it causes over time is real. Gravity pulls the weight of the fabric down through the shoulder, which creates those telltale stretch bumps that never fully go away, especially in knits and heavier wool pieces. Open shelves with folded sweaters are both better for the clothes and actually easier to browse.
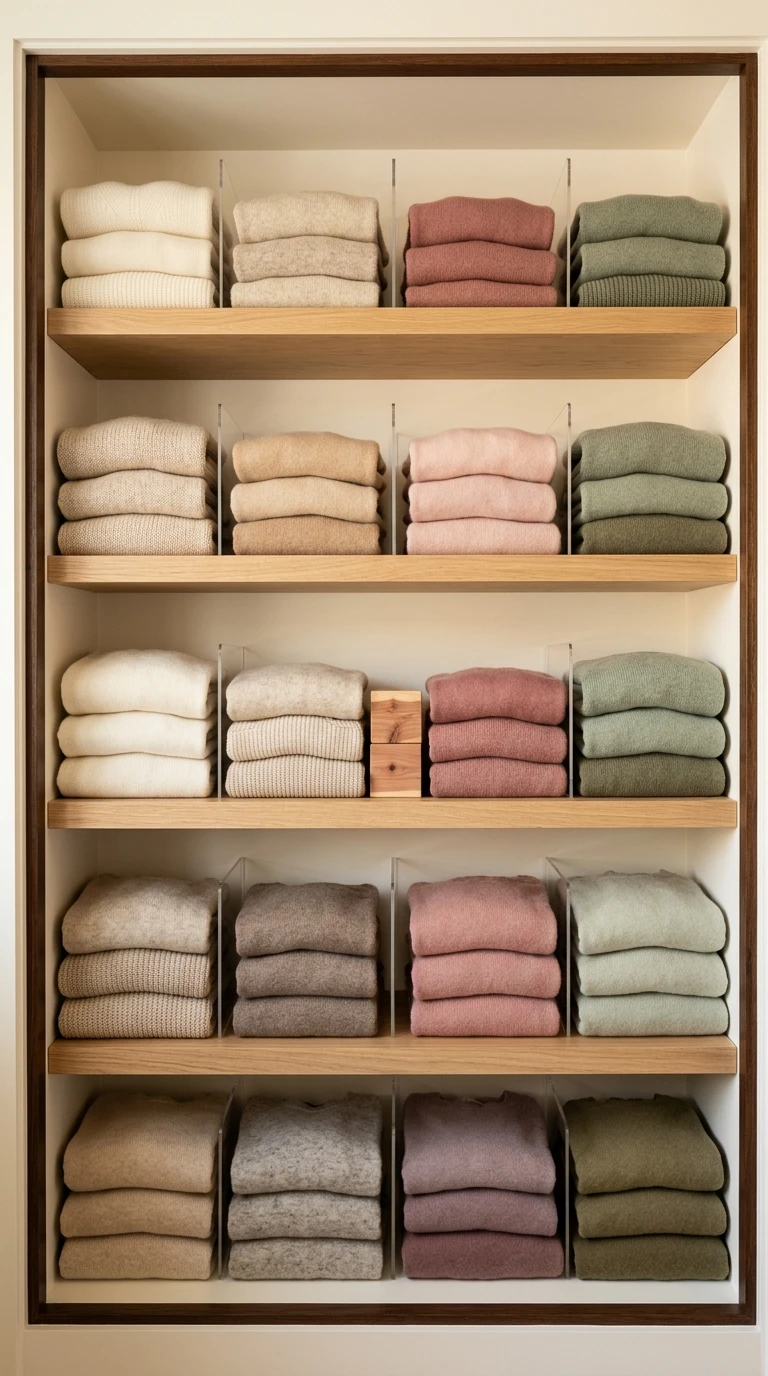
The key to keeping folded sweaters tidy on open shelves is consistent folding and consistent height. Fold each sweater to the same width so they stack in a uniform column. File them vertically if the stack is deep, or lay them flat in a single tidy row if you have enough shelf width. Separating by weight works well: lightweight cotton knits together, mid-weight merinos together, and heavy chunky knits on their own.
Shelf dividers help prevent sweater stacks from toppling into each other, especially as you pull one out and put it back. Cedar blocks placed on the shelf between stacks are a smart addition for wool pieces, since cedar naturally repels moths without the harsh smell of mothballs. It is a small detail that protects a wardrobe investment.
Designer Advice: Limit each shelf section to a stack of five or six sweaters maximum. When you exceed that number, the bottom sweater is effectively invisible and the stack becomes unstable. A second shelf section is a better solution than a taller pile.
11. Pull-Out Trouser Racks for Pants
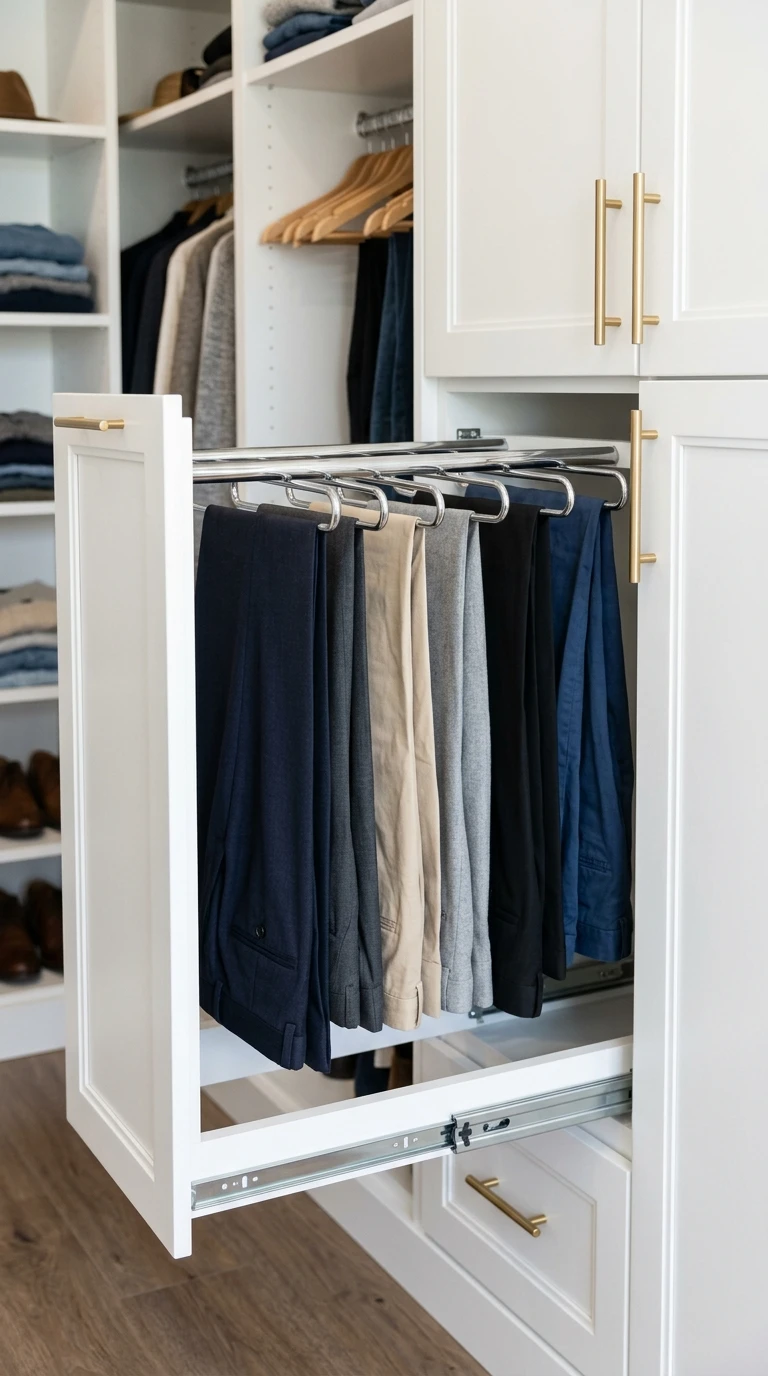
Folded pants on a shelf tend to crease in the wrong places and require ironing before you can wear them. Hanging pants on a regular hanger wastes rod space and can leave a fold mark across the knee. A pull-out trouser rack, which is a mounted rack that slides out from a cabinet or open slot in a shelving unit, is a much cleaner solution that treats pants with the respect they deserve.
The rack holds each pair individually over a rounded bar, preserving the crease line properly without adding folds or pressure points. Because the rack pulls out fully, you can see every pair at once without moving anything. It also keeps pants accessible without taking up hanging rod space, which can be redirected to jackets, shirts, and other pieces.
In a smaller walk-in, a simple multi-trouser hanger that holds five or six pairs on a single hook is a good alternative. The pants hang vertically with gravity doing the work of keeping them flat. It is not as visually elegant as a dedicated trouser rack, but it solves the problem efficiently and uses existing rod space rather than requiring additional installation.
Designer Advice: Always hang or rack pants right after wearing them, even if they need washing. Tossing them on a chair or the floor creates unnecessary creases that take more effort to deal with later. A trouser rack that lives at arm’s reach makes this habit very easy to keep.
12. Dedicate a Shelf to Tomorrow’s Outfit
One of the lowest-effort, highest-impact organizational habits you can build is picking out tomorrow’s outfit the night before and putting it in a specific spot. This sounds basic, but most closets have no designated place for this, which means the staged outfit ends up on a chair, the back of a door, or hanging off a drawer knob. A dedicated staging shelf or valet rod solves this cleanly.
A single open shelf at eye level, kept empty during the day and used only for the staged outfit each night, is all you need. Some people prefer a short valet rod that pulls out from the side of a cabinet, which holds the outfit on hangers and lets accessories be placed on the surface below it. Either approach creates a system where your morning routine starts with zero decisions.
If you share a closet, two staging zones side by side keep things organized without confusion. This is one of those ideas that sounds overly simple but genuinely reduces morning stress in a way that is hard to quantify until you experience it consistently for a week.
Designer Advice: Set a phone reminder for 9 or 10 p.m. as a staging prompt until the habit becomes automatic. After a few weeks it will feel as natural as brushing your teeth, and you will notice the difference in how calm your mornings feel.
Lighting and Finishing Touch Ideas
13. Install LED Strip Lighting Under Every Shelf
The single fastest way to make a walk-in closet feel more functional and more beautiful is better lighting. Most closets have one overhead fixture that casts flat light and creates heavy shadows on lower shelves and inside drawers. LED strip lighting mounted under each shelf changes this completely. The light falls directly onto the shelf below, illuminating everything at that level without any shadows.
LED strips are inexpensive, easy to install with peel-and-stick adhesive backing, and can be cut to fit any shelf length. Warm white LEDs, around 2700K to 3000K, make clothing colors look accurate and the space feel inviting rather than clinical. Cool white or daylight LEDs can feel harsh under shelves and make certain fabric colors look off, so warm tones are generally the better choice for closets.
If you want a step up, LED strips with a dimmer allow you to lower the intensity during nighttime visits to the closet without flooding the room with bright light. Motion-activated strips are another option, turning on automatically when you enter and off when you leave, which is both practical and a surprisingly satisfying detail that makes the closet feel intentional and well-designed.
Designer Advice: Run a single continuous LED strip along the front underside of each shelf rather than centering it. The front position projects light forward and down onto the items below, whereas center placement can create a hot spot directly below without illuminating the depth of the shelf.
14. Add a Statement Mirror
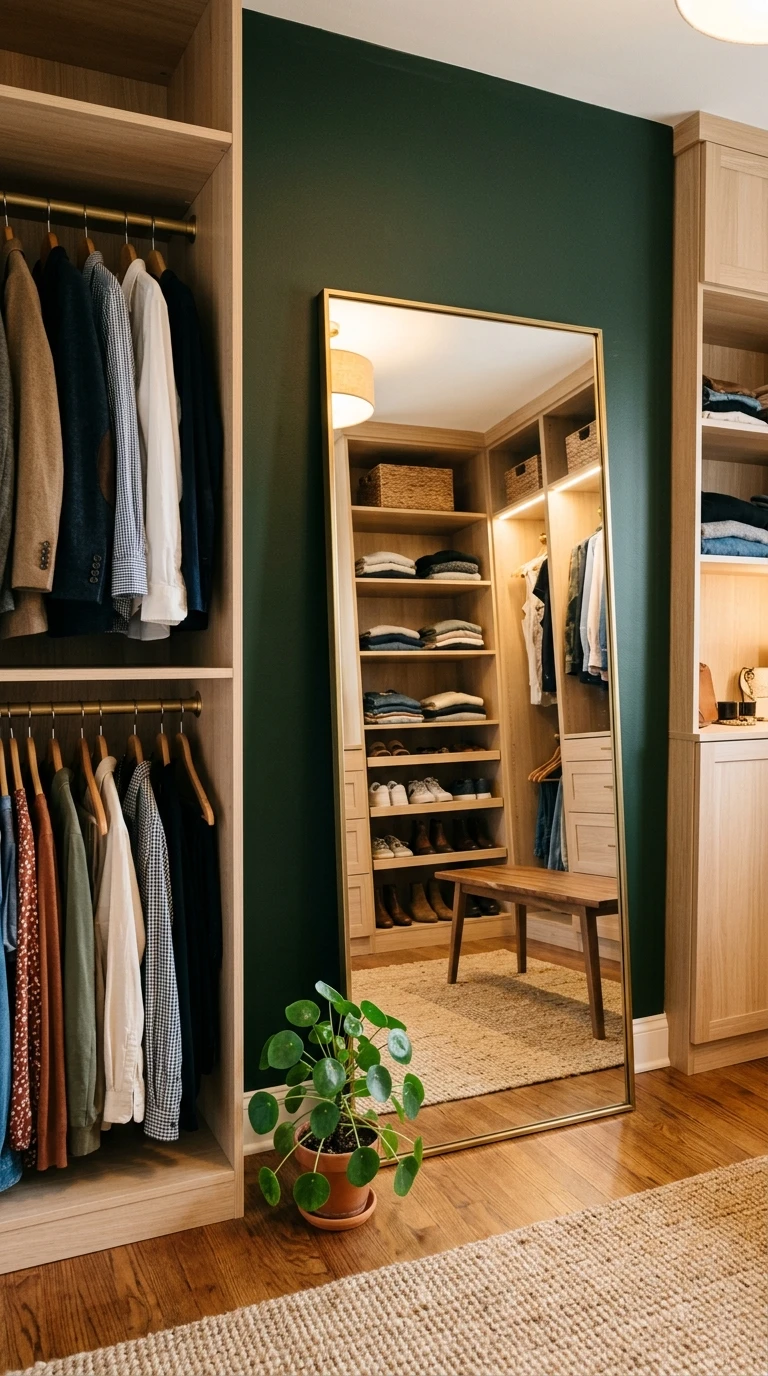
A mirror in a walk-in closet is not optional, it is essential. But beyond the practical need to check how something looks before you leave the house, the right mirror also does a lot for the feel of the space. A full-length mirror in a well-positioned spot reflects light back into the closet, making the whole room feel larger and brighter. It also gives the space a sense of completion, like a room that was designed rather than assembled.
Leaning mirrors work well in closets with floor space against one wall. They have a relaxed, boutique feel and can be moved if you rearrange your layout. Mounted full-length mirrors are more permanent but save floor space and feel more custom. For a shared closet, two smaller mirrors positioned at each person’s primary section can work better than one central mirror.
A mirror with a thin brass, black, or natural wood frame adds a decorative layer to the closet without taking up any storage space. It anchors the wall it is on and gives the eye a focal point that makes the space feel designed. Even in a small walk-in, a well-chosen mirror does more for the look and feel of the room than almost any other single addition.
Designer Advice: Position your mirror where it catches light from both the overhead fixture and the LED shelf lighting. This eliminates shadows on your face and body when you are checking a full outfit, which gives you a much more accurate read on how something actually looks.
15. Use Matching Hangers Throughout
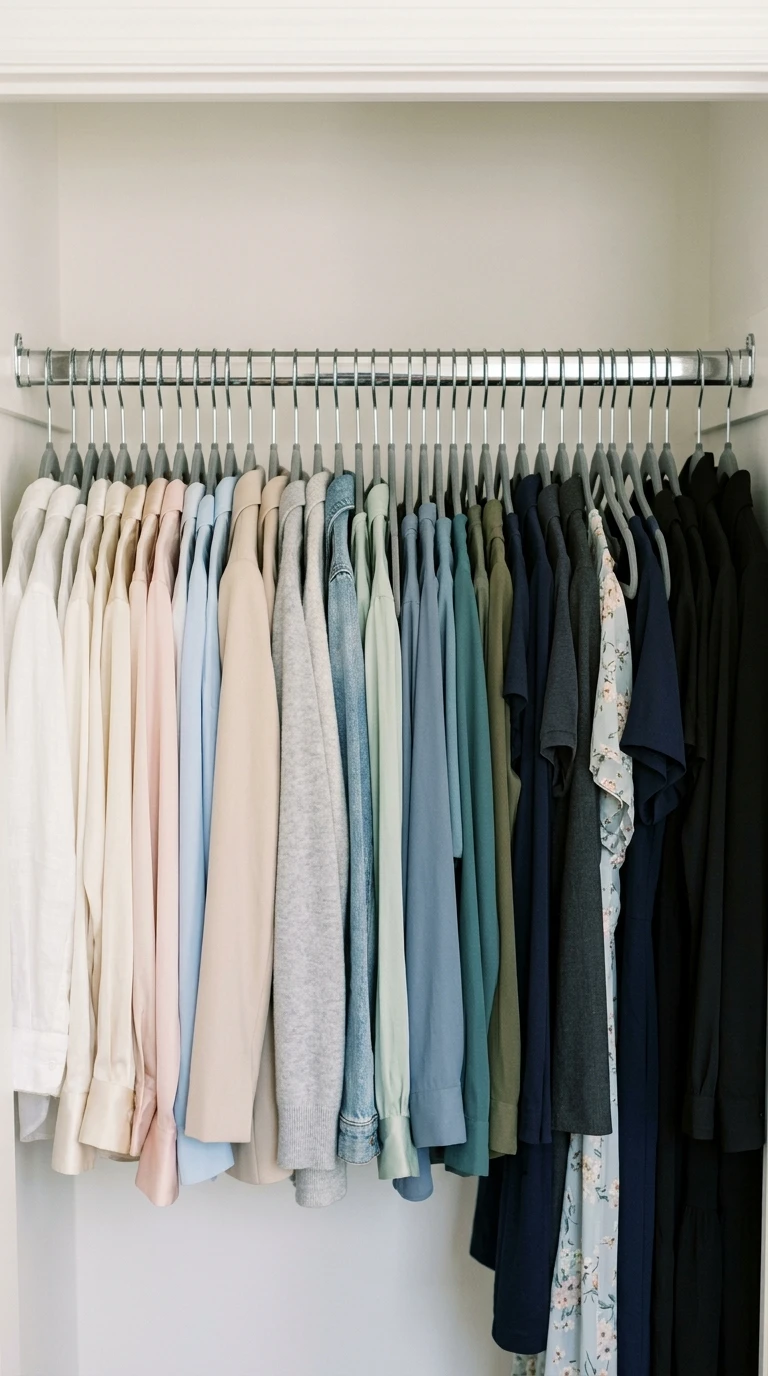
This one sounds almost too simple to mention, but switching to matching hangers throughout your entire closet creates an immediate visual transformation that is genuinely hard to overstate. A rod full of mismatched plastic hangers in different colors, widths, and styles looks cluttered no matter how neatly the clothes themselves are arranged. A rod full of identical hangers looks organized even when the closet is only moderately tidy.
Slim velvet hangers are the most popular choice and for good reason. They take up roughly half the rod space of a standard plastic hanger, which means you can fit significantly more hanging items in the same length of rod. The velvet surface also grips fabric gently, preventing slippery items like silk blouses and satin dresses from sliding off. They come in neutral tones like gray, black, and blush that work with virtually any closet aesthetic.
Wood hangers are a more premium option that works particularly well for structured jackets, blazers, and coats. The wider shoulder shape supports the garment better, which means pieces hold their form over time rather than developing hanger bumps. Using wood hangers exclusively for outerwear and suiting, with slim velvet for everything else, gives the closet a layered, considered look.
Designer Advice: When switching to matching hangers, do it all in one session rather than gradually. Mixing old and new hangers for months in between defeats the purpose. Set aside an afternoon, transfer everything at once, and the effect is immediate and noticeable.
16. Add Wallpaper or Paint to the Back Wall
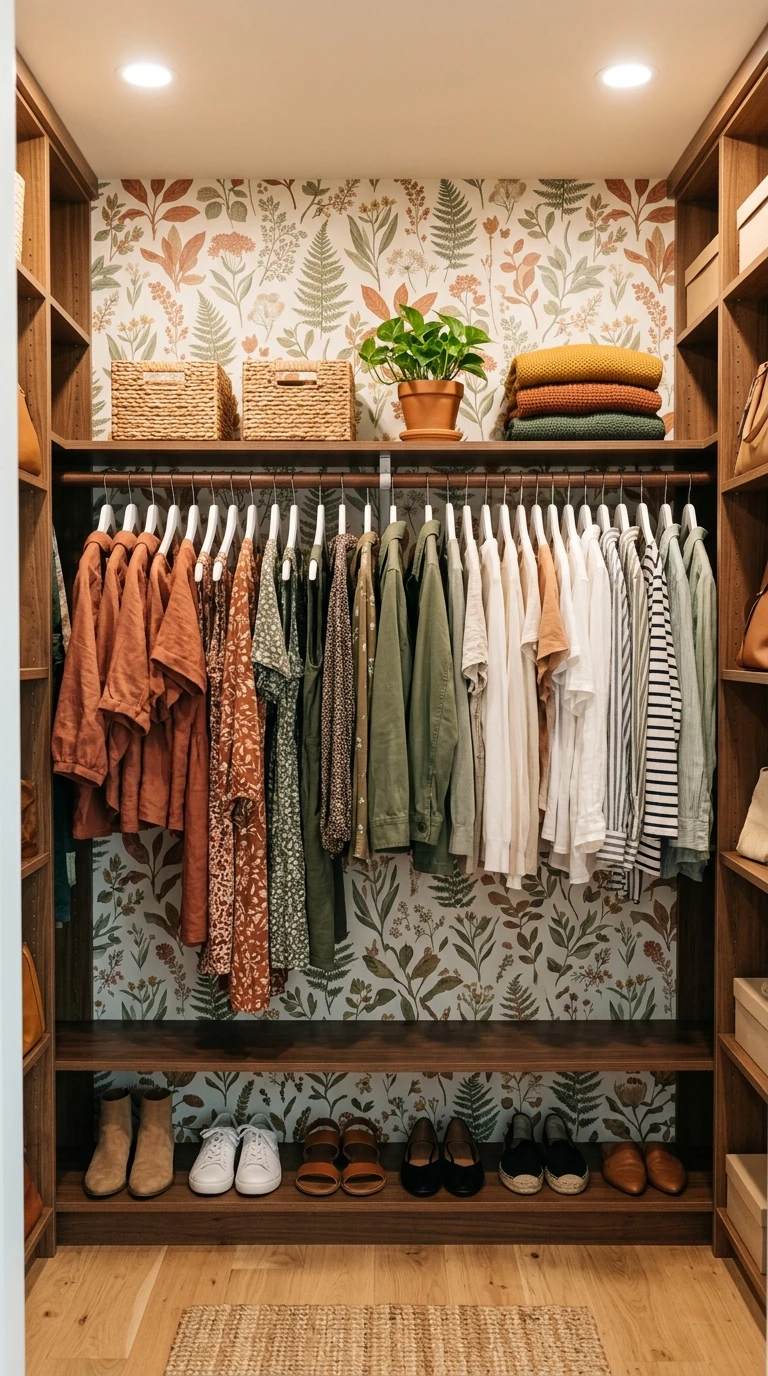
The back wall of a walk-in closet is one of the most overlooked decorating opportunities in the home. Because it is usually visible the moment you open the closet door, a single thoughtfully finished wall has an outsized impact on how the whole space feels. A coat of paint in a deep, rich color or a strip of removable wallpaper turns a utilitarian storage room into a space with genuine character.
Deep tones like forest green, navy, warm terracotta, and charcoal all work beautifully as closet accent walls. They create contrast against the clothes and accessories displayed in front of them, which actually makes individual items more visible and easier to identify. The effect is similar to how a gallery hangs art against a dark or saturated wall to make the pieces stand out.
Removable peel-and-stick wallpaper has made this kind of update genuinely accessible. Floral patterns, subtle textures, geometric prints, and botanical designs all translate well to closet walls. You are not committing to anything permanent, and the installation takes an afternoon at most. The return on that effort in terms of how the closet looks and feels is substantial.
Designer Advice: If you are painting or papering behind shelving, do it before the shelves go up. If shelves are already in place, use a small brush or foam roller to carefully cover the visible portions of the wall, and consider doing the inside of the shelf units too for a wrapped, finished look.
17. Incorporate a Small Lamp or Ambient Light
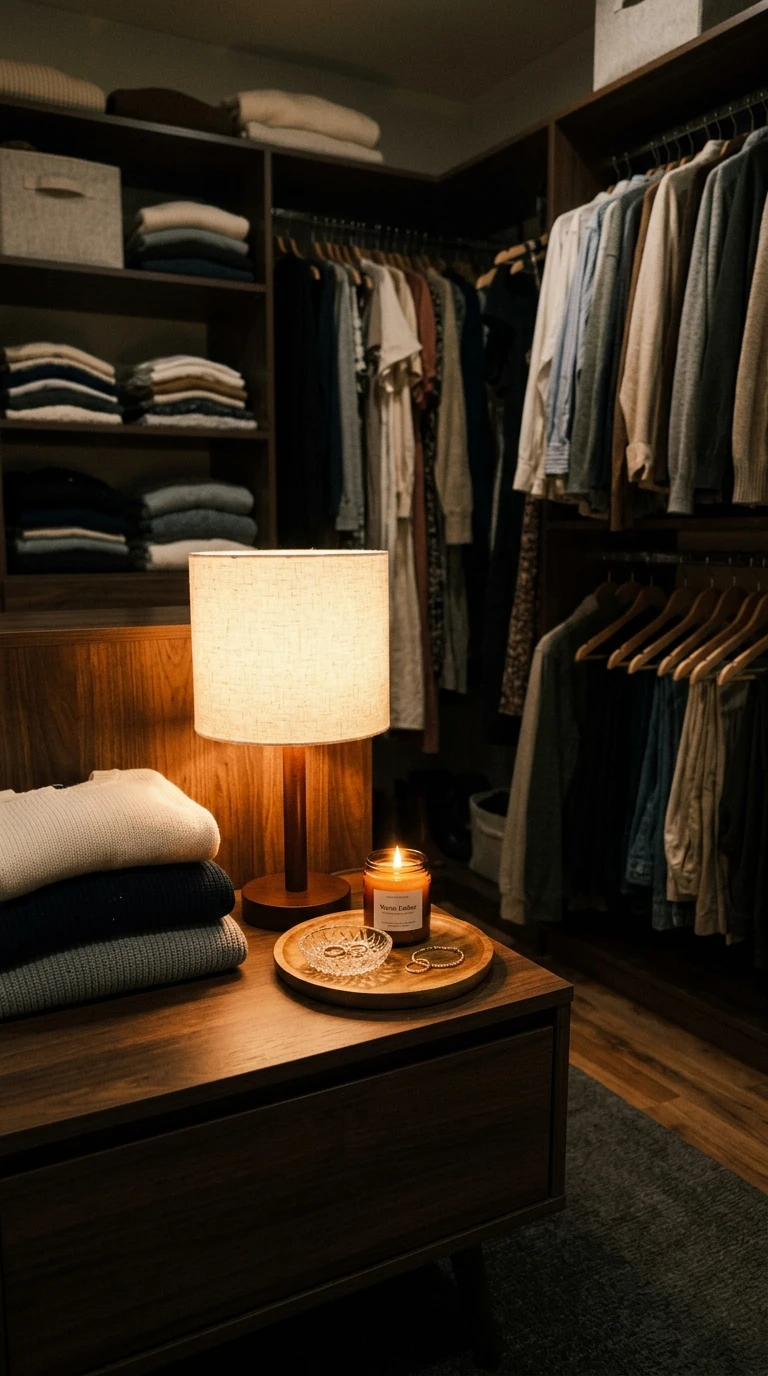
A dedicated overhead fixture handles task lighting just fine, but a small lamp brings warmth to a closet in a way that overhead lights cannot replicate. Placed on top of a dresser, on a low shelf, or tucked onto a small surface near the dressing zone, a lamp makes the closet feel less like a utility room and more like a space you actually enjoy being in. It is a small investment that changes the atmosphere of the room entirely.
A compact table lamp with a linen or cotton shade in a warm tone is a good starting point. The shade diffuses the light softly, casting a gentle glow rather than a directed beam. For tighter spaces where a lamp base and shade are too large, a small plug-in wall sconce does the same job with no surface footprint. Battery-operated versions make this possible even without a nearby outlet.
Some people go a step further and put a smart bulb in the closet lamp that can be scheduled. Setting it to turn on automatically in the morning at your usual wake-up time means you walk into a warmly lit closet rather than reaching for a switch in the dark. It is an unexpectedly pleasant detail that makes the morning feel a little more considered.
Designer Advice: Keep the lamp wattage low, around 40 to 60 watts equivalent. The goal is ambiance, not task lighting. The LED shelf strips and overhead fixture handle visibility. The lamp is purely for warmth and mood.
Seasonal and Special Storage Ideas
18. Rotate Your Wardrobe Seasonally
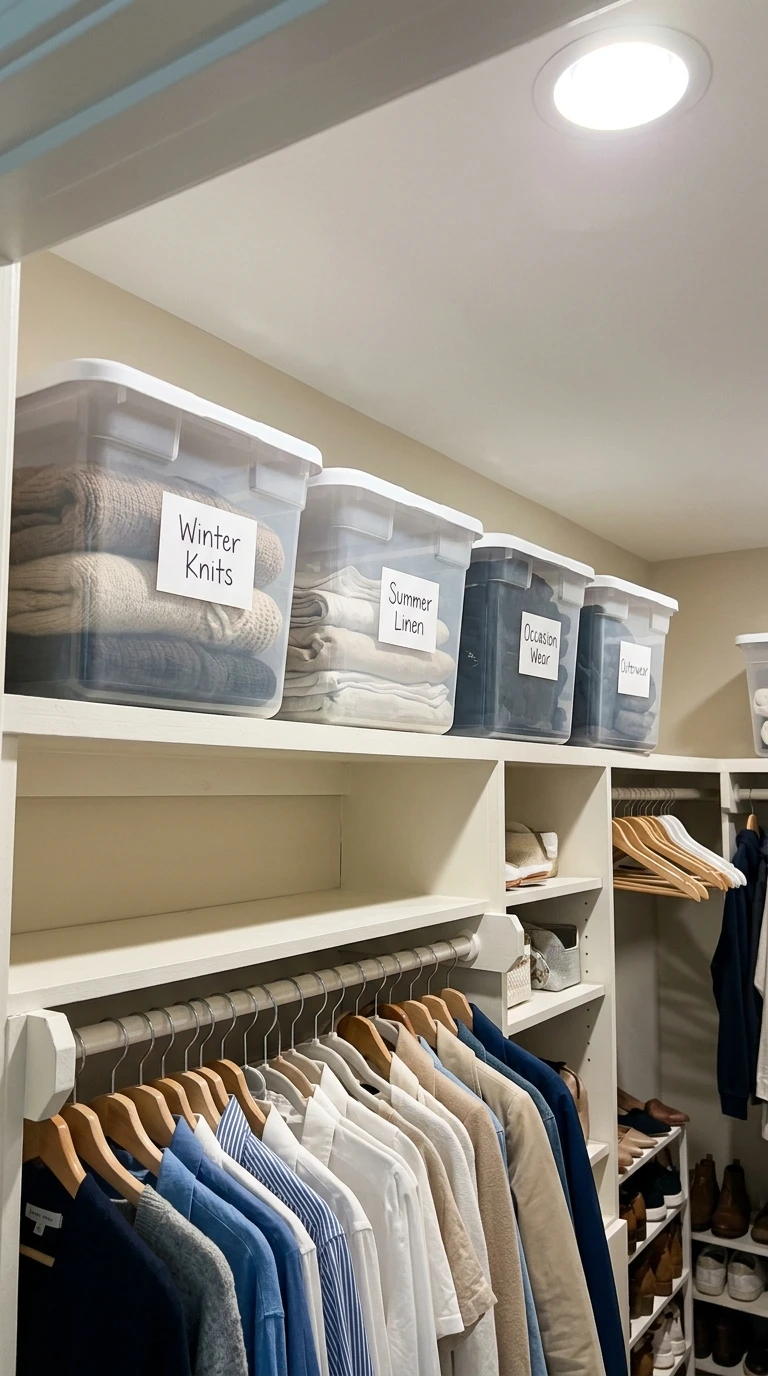
One of the most effective things you can do for closet organization is removing the items you are not currently wearing. A closet packed with both winter coats and summer linen at the same time is twice as hard to navigate as one that only holds what is relevant to the current season. Seasonal rotation is not just about space, it is about clarity.
The system is straightforward: at the transition between seasons, move off-season items into breathable cotton storage bags or clear bins that can live on high shelves, in under-bed storage, or in a secondary closet. Vacuum storage bags are useful for bulky items like heavy blankets and puffy coats, compressing them to a fraction of their normal size. Label every container clearly so there are no mystery boxes when you rotate back.
The beginning of each rotation is also the best moment to reassess what you are keeping. If something you packed away last season gives you a moment of hesitation before you store it again, that is a signal. Removing pieces you no longer reach for makes space for things you actually wear, and it keeps the active wardrobe feeling current and intentional.
Designer Advice: Store off-season shoes in individual cloth or clear bags inside a labeled bin. Shoes stored loose together in a box can scuff each other, lose their shape, and collect dust at different rates. Individual bags also make finding a specific pair at rotation time much faster.
19. Create a Formalwear Section with Breathing Room
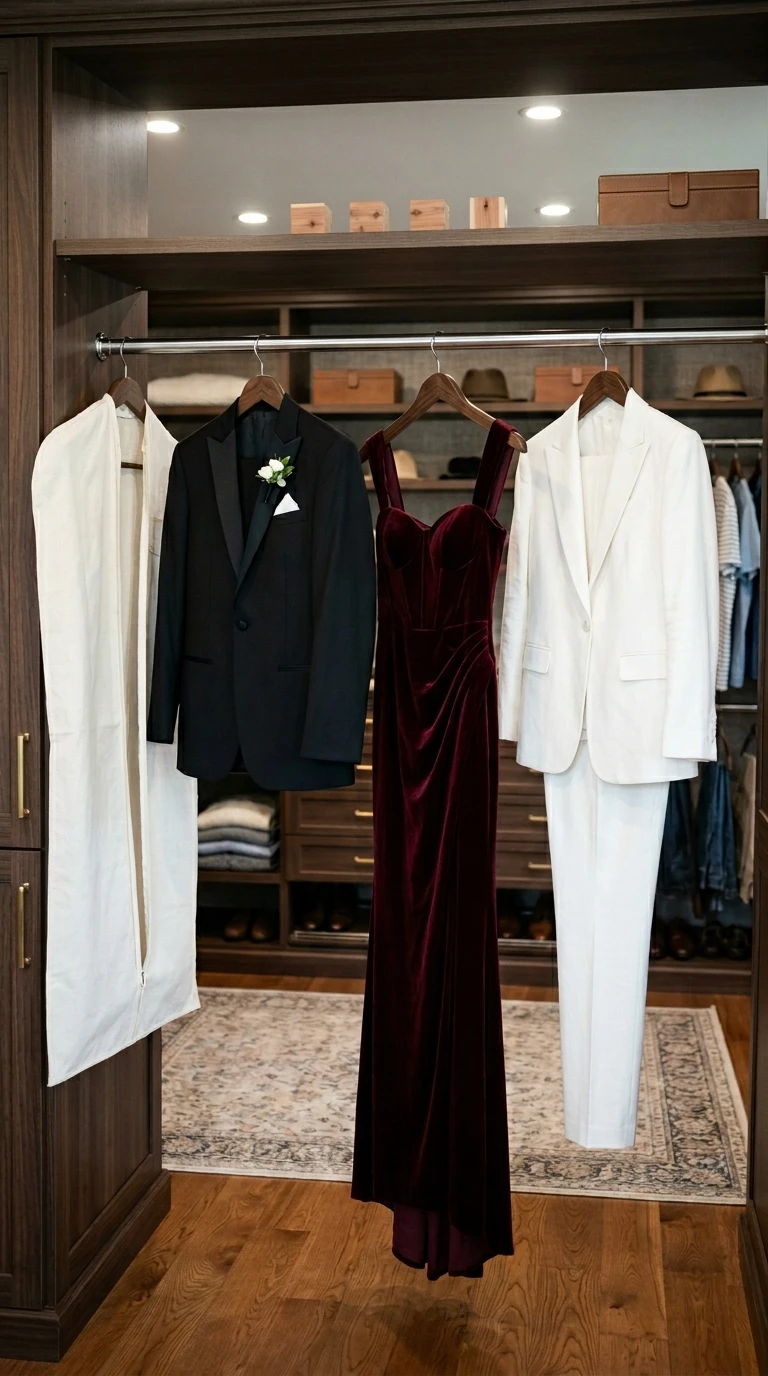
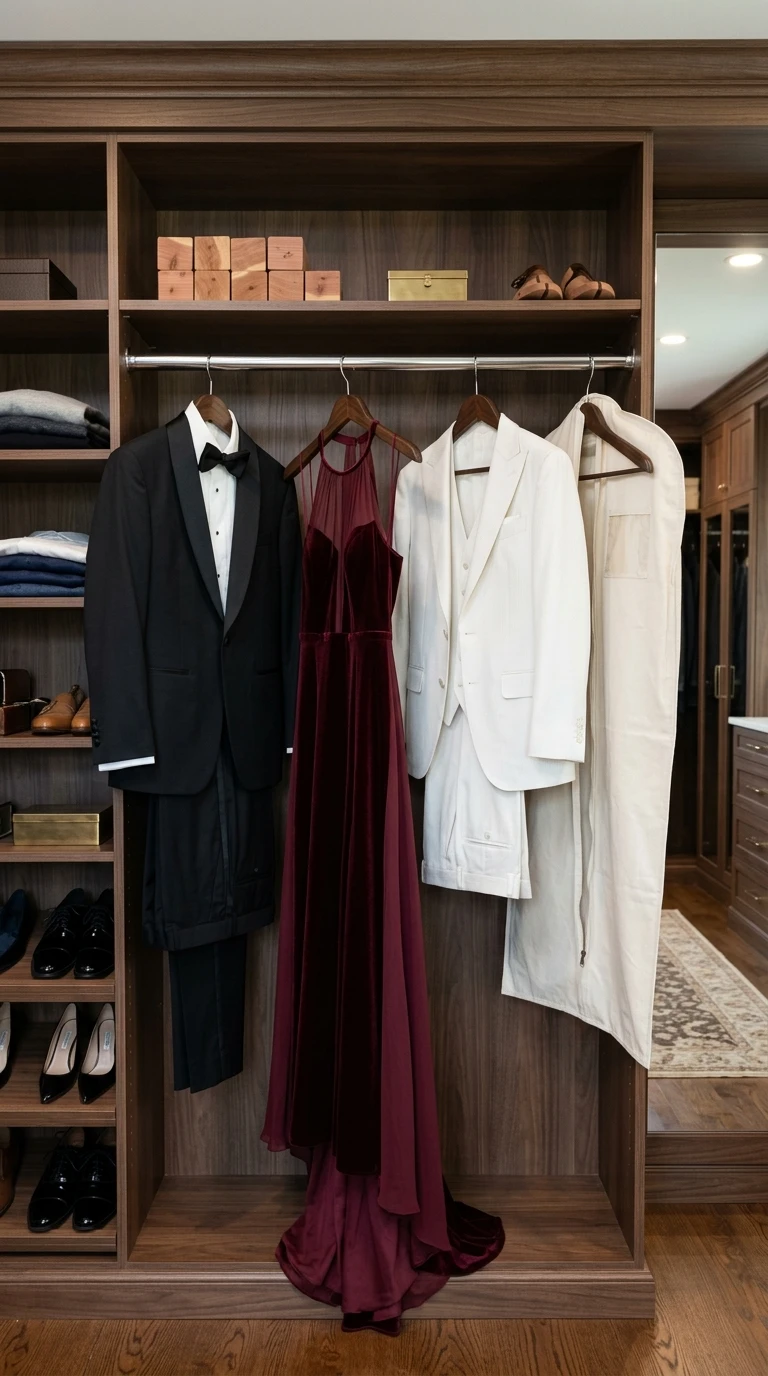
Formal and occasion wear needs more space than everyday clothes, not just because the pieces are often larger, but because crowding them damages the fabric and silhouette. A tuxedo crammed between a row of work shirts will not hang the same way it would in a clean, open section. Formalwear deserves its own dedicated zone with generous spacing between pieces.
This section ideally sits at the end of one rod run, away from the densely packed everyday hanging area. Long dresses and floor-length gowns need a full-length rod section with nothing stored beneath them. Formal suits and blazers benefit from wide wood hangers with shoulder support. Leave at least two to three inches of air between each garment so fabric does not get compressed or take on the smell of neighboring pieces.
For pieces worn only a few times a year, breathable garment bags are worth using between wearings. They protect against dust and light exposure without trapping moisture the way plastic dry-cleaning bags do. Cedar blocks or small sachets of dried lavender placed in this section add natural moth protection that is far gentler on delicate fabrics than chemical alternatives.
Designer Advice: After wearing formal pieces, always hang them back in the formalwear zone the same day and let them air out before replacing the garment bag. Storing anything in a bag while it still holds body heat or odor from wearing can set stains and trap moisture.
20. Use the Floor Space Intentionally
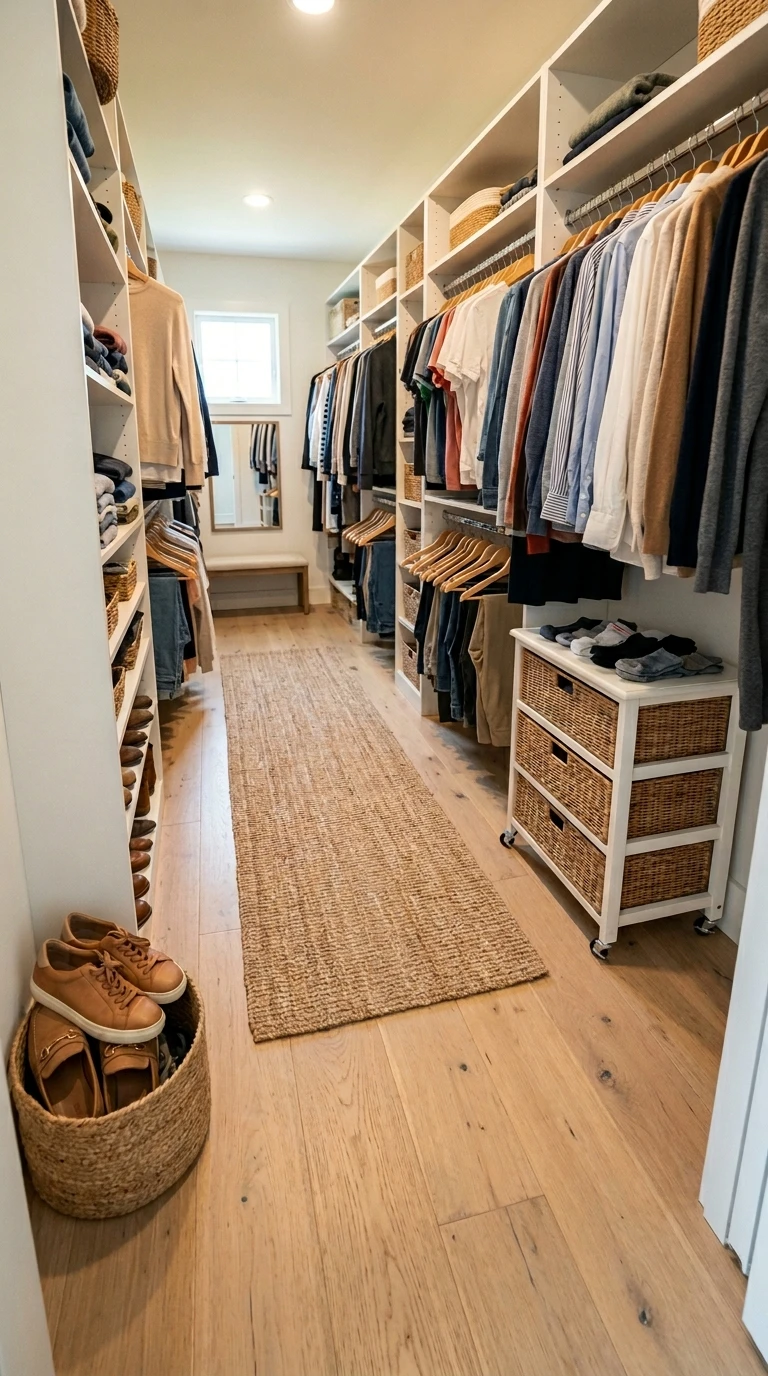
The floor of a walk-in closet is often either completely bare or covered in piled-up shoes and bags that found no other home. Neither approach is ideal. The floor is real usable space that, with a little thought, can handle storage that frees up shelves and rods for clothing. The key is keeping floor items contained and off the ground itself where possible.
A low rolling cart or drawer unit fits under hanging clothes and uses the vertical gap between the hem of shirts and the floor. It can hold folded items, extra bags, or even laundry supplies if your closet is near a laundry area. A small narrow dresser fits along one wall and takes clothes off shelves, creating more breathing room above. A decorative basket on the floor in one corner provides a spot for items in rotation, like shoes you wore yesterday and will wear again tomorrow.
Keeping at least part of the floor completely clear is important for both function and the feel of the space. A closet where you can walk freely and see the floor feels significantly more organized than one where the floor is packed, even if the shelves themselves are tidy. Clear floor, clear mind is a principle that applies surprisingly well to closets.
Designer Advice: Place a small rug in the center of the closet floor if the space is large enough. It defines the dressing area, feels warm underfoot, and adds a finishing touch that makes the closet feel like a designed room rather than a storage space.
21. Store Luggage Smartly
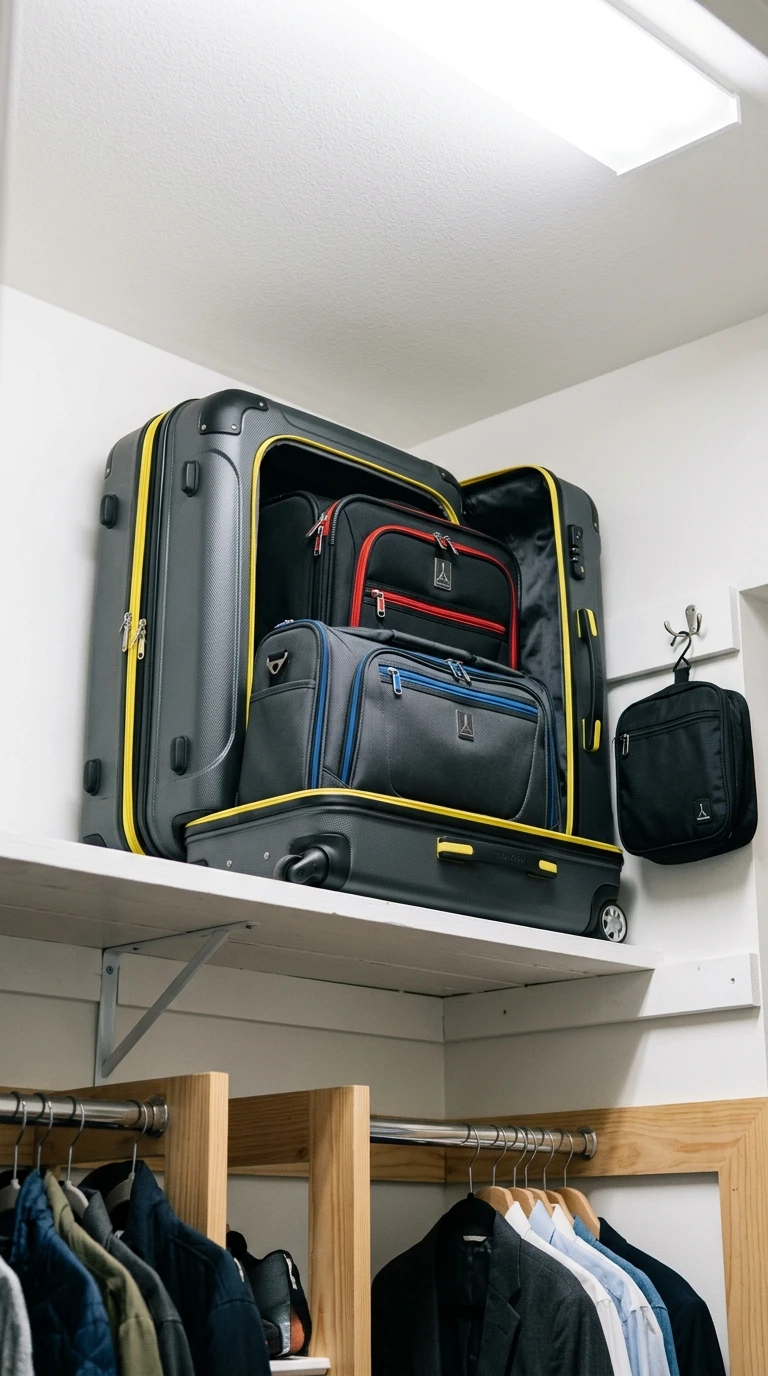
Luggage is one of those categories that tends to end up wherever it can fit rather than in any specific organized spot. Large suitcases on the floor take up prime space. Bags stacked precariously on a high shelf are awkward to retrieve. The best approach is storing luggage in a way that it takes up the least possible amount of active closet space while remaining accessible when you need it.
Nesting luggage inside each other, largest piece on the outside and progressively smaller pieces inside, is the most space-efficient approach for a set. Stored this way on a high shelf or on the floor under a hanging section, the whole collection takes up no more space than a single large suitcase. Soft-sided bags can be compressed further by removing any internal frames or packing aids.
If you travel frequently, keeping one carry-on or overnight bag at a more accessible height than the larger pieces saves time when you need it quickly. Storing a small toiletry kit or a packing essentials bag inside the carry-on means you are ready to go faster, which is the kind of practical organizational thinking that makes a closet actually serve your life.
Designer Advice: Use the interior of stored luggage for off-season items like bulky sweaters or extra bedding. It fills dead air space inside the case and keeps those items dust-free. Just attach a note or tag to the handle so you know what is inside before you open it during packing.
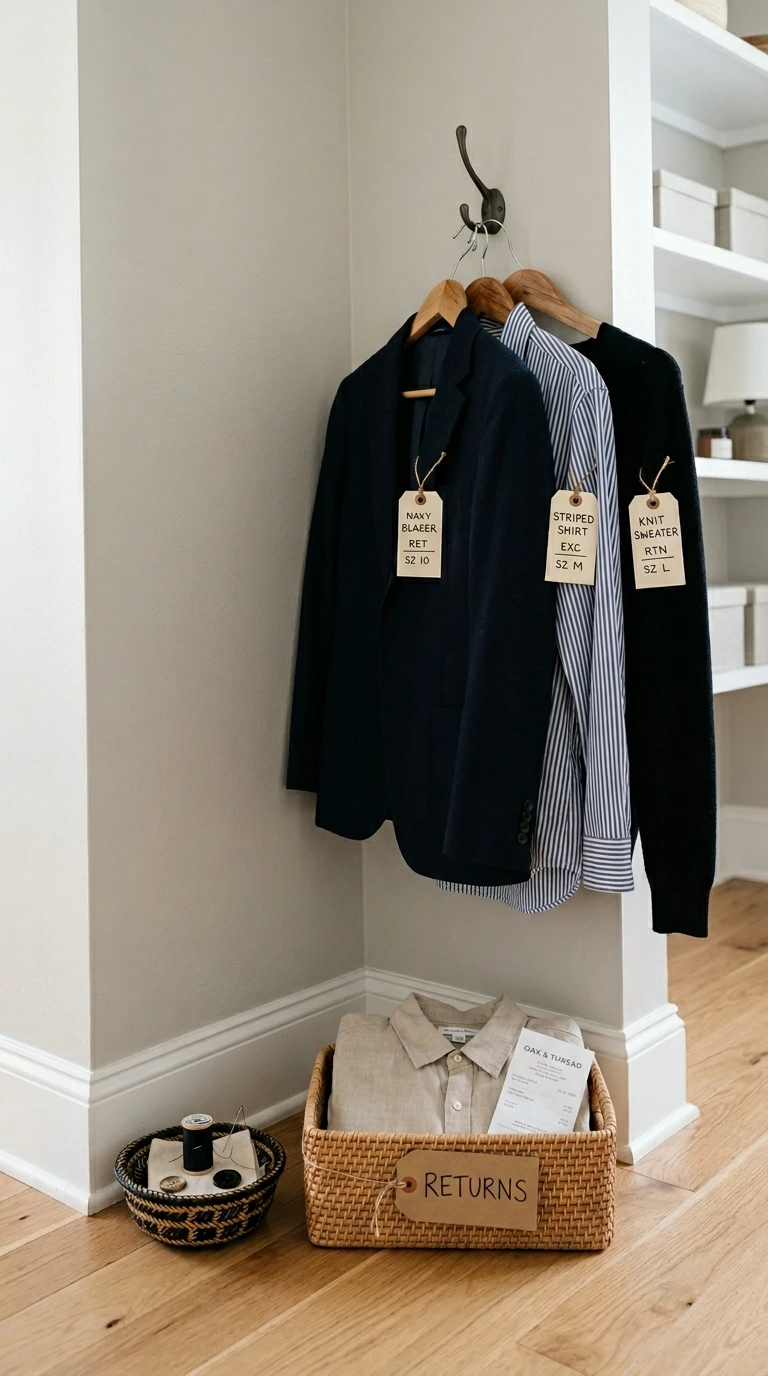
22. Dedicate a Spot for Dry Cleaning and Returns
One of the small but persistent sources of closet clutter is the pile of things waiting to go somewhere else. Items that need dry cleaning pile up on the back of a chair. Things to return to a store sit in a bag on the floor. Clothes that need repair or tailoring get forgotten in a corner. Creating a dedicated spot for all of these in-transit items gives them a home that is not the floor and makes sure they actually leave the closet eventually.
A single hook or a short rod section in a corner of the closet works well for dry cleaning items. Hang them together with a dry-cleaning ticket or a sticky note on the hanger so you remember which shop they are going to. For returns, a labeled basket or shallow bin near the closet door catches anything headed out so it is impossible to forget on your way to the car.
A small repair basket, a shallow container that holds loose buttons, a spool of matching thread, and the item that needs attention, keeps mending from being forgotten. Designating one afternoon every few weeks as a mending session means the basket never overflows and clothes that need minor fixes actually get fixed rather than sitting unworn for months.
Designer Advice: Make it a habit to check the dry-cleaning hook and the returns basket every Sunday. One weekly sweep means nothing sits waiting for longer than a week, and the closet never accumulates that specific kind of clutter that comes from items in transit.
Budget-Friendly and DIY Ideas
23. Repurpose Everyday Items as Closet Organizers
Not every closet organization solution needs to come from a specialty store at a premium price. Some of the most effective organizers are items you likely already have or can find inexpensively. Ice cube trays from the dollar store make excellent jewelry organizers for small earrings and rings. Tension rods mounted inside a cabinet create additional hanging space for clutches and small bags. A simple wooden ladder leaned against a wall holds scarves, blankets, and bags with no installation required.
Shoeboxes, especially when labeled on the short end, are a free storage solution for accessories, folded scarves, belts, and small bags. Keep them uniform by covering them in wrapping paper or contact paper in a color that coordinates with your closet. Stacked neatly on a shelf, they look intentional rather than improvised.
An over-the-door organizer on the inside of your closet door handles an enormous amount of storage without touching your shelves or rods. These work for shoes, accessories, cleaning supplies, and any small items that currently have no home. The back of a closet door is prime real estate that most people never think to use.
Designer Advice: Before buying any new organizer, do a full inventory of what you already own that could be repurposed. A wire magazine rack screwed to the wall becomes a clutch holder. A pegboard from a hardware store becomes a customizable wall organizer. Creativity before spending is always the better first move.

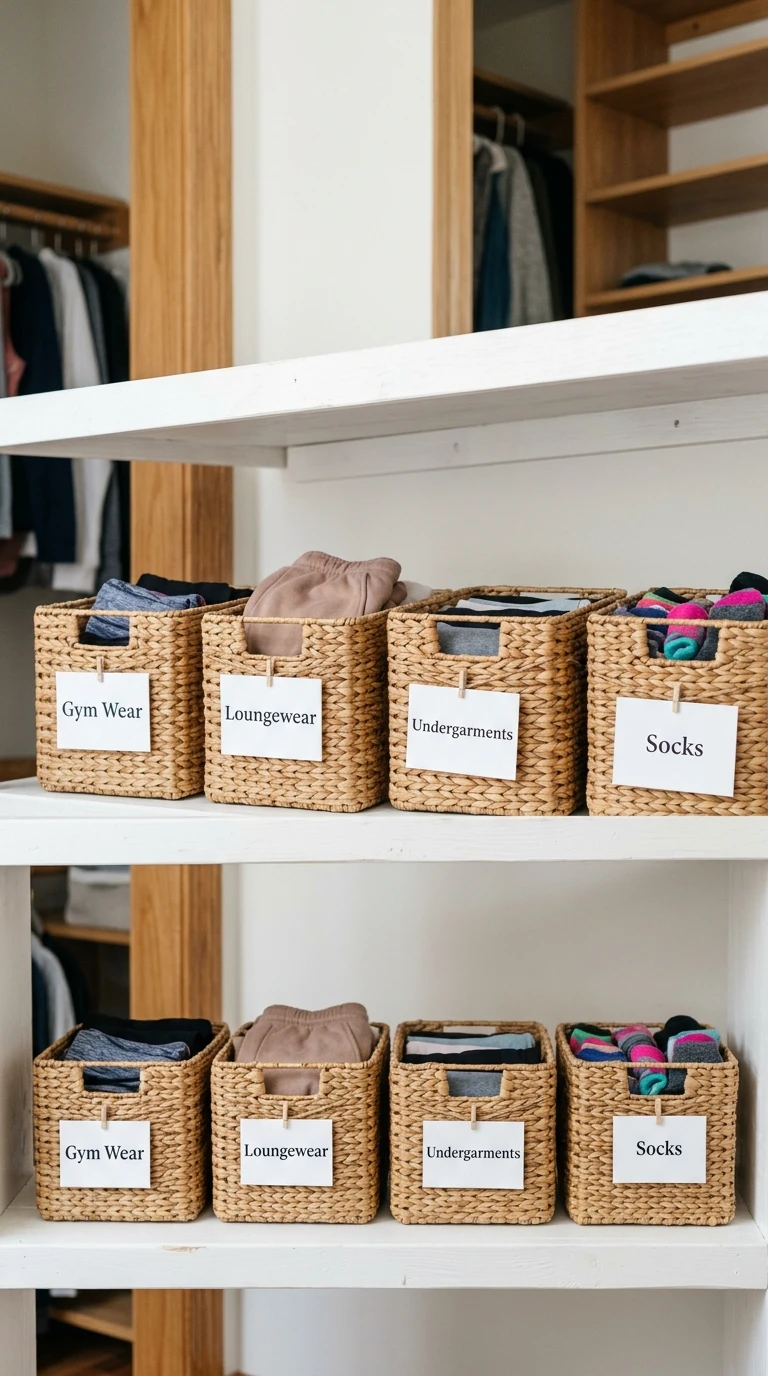
24. Add Labels to Everything
Labels are the unsexy secret weapon of truly organized people. They are the thing that separates a closet that stays organized from one that looks great on Sunday and descends into chaos by Thursday. When everything has a label, putting things away correctly becomes the path of least resistance, not the effort. Without labels, every item that gets put back requires a decision. With labels, there is no decision to make.
Labels do not need to be elaborate or expensive. A label maker and a roll of white tape is all you need for a clean, uniform look. Printed labels in a clean font look polished and professional without requiring any design skill. Handwritten labels in good handwriting on small card stock tags can look warm and considered in a more casual closet. What matters is that they exist and that they are clear.
Label everything: shelf sections, drawer dividers, storage bins, baskets, and boxes. Label by category rather than by specific item so the labels remain accurate even as your wardrobe changes. A shelf labeled ‘Knitwear’ stays correct whether it holds three sweaters or twelve, while a label that says exactly what is in it might need to be replaced every time something shifts.
Designer Advice: Use consistent formatting across all your labels. Same font, same size, same background color. Consistency is what makes a labeled closet look purposeful rather than patched together. Even a simple handwritten system looks sharp when every label is written the same way.
25. Do a Monthly Fifteen-Minute Reset
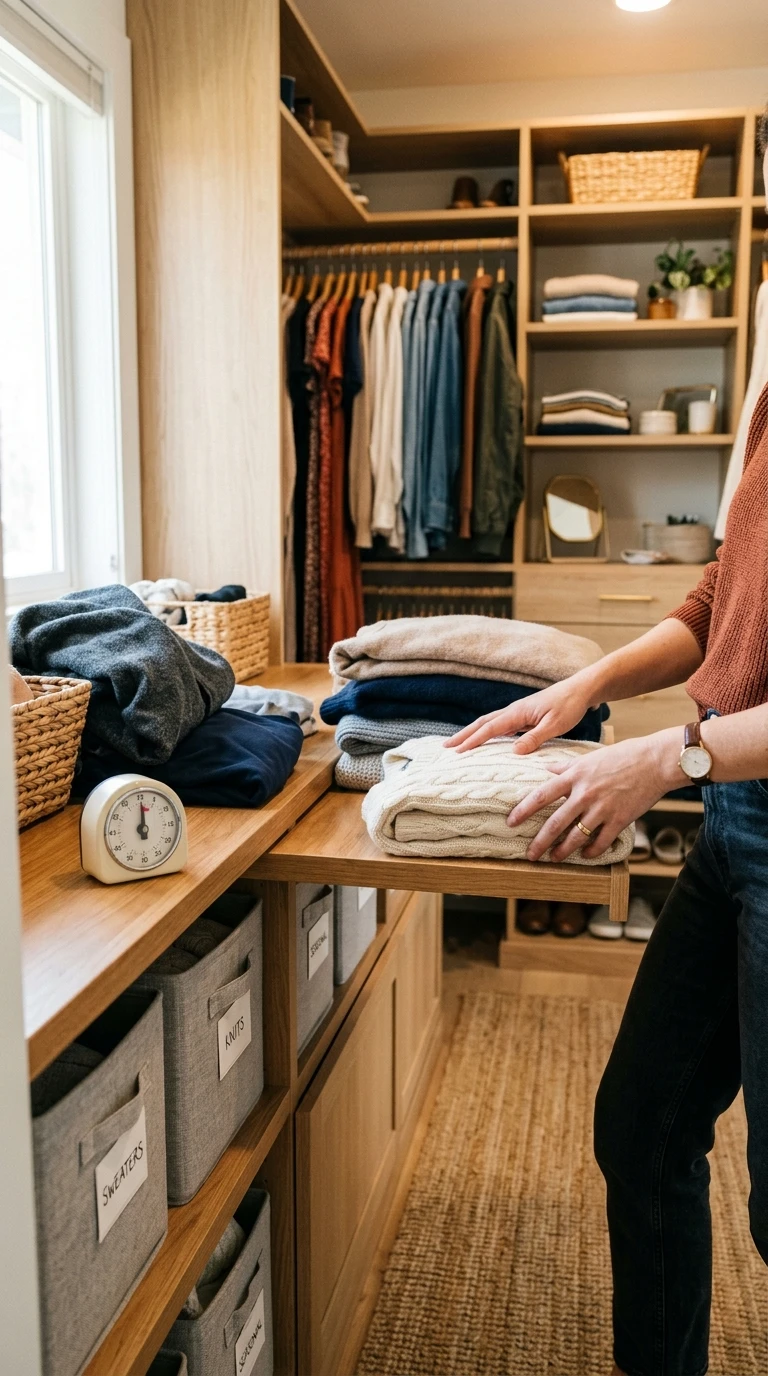
The most beautiful, perfectly organized closet in the world will eventually drift if there is no maintenance habit attached to it. Things get shoved in the wrong spot when you are in a hurry. A stack of folded shirts slowly migrates into a pile. Shoes that belong on the rack end up on the floor. None of this means the system failed. It just means closets need occasional resetting, and building that reset into a regular habit is what keeps organization working long term.
A fifteen-minute monthly reset is enough for most closets. Set a timer, put on a podcast or playlist, and go through each zone: refold anything that has slipped, return misplaced items to their home, check the staging shelf, clear out anything in the dry-cleaning spot or returns basket that should have left already, and do a quick scan for anything that has crept in that does not belong.
The monthly reset is also a good moment to notice what is not working. If the same shelf becomes messy every single month, that is feedback. Maybe the category does not suit that location, or the storage type is not right for how you actually use those items. A good organizational system is not static, it evolves with your habits, and the monthly reset is the moment to make small adjustments before small problems become big ones.
Designer Advice: Combine the monthly reset with a quick review of anything you have not touched in thirty days. If something has sat unworn for a full month and it is not seasonal, it is worth asking whether it belongs in your active wardrobe at all. Small, regular edits keep the closet feeling current rather than accumulated.
Conclusion
A walk-in closet that is truly organized is not about having the most storage products or the most expensive custom system. It is about building a space that reflects how you actually live, one that is designed around your habits, your wardrobe, and your daily routine. The ideas in this article cover everything from big-picture layout decisions to small finishing touches, and even implementing a handful of them will make a noticeable difference in how your closet feels and functions every day.
Start with the changes that address your biggest frustrations. If mornings are chaotic, the staging shelf and zone system will help immediately. If you are always losing accessories, the dedicated display corner is the right starting point. If the closet just feels dark and uninspiring, LED strips and a mirror will do more than almost anything else. There is no single right order, only the order that makes sense for your space and your life.
The most important thing is that the system you build is one you can maintain. A simple system that holds up over time beats a complicated one that collapses after a week. Start with what works, adjust as you go, and give yourself a monthly reset to keep things running smoothly. Your closet can be one of the most functional, pleasant spaces in your home. These ideas are a strong starting point for getting it there.
Frequently Asked Questions
How do I start organizing a walk-in closet that is completely overwhelmed?
Start by taking everything out. It sounds drastic, but trying to organize around existing clutter rarely works. Once the closet is empty, sort into four piles: keep, donate, store elsewhere, and discard. Only then should you start thinking about where things go back in. Zones come first, then shelving and storage solutions follow.
What are the most important things to invest in for a walk-in closet?
If you are going to spend money on a few things, prioritize matching slim hangers, LED strip lighting, and at least one full-length mirror. These three changes alone have a higher impact on how the closet looks and functions than almost any other single purchase. Everything else can be built up gradually over time.
How do I keep a walk-in closet organized when I share it with a partner?
Clear, labeled zones for each person are the foundation of a shared closet that stays organized. Make sure each person has enough hanging, shelf, and drawer space for their wardrobe without overlap. A monthly reset together also helps, since shared spaces tend to drift faster than individual ones. A staging shelf for each person’s daily outfit helps reduce the morning chaos that often comes from two people getting ready at the same time.
What is the best way to store shoes in a walk-in closet?
Graduated or angled shelves where shoes face outward are the most visually appealing and functional option. Clear stackable boxes work well for a smaller collection or for shoes worn less frequently. Avoid deep shelves where shoes are stored heel-out and hidden behind each other. The golden rule is that you should be able to see every pair without moving anything.
How do I make a small walk-in closet feel more organized and less cramped?
Maximize vertical space with floor-to-ceiling shelving, add LED lighting under every shelf to eliminate shadows, and keep the floor as clear as possible. Stick to a light, neutral palette on the walls and use slim hangers to open up rod space. Removing anything from the closet that does not belong there, like sports equipment, cleaning supplies, or random household items, immediately makes the space feel more intentional and less tight.
How often should I declutter my walk-in closet?
A quick fifteen-minute reset monthly is enough for maintenance. A more thorough declutter at the beginning of each season, four times a year, is ideal for assessing what stays and what goes. Seasonal rotation is the natural moment to remove pieces you did not reach for during the past three months, and rotating with fresh eyes is always easier than trying to edit a packed, active wardrobe mid-season.