Small Bathroom Wall Decor Ideas That Actually Make a Difference
Here is something most bathroom decorating articles skip over: the walls are the largest uninterrupted surface in a small bathroom, and most people leave them completely blank. A shower curtain gets chosen carefully. A vanity gets researched for weeks. But the wall above the toilet, the stretch of drywall beside the mirror, the narrow strip between the door and the window — those just sit there, painted the same builder beige they have been since the day the house was built.
That is a missed opportunity, and a significant one. In a small bathroom, the walls are where you have the most freedom to make design choices without spending money on plumbing or tilework. You can change them in an afternoon. You can change them back if you hate the result. And when you get it right, the whole room shifts from something you walk through without noticing to a room you actually enjoy being in for a few minutes every day.
This article is organized by style and intention rather than just throwing 21 random ideas at you in no particular order. Each section addresses a specific kind of small bathroom and a specific design challenge, so you can find the section that matches your space and your taste and go from there. Within each section, every idea opens with a real scenario — the kind of situation you might actually be in — before walking through exactly how to pull it off.
Whether you are working with a rented apartment where you cannot touch the walls, a dated bathroom that needs personality fast, or a blank-slate space you are ready to actually design with intention, something in here will be genuinely useful. Start with the section that sounds most like your bathroom right now.
Wall Decor for the Minimalist Small Bathroom
These ideas are for bathrooms where the goal is calm, clean, and considered. Not bare — just deliberate. Every element earns its place.
1. A Single Large-Scale Art Print in a Simple Frame
The scenario: You walk into your bathroom every morning and there is nothing on the walls but paint. It feels like a room that has not been finished yet, even though everything else is in place.
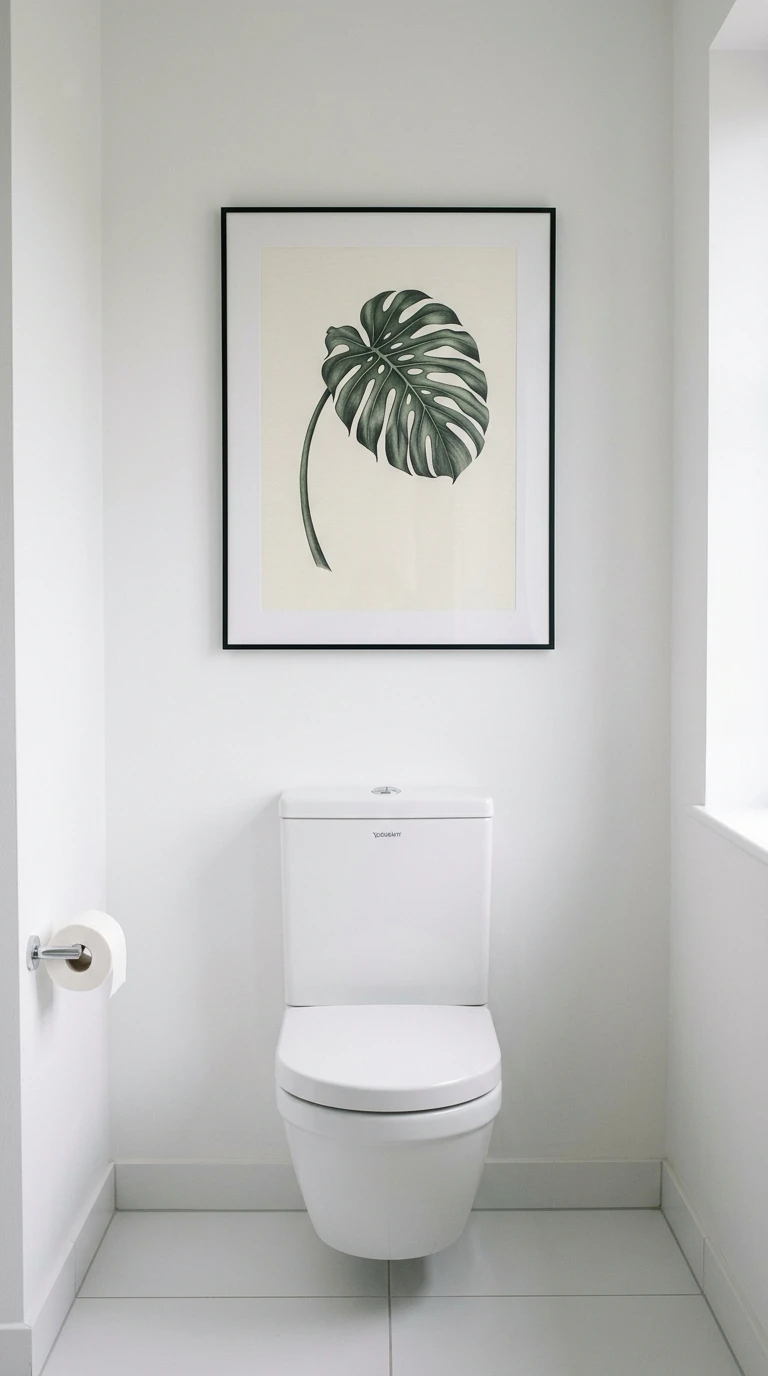
One large print does more for a small bathroom than four small ones ever could. The key is scale. A print that feels too big for the wall is almost always the right call in a compact bathroom, because it reads as a confident design choice rather than a timid one. A 16×20 or even 18×24 inch print in a simple matte black or natural wood frame, hung centered above the toilet tank or on the wall facing the door, becomes an immediate focal point that makes the whole room feel intentional.
For a minimalist bathroom, choose prints with a clean subject and plenty of negative space. A single botanical illustration on a white background, a minimal line-drawing landscape, or a black and white architectural photograph all work beautifully. The subject does not need to be bathroom-related. In fact, the best bathroom art is often something unexpected, a still life, an abstract shape, a single large leaf, that makes you do a slight double-take and then appreciate it more each time.
Keep the frame itself simple and let the print do the work. A thin black metal frame is the most versatile choice and works with almost any wall color or tile. A natural wood frame adds warmth in bathrooms with warm-toned fixtures or tile. Skip ornate or gilded frames entirely in a small minimalist bathroom, as they add visual noise that works against the calm you are trying to create.
Designer Advice: Hang the print slightly higher than feels natural. Eye-level in a standing position, rather than eye-level when seated, draws the eye upward and makes the ceiling feel higher.
2. A Frameless Round Mirror as Wall Art and Function
The scenario: Your bathroom mirror is a builder-grade rectangle stuck directly to the wall. It works, but it makes the room look like a budget hotel room from 2003.
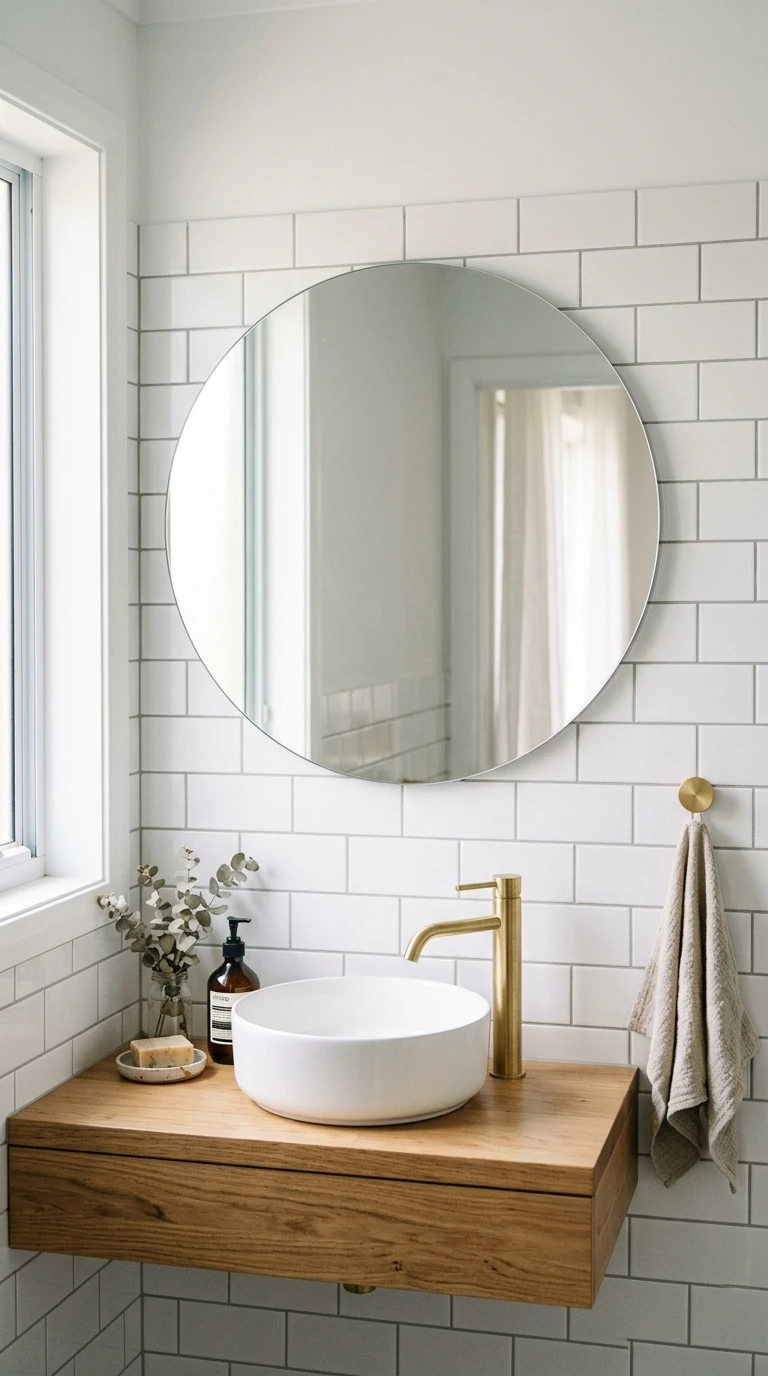
Swapping a flat rectangle mirror for a frameless round or arch-shaped one is one of the highest-impact, lowest-effort upgrades in bathroom design. The round shape introduces a softness that rectangular rooms desperately need, and the absence of a frame keeps the look clean and modern without adding visual weight. In a small bathroom, this matters a lot because every element either adds weight to the room or keeps it light, and a heavy framed mirror can tip a small space from cozy into cramped.
A frameless circle mirror in the 24 to 30 inch range works well for most single-sink vanities. Larger mirrors, up to 36 inches, can work in a bathroom with higher ceilings because they add a sculptural quality that reads as decor rather than just function. Position it centered above the sink at a height where the bottom of the mirror sits roughly 5 to 6 inches above the faucet. This leaves enough visual breathing room between the sink and the mirror without making the mirror feel like it is floating too high.
The round mirror works especially well with rectangular subway tile, square floor tile, or any grid-heavy pattern in the bathroom, because it introduces a contrasting shape that breaks up the rigidity of right angles. It is a minimalist move that has more design logic behind it than it initially appears.
Designer Advice: If you want to add a subtle frame without going decorative, look for mirrors with a thin brass or matte black metal rim. The rim adds just enough definition to make the mirror feel finished while still keeping the overall look clean and contemporary.
3. Floating Wooden Ledge with Carefully Edited Objects
The scenario: You want something on the walls but you do not want art. You are more drawn to objects and materials than to prints and frames.
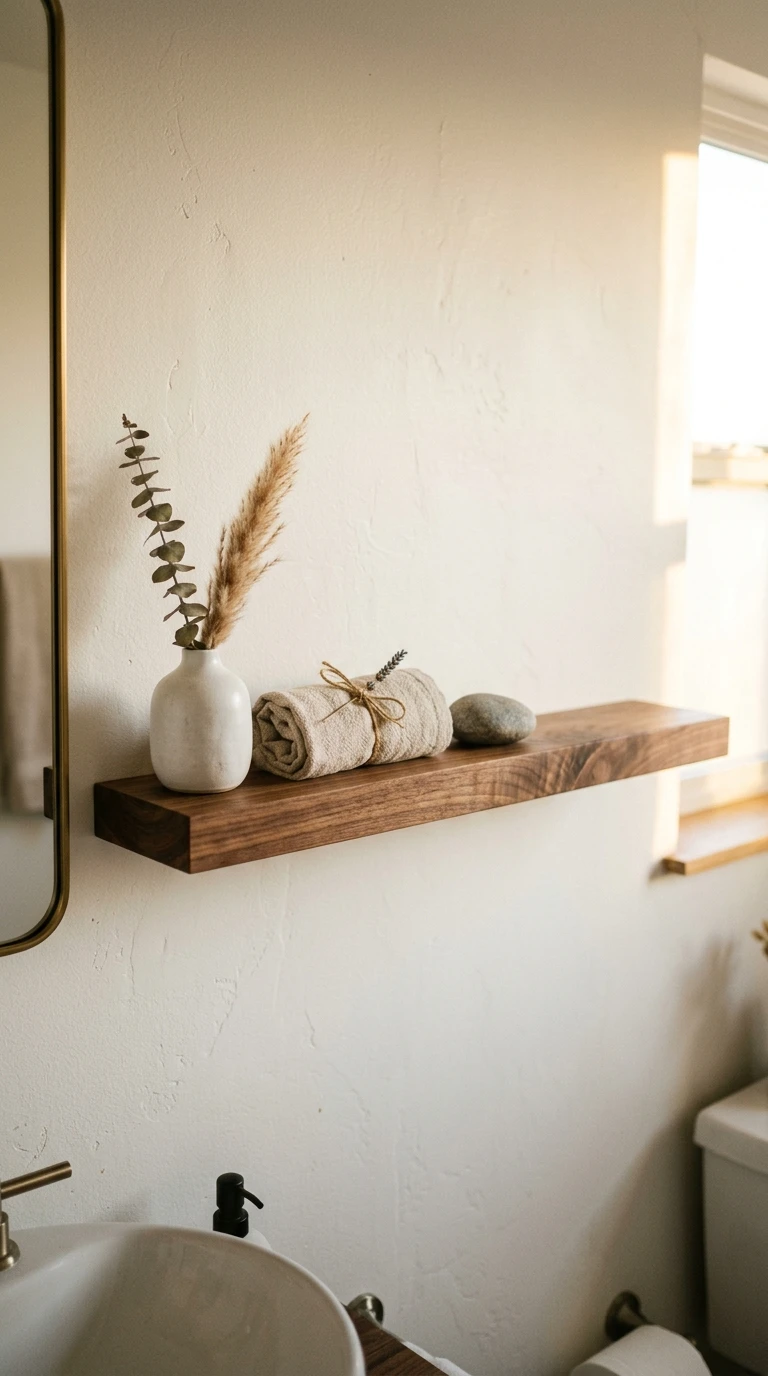
A single floating wooden ledge, the kind with a small lip to keep things from sliding off, gives you a surface to compose a small still life that functions as wall decor. The difference between this looking intentional and looking cluttered comes entirely down to editing. You want three to five objects maximum on a ledge in a small bathroom, and every object should either be beautiful, functional, or both. A small ceramic vase, a rolled linen hand towel, a single candle, and a smooth river stone is a complete composition. Six products, a toothbrush holder, a plant, two candles, and a shell collection is clutter.
The ledge itself should be in a natural wood tone, walnut, oak, or teak, rather than painted. The warmth of real wood grain against a painted or tiled wall adds the kind of organic texture that makes a bathroom feel like it was put together by a person with taste rather than assembled from a catalog. Mount it on the wall that faces you most directly when you are at the sink, at roughly eye level, so you see it naturally throughout your morning routine.
For the objects, stick to a tight palette. All white with one natural wood element. All ceramic in two tones. All green with one brass piece. Mixing too many colors or materials on a small ledge makes it feel busy rather than designed. Replace one or two objects seasonally to keep the arrangement feeling fresh without having to redecorate the whole room.
Designer Advice: Leave at least one third of the ledge surface empty. Negative space is part of the composition, not wasted space. A ledge that is completely full of objects looks like a storage shelf. A ledge with breathing room looks like a design decision.
Wall Decor for the Warm and Earthy Small Bathroom
These ideas are for bathrooms that want to feel grounded, organic, and genuinely cozy. The goal is natural materials, warm tones, and textures that reference the outside world.
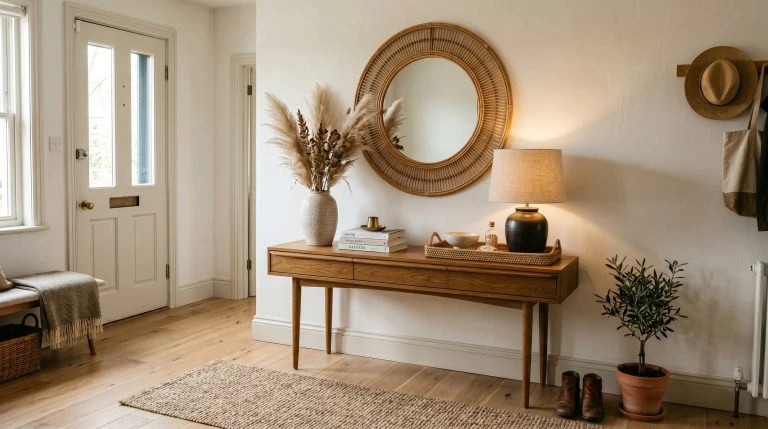
4. Woven Rattan or Sea-grass Wall Hanging
The scenario: Your bathroom feels cold and hard. Every surface is tile, glass, or chrome, and nothing softens it. You want warmth without a renovation.
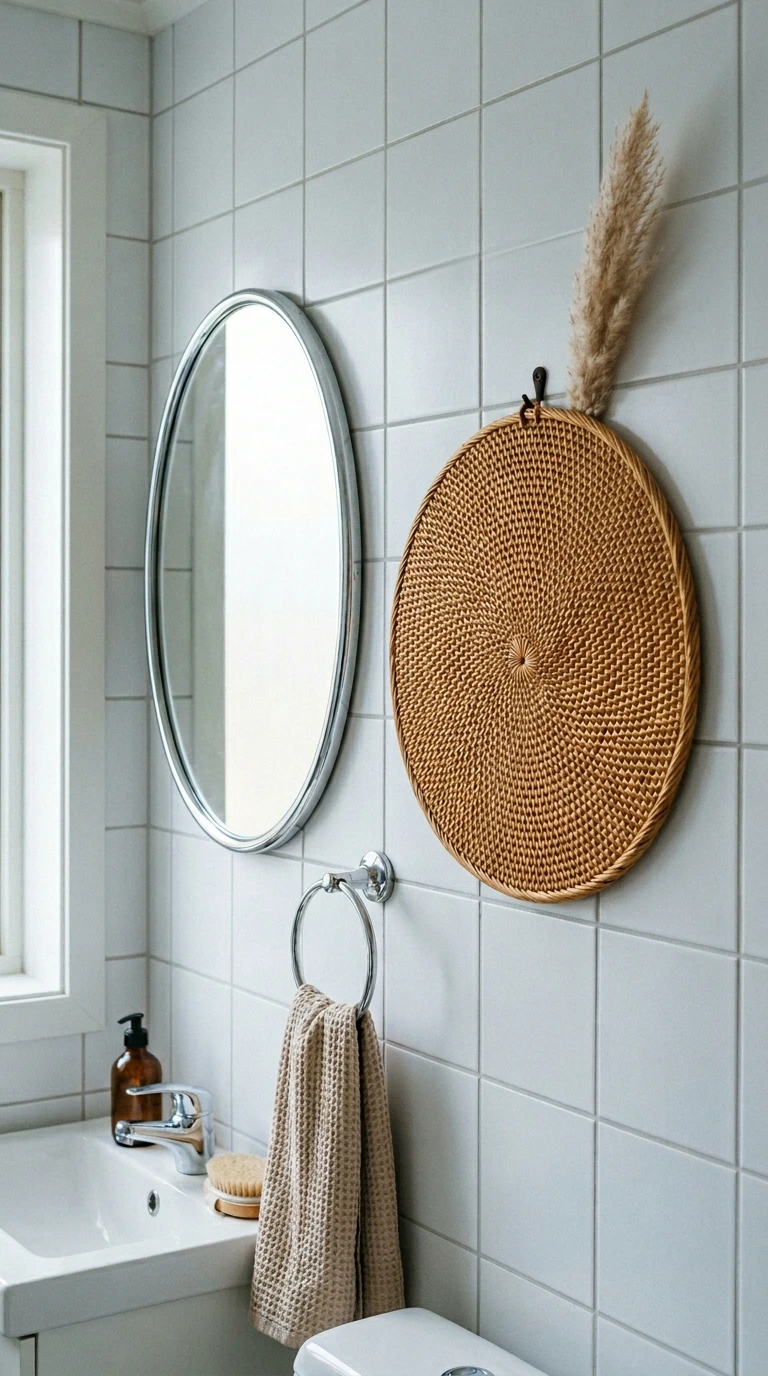
A woven wall hanging in rattan, seagrass, or natural fiber is one of the fastest ways to bring organic warmth into a bathroom dominated by hard surfaces. The texture of woven natural material absorbs the harshness of overhead lighting, adds a handcrafted quality that manufactured materials cannot replicate, and introduces a color tone, warm honey, sandy beige, or natural tan, that immediately softens a room full of cool whites and grays.
For a small bathroom, look for a round woven piece in the 12 to 18 inch range, or a rectangular weave no wider than about 14 inches, so it does not overwhelm the wall. Hang it on the wall beside the mirror or above the toilet, in a spot where it can be seen from the doorway. The wall hanging does not need to be a formal art piece. Simple woven baskets hung flat, a macrame piece with natural jute, or even a single large rattan plate all read the same way: handmade, warm, and considered.
Natural fiber wall hangings are also one of the most humidity-friendly wall decor options for a bathroom, as long as your ventilation is reasonably good. Unlike paper-based art or canvas prints that can warp in a consistently humid room, natural fiber handles moisture better and actually develops a slightly more weathered quality over time that looks intentional rather than damaged.
Designer Advice: Layer a small dried pampas grass stem or a few dried eucalyptus branches behind the wall hanging so they peek out at the edges. It takes the piece from a flat wall accent to a three-dimensional, gallery-quality moment for almost no additional cost.
5. Terracotta Wall Tiles as a Small Accent Panel
The scenario: You want to add something to the wall that feels permanent and intentional, not just hung there. You are willing to do a small amount of work for a big result.
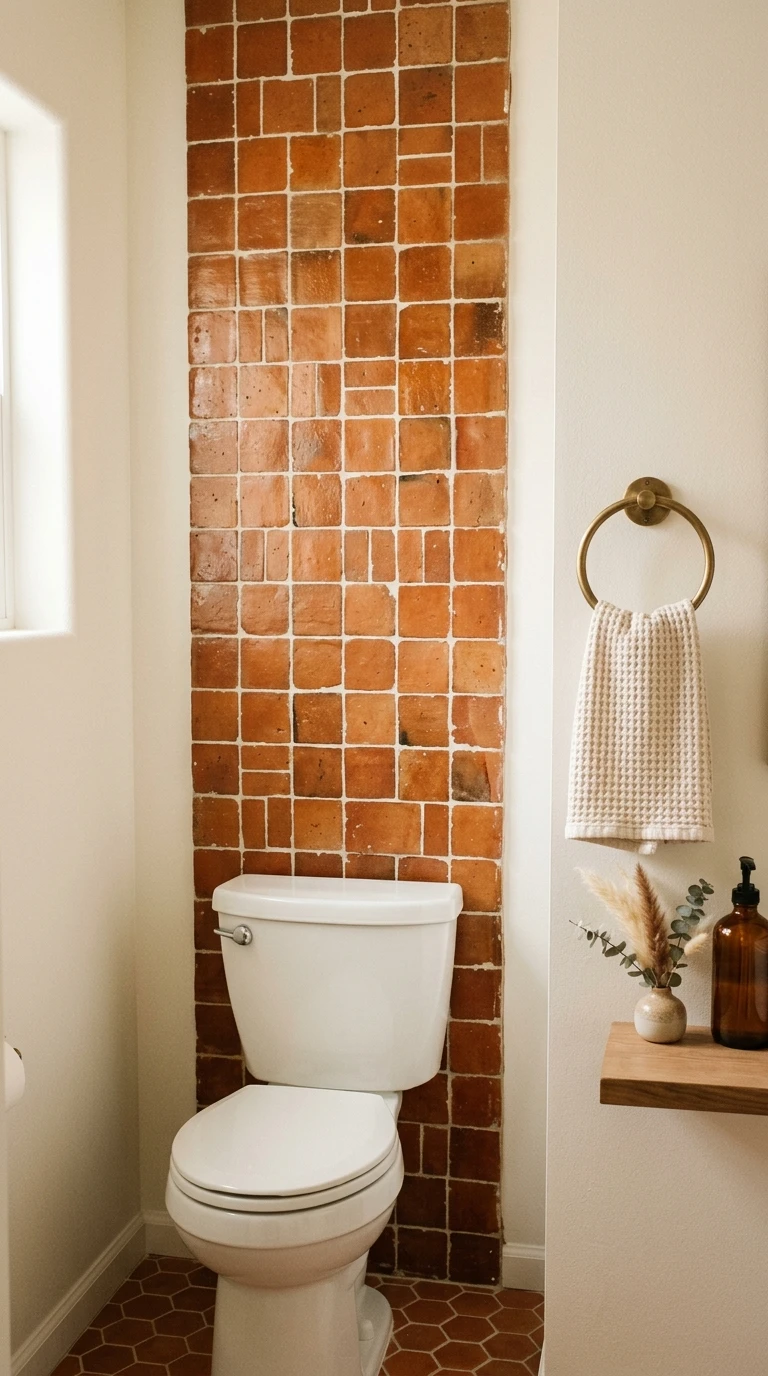
You do not need to retile your entire bathroom to get the warmth of terracotta on the walls. A small accent panel of handmade terracotta or zellige tiles, just 4 to 6 tiles wide and 8 to 10 tiles tall, mounted in a dry zone of the bathroom like the wall opposite the shower or the wall behind the toilet, adds a material richness that no print or shelf can match. The imperfect, slightly varied surface of handmade tile catches light differently than machine-made tile and gives the wall a depth and warmth that feels genuinely luxurious.
Handmade terracotta tiles are widely available in both glazed and unglazed finishes. Unglazed terracotta in its natural burnt orange tone is the warmest and most organic-looking option, but it requires sealing before installation in any area with moisture. Glazed terracotta, available in warm whites, dusty pinks, sage greens, and traditional orange-red, is more moisture-resistant and easier to maintain. Zellige tiles, the Moroccan handmade ceramic with a characteristic crackle glaze, are the most visually rich option and work exceptionally well in a bathroom with brass or warm gold fixtures.
The installation is manageable as a weekend DIY project in a dry zone where waterproofing is not required. Use a quality tile adhesive, keep the grout lines consistent, and finish with an unsanded grout in a warm tone that complements the tile rather than contrasting sharply with it.
Designer Advice: Keep the accent panel narrow and tall rather than wide and short. A vertical arrangement of tiles draws the eye upward, reinforcing the sense of height that a small bathroom always needs.
6. Framed Pressed Botanicals or Herbarium Prints
The scenario: You love the idea of natural wall art but you want something more finished and intentional than a loose dried flower arrangement. You want it to feel like a curated art choice.
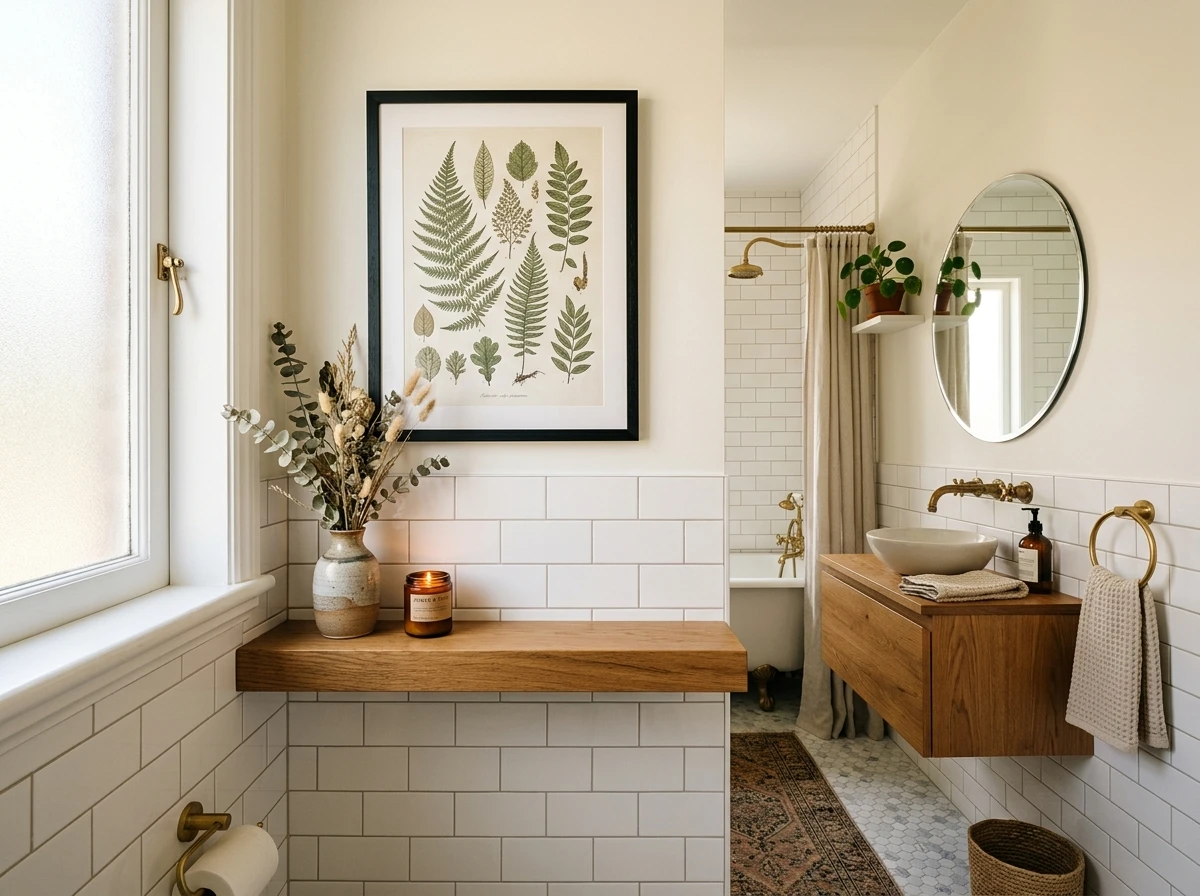
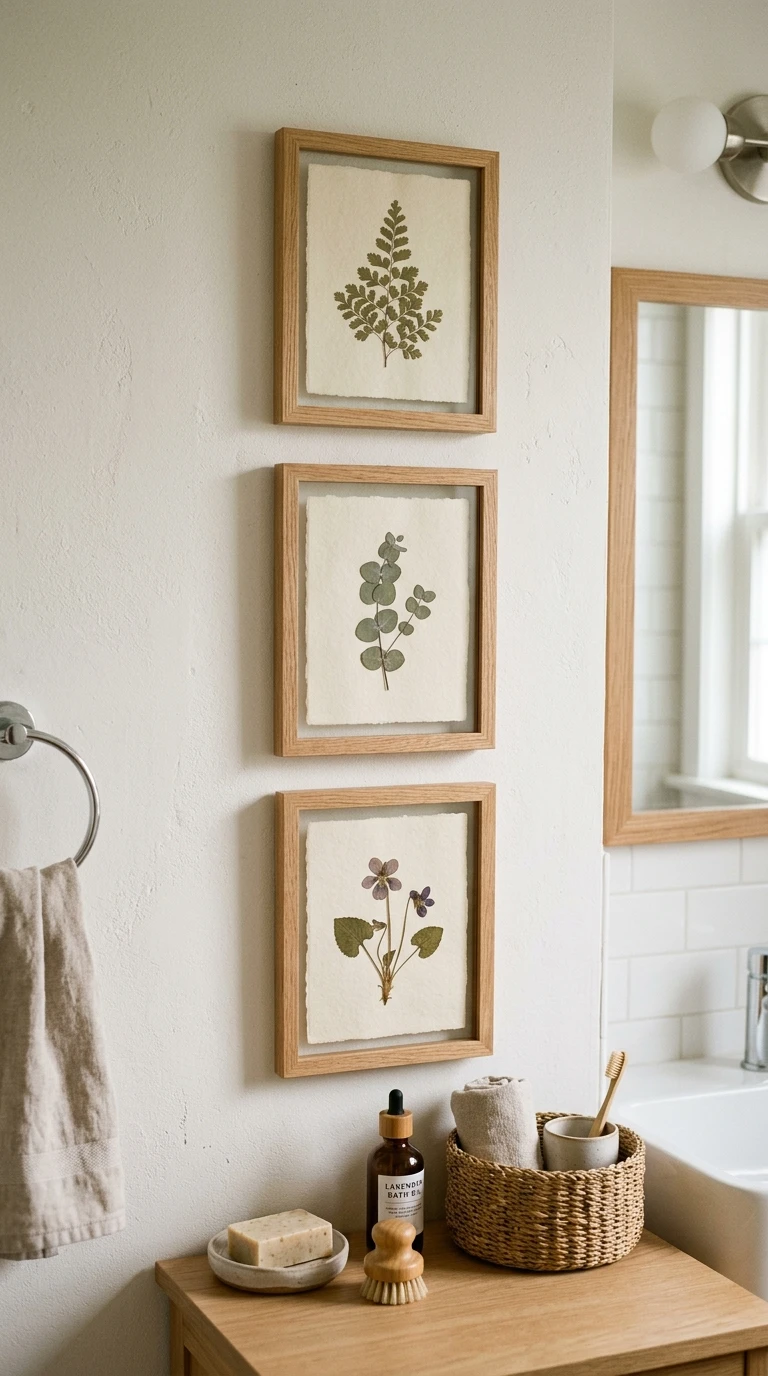
Pressed botanical prints, either real pressed flowers and leaves mounted and framed behind glass, or high-quality herbarium illustrations printed on warm ivory paper, bring a museum-quality organic quality to a small bathroom wall. They sit at the intersection of art and nature, which makes them feel more considered than typical bathroom wall art and more warm and personal than abstract prints.
Real pressed botanicals can be sourced affordably from botanical print artists on Etsy and similar marketplaces. Look for pieces where the specimen is mounted on warm cream or ivory paper rather than bright white, as the warmer background reads as more organic and less clinical in a bathroom setting. Frame in simple natural wood frames with a small mat to give the specimen visual breathing room. A set of two or three in matching frames, hung in a vertical column on a narrow wall, creates a gallery-quality arrangement without requiring a large wall.
Herbarium-style prints, the kind that reference Victorian-era botanical illustration with handwritten Latin names and clean scientific precision, are currently having a real moment in interior design and work especially well in bathrooms because they reference nature without being literally decorative in the way that seashell or beach print art can be. They feel intellectual and warm at the same time, which is an unusual and appealing combination for a small bathroom.
Designer Advice: In a humid bathroom, mount real pressed botanicals in frames with a sealed backing and UV-protective glass to protect the specimens from moisture and light. This keeps them looking fresh and archival for years rather than fading or warping within months.
7. Wainscoting or Board and Batten for Architectural Warmth
The scenario: Your bathroom walls are completely flat and plain. You want something that looks like it was always part of the room, not something that was hung on it.
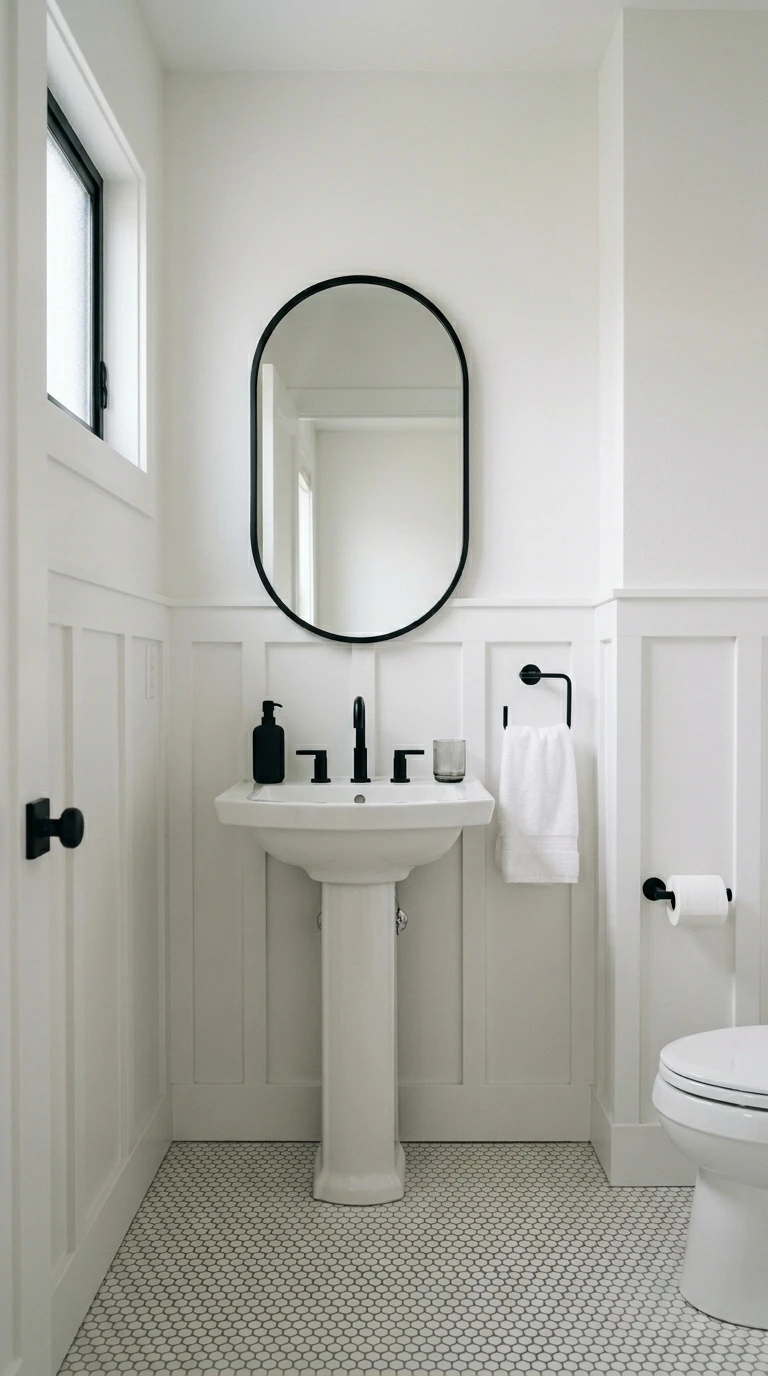
Wainscoting, the traditional technique of paneling the lower portion of a wall, and board and batten, the vertical strip-and-rail variation, both add architectural depth and character to a small bathroom that no piece of art or shelf can replicate. When you walk into a bathroom with board and batten paneling, the room looks like it was designed by someone who paid attention to detail, because the walls have dimension and structure rather than being four flat painted planes.
For a small bathroom, run the paneling to about 36 to 48 inches from the floor, which is roughly one-third to one-half the wall height. Paint both the paneling and the wall above it in the same color for a cohesive look that feels modern and quiet, or paint the paneling a slightly different shade or sheen, a satin finish below and a matte finish above, for a subtle but sophisticated contrast. White and off-white are the most popular choices, but deep navy, sage green, and warm charcoal all look remarkable in a small bathroom with board and batten.
The materials cost for board and batten is low, typically just MDF strips, wood glue, and paint, and the installation is a manageable weekend project for anyone comfortable with a miter saw and a level. The visual return on a few hours of work is significant: the bathroom immediately looks more finished, more designed, and more expensive than it actually was to achieve.
Designer Advice: In a small bathroom, keep the battens relatively close together, 6 to 8 inches apart rather than the wider spacing you might see in a larger room. The tighter spacing creates a rhythm that feels more refined in a compact space.
Wall Decor for the Bold and Personality-Driven Small Bathroom
These ideas are for bathrooms where the goal is not restraint but expression. Small spaces are actually ideal for bold moves because the commitment is contained and the impact is immediate.
8. Wallpaper on a Single Accent Wall
The scenario: You have wanted to try wallpaper for years but you are scared of committing to a whole room. Your small bathroom is the perfect low-risk place to finally do it.
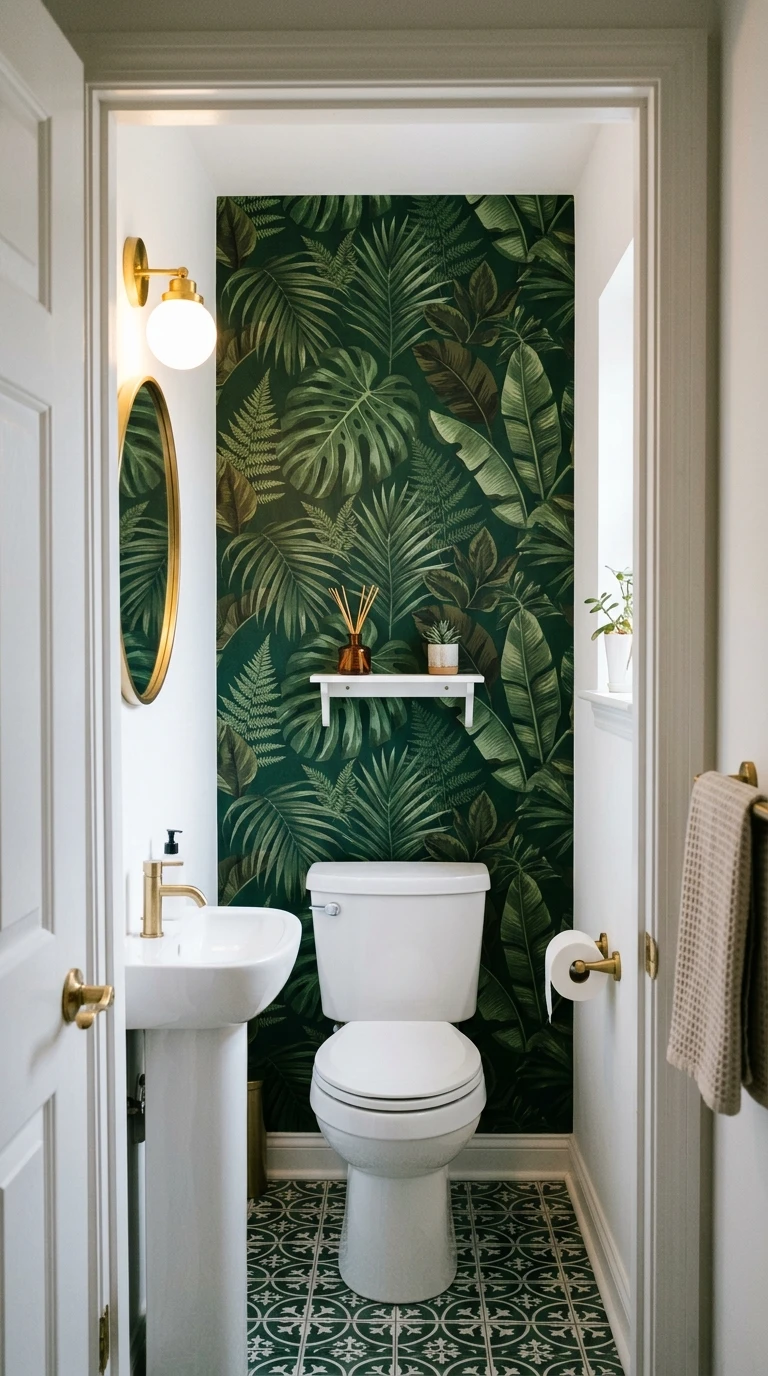
A single wallpapered accent wall in a small bathroom, usually the wall behind the toilet or the wall facing the door, is one of the most transformative and surprisingly affordable decorating moves you can make. Because you are only papering one wall in a small room, the material cost is low, rarely more than one or two rolls for most bathroom accent walls, and the impact is enormous. Walk into a bathroom where one wall has a stunning botanical print, a dramatic moody pattern, or a graphic geometric, and the whole room feels like it was professionally designed.
For a small bathroom, choose patterns with a medium to large scale repeat rather than tiny all-over prints. Larger pattern repeats actually read better in small spaces because they feel bold and intentional. Tiny prints can look busy and fussy in a compact room. Dark backgrounds, deep forest green, navy, charcoal, or rich burgundy, work especially well on a single accent wall because they create depth and drama without making the whole room feel dark, since the other three walls remain light.
Use peel-and-stick wallpaper if you are renting or simply nervous about commitment. The quality of peel-and-stick has improved dramatically and many current options are genuinely difficult to distinguish from traditional wallpaper, especially in a bathroom where the walls are not at eye level for extended periods. In a dry zone of the bathroom, peel-and-stick performs reliably for several years.
Designer Advice: Wallpaper the wall that faces you when you first open the bathroom door. This is the wall your eye lands on immediately upon entry, which means it has the most impact on the overall impression of the room.
9. A Gallery Wall of Mismatched Frames in One Color
The scenario: You have art you love but nowhere to put it. Or you love the look of gallery walls but every attempt you have made looks like a random collection of things rather than a curated arrangement.
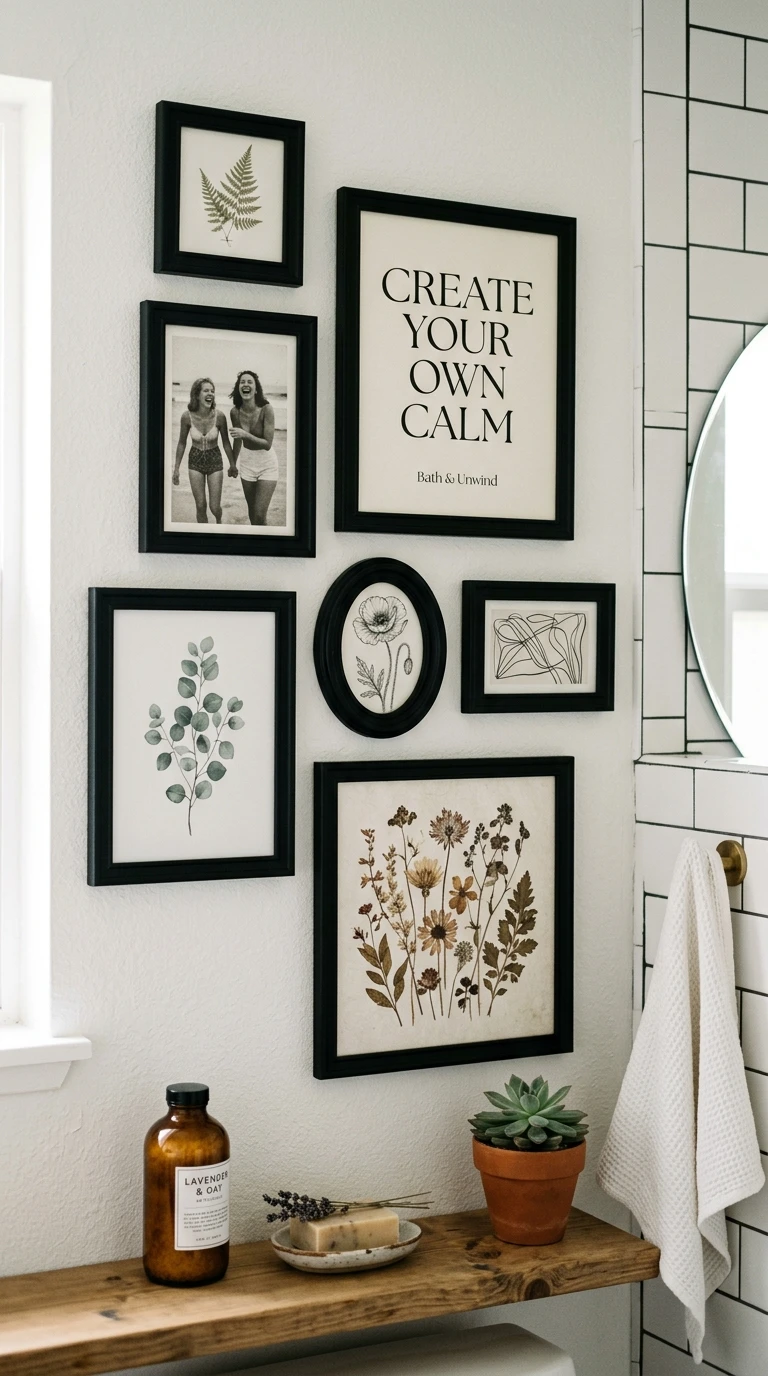
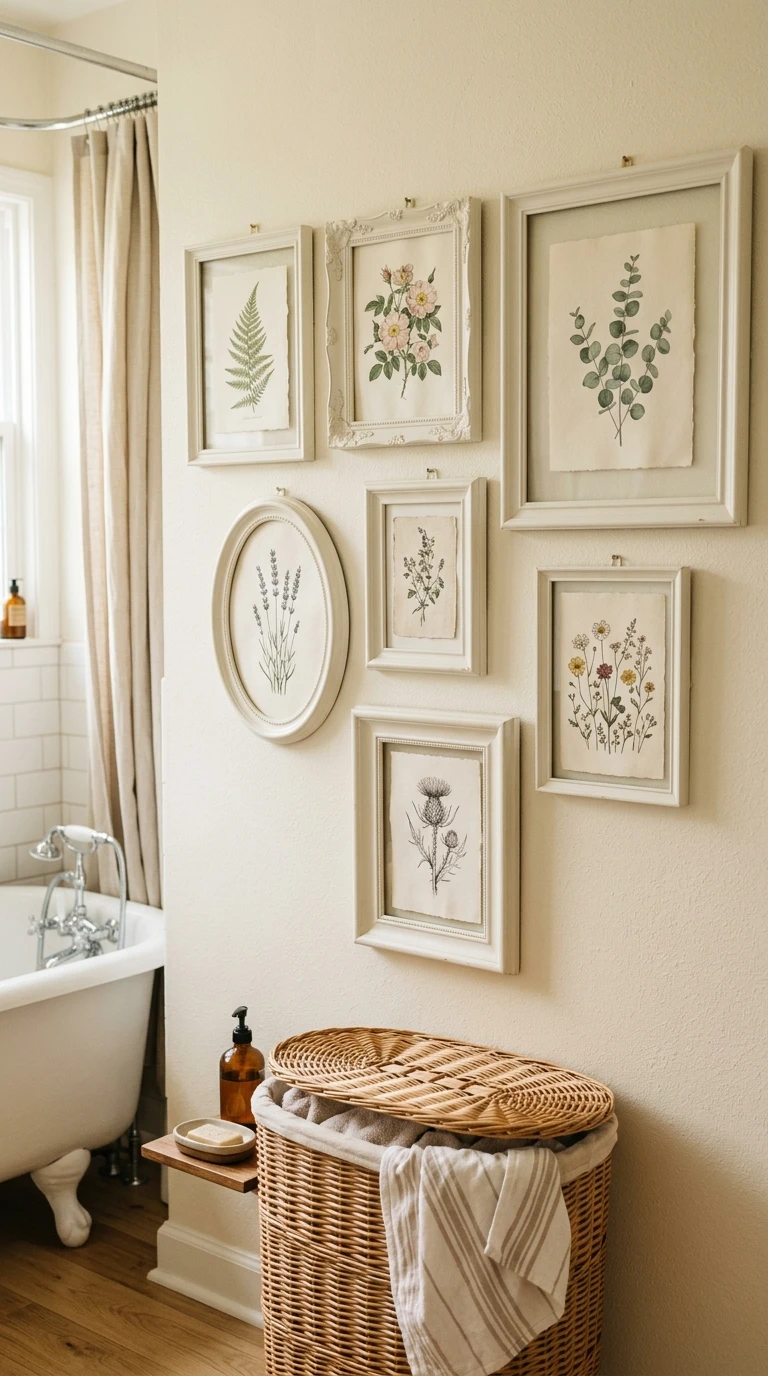
The secret to a gallery wall that looks designed rather than random is a single unifying element. In a small bathroom, the most effective unifier is frame color. Collect frames in wildly different shapes and sizes, rectangles, squares, ovals, arches, even irregular shapes, but paint or choose them all in the same color. All matte black. All natural oak. All antique white. When the frames share a color, the eye reads the entire arrangement as a set rather than a collection of individual objects, and the variety of shapes becomes interesting rather than chaotic.
For a small bathroom gallery wall, aim for five to seven pieces arranged in an asymmetric cluster rather than a rigid grid. A grid of identical frames looks corporate in a bathroom. An organic cluster with varied spacing looks personal and collected. Mix art types freely: a botanical print beside a black and white photograph beside a simple quote card beside a piece of children’s art beside a postcard from a trip you loved. The personal mix is what makes a gallery wall feel like it belongs to a real person rather than a staged photo shoot.
Before committing any nails to the wall, lay the entire arrangement on the floor and adjust until you are happy with it. Photograph it on your phone and hold the phone up against the wall to roughly visualize the result. Then transfer the arrangement to the wall using paper templates taped in place to mark nail positions before you start driving hardware.
Designer Advice: In a small bathroom, keep the outer edges of the gallery wall within a contained rectangle rather than letting pieces straggle too far in any direction. A tight, confident cluster reads better in a small space than a loosely spread arrangement that seems to bleed off in different directions.
10. Bold Paint Color on One Wall as Decor
The scenario: You want drama but you do not want to hang anything. You want the wall itself to be the statement.
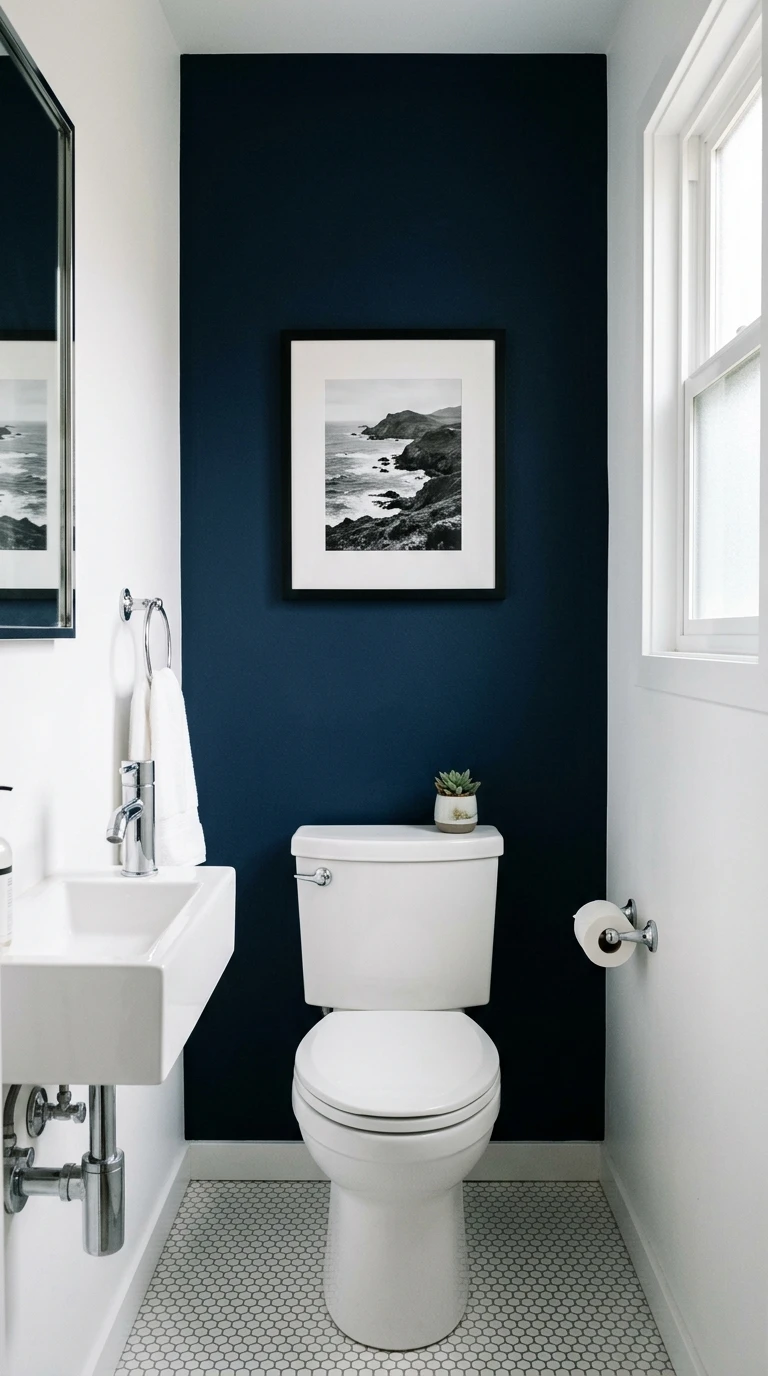
Painting a single wall in a deep, saturated color is one of the most underrated wall decor moves in a small bathroom. It costs almost nothing, takes an afternoon, and completely changes the character of the room. The wall behind the toilet, painted in deep hunter green, inky navy, warm terracotta, or moody plum, reads as a deliberate design decision that turns an overlooked zone of the bathroom into a focal point. It looks like something a designer did, and it is something you can undo in a weekend if you change your mind.
The psychological effect of one bold wall in a small room is worth understanding. Rather than making the room feel smaller, as many people fear, a dark accent wall creates depth. The eye reads the darker plane as receding, which actually makes the room feel like it has more dimension than four flat identical walls do. The contrast between the bold wall and the lighter surrounding walls also highlights the architectural boundaries of the room in a way that feels defined and intentional rather than boxed-in.
Choose a finish carefully for a bathroom accent wall. Satin or semi-gloss paints are more moisture-resistant and easier to wipe down than matte finishes, which is particularly important in a bathroom. Many paint brands now offer bathroom-specific formulas in the full range of colors, and these are worth seeking out for the superior moisture resistance they provide in a consistently humid space.
Designer Advice: Extend the bold color slightly onto the adjacent walls, just 6 to 8 inches around each corner, to make the accent wall feel like an architectural feature that wraps the space rather than a flat rectangle of color stuck on one surface.
11. A Statement Vintage Mirror with an Ornate Frame
The scenario: Your bathroom is all clean lines and contemporary fixtures, and it feels a little soulless. You want one piece that has some history and character.
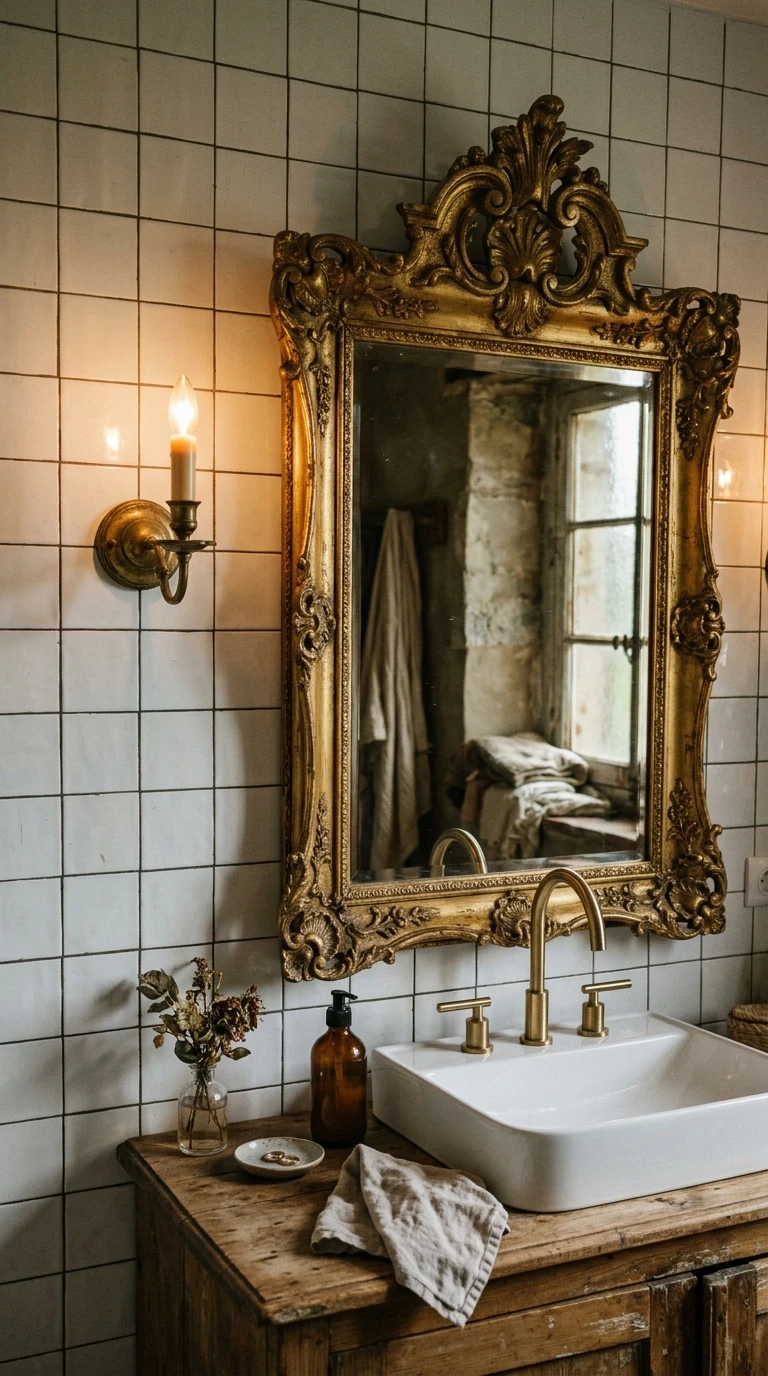
A vintage or vintage-inspired mirror with an ornate, heavily detailed frame is one of the most effective ways to inject character and soul into a bathroom that feels too new and too perfect. The contrast between the contemporary clean lines of modern bathroom fixtures and the decorative complexity of an antique-style mirror frame is a tension that designers use deliberately in high-end bathrooms, because it makes the space feel layered, collected, and genuinely interesting.
Look for ornate mirrors at estate sales, thrift stores, antique markets, and online vintage marketplaces. A damaged mirror with a beautiful frame can be refitted with new glass at a local frame shop for less than you might expect. The frame itself is the design element. Size matters: in a small bathroom, an ornate mirror that feels too large is usually exactly right, because the over-scaled quality of the piece makes it feel like a statement rather than an afterthought.
Gold and gilded frames work exceptionally well in bathrooms with warm tones, brass fixtures, and cream or beige walls. Darker antique frames in espresso, black, or aged silver read beautifully in bathrooms with cooler tones, chrome fixtures, and crisp white walls. A mirrored frame, one that has its own mirrored insets within the decorative surround, doubles the light-reflecting properties and is particularly effective in a small bathroom with limited natural light.
Designer Advice: Position an ornate vintage mirror slightly off-center rather than perfectly centered above the vanity. The asymmetric placement reinforces the collected, found-over-time quality of the piece and looks more personal and less showroom-staged.
Wall Decor for the Budget-Conscious Small Bathroom
These ideas prove that the most compelling bathroom walls are not necessarily the most expensive ones. Each of these can be done for under $50, and several for under $20.
12. DIY Painted Arch or Shape Directly on the Wall
The scenario: You have seen painted wall arches all over design accounts and you want one, but you are not sure if it is something you can actually do yourself without it looking amateur.
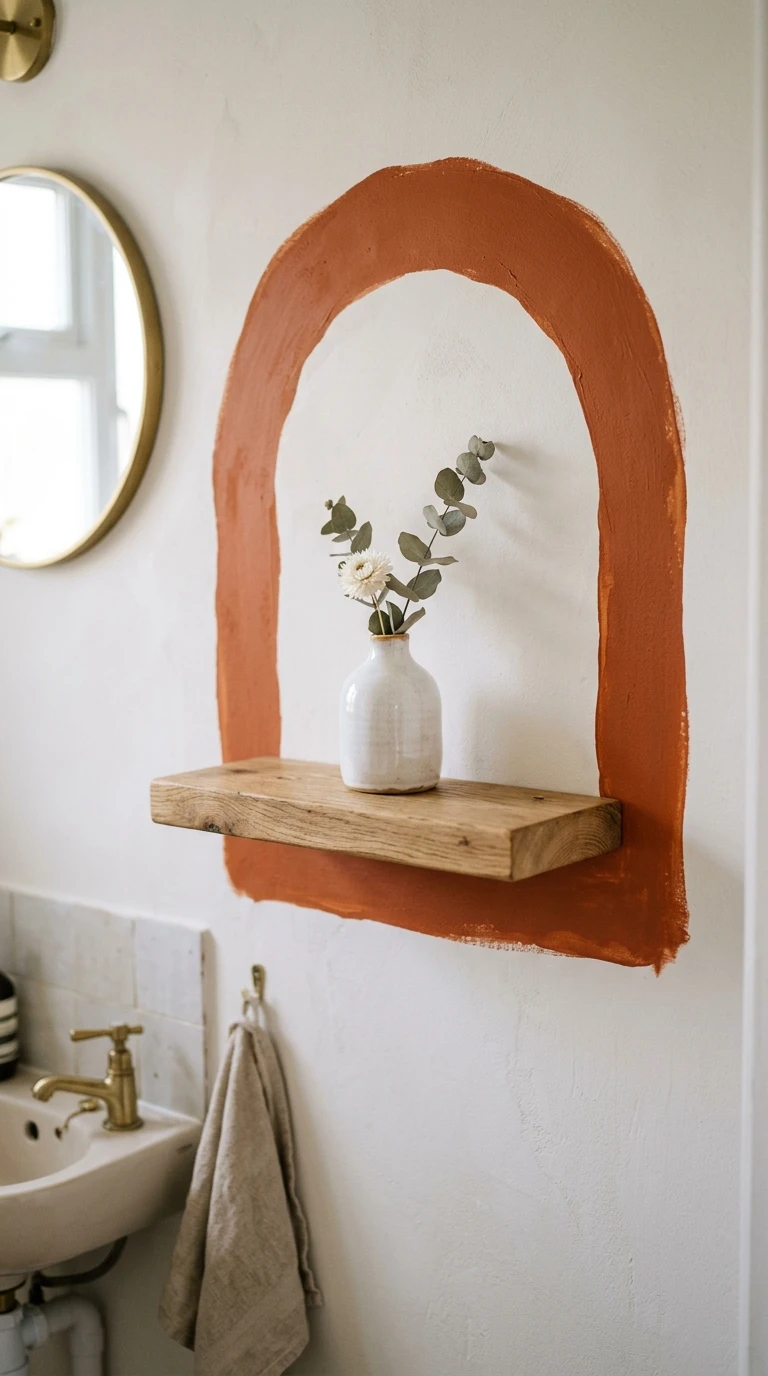
A painted arch, circle, half-moon, or other geometric shape painted directly on the wall is genuinely achievable without professional painting skills, and the result reads as a confident design choice that looks far more considered than its actual cost, which is approximately one small sample pot of paint. The most popular execution is a simple arch painted behind a floating shelf, above the toilet, or framing the vanity mirror, in a color that is one or two shades darker or warmer than the wall color.
Use painter’s tape for straight edges and a flexible tape measure or a piece of string attached to a nail for curved sections. For a true arch, find the center point, mark a radius with a pencil tied to a piece of string cut to the desired radius length, and sweep it across the wall to create your curved guideline. Fill in the shape with a small roller for an even finish, and remove the painter’s tape while the paint is still slightly wet for the cleanest edge.
Terracotta, sage green, dusty rose, and warm ochre are all popular colors for painted shapes in a bathroom because they add warmth without requiring the rest of the room to change. A painted arch in one of these colors on a white or off-white wall creates enough visual interest to function as wall decor without requiring anything to be hung, installed, or purchased beyond a sample pot of paint.
Designer Advice: Slightly imperfect edges on a painted shape actually look more authentic and handmade than a machine-perfect line. Do not stress over getting every curve flawless. A small amount of organic variation reads as intentional brushwork in the final result.
13. Thrifted Frames Painted Uniform and Filled with Free Art
The scenario: You love the look of framed art but art feels expensive. You want real framed pieces on the wall without paying gallery prices.
Thrift stores and garage sales are consistently reliable sources of frames in every size and shape, often for $1 to $5 each. The frames are rarely beautiful on their own, covered in dated finishes and filled with forgettable prints, but that is irrelevant because you are going to spray paint them all the same color and fill them with art you source for free. This is one of the best bathroom decorating moves available on an extremely tight budget and the result looks completely polished when done with a little intention.
Collect five to eight frames in a variety of sizes without worrying about matching styles or colors. Take them outside, lay them on a drop cloth, and apply two light coats of matte black, warm white, or gold spray paint. Let them cure fully before handling. For the art inside, print high-resolution botanical illustrations, vintage maps, abstract shapes, or architectural drawings from free resources like the New York Public Library digital collections, Unsplash, or Wikimedia Commons. Print on a home printer or at a local print shop on card stock or matte photo paper.
The combination of uniform frames and carefully chosen free art creates a gallery wall that looks like it was assembled over time with deliberate taste. Nobody looking at the finished result will know the frames came from a thrift store or that the prints were free. What they will see is a considered, personal collection of framed art that makes the bathroom feel lived-in and designed.
Designer Advice: After spray painting, lightly sand the frames with fine-grit sandpaper for an aged, slightly distressed quality. This removes the obviously spray-painted look and gives the frames a more considered, artisan finish.
14. Removable Wallpaper or Wall Decals for Renters
The scenario: You rent your apartment and you cannot put holes in the walls or make permanent changes. You have accepted that your bathroom will always be boring, but you are not actually happy about it.
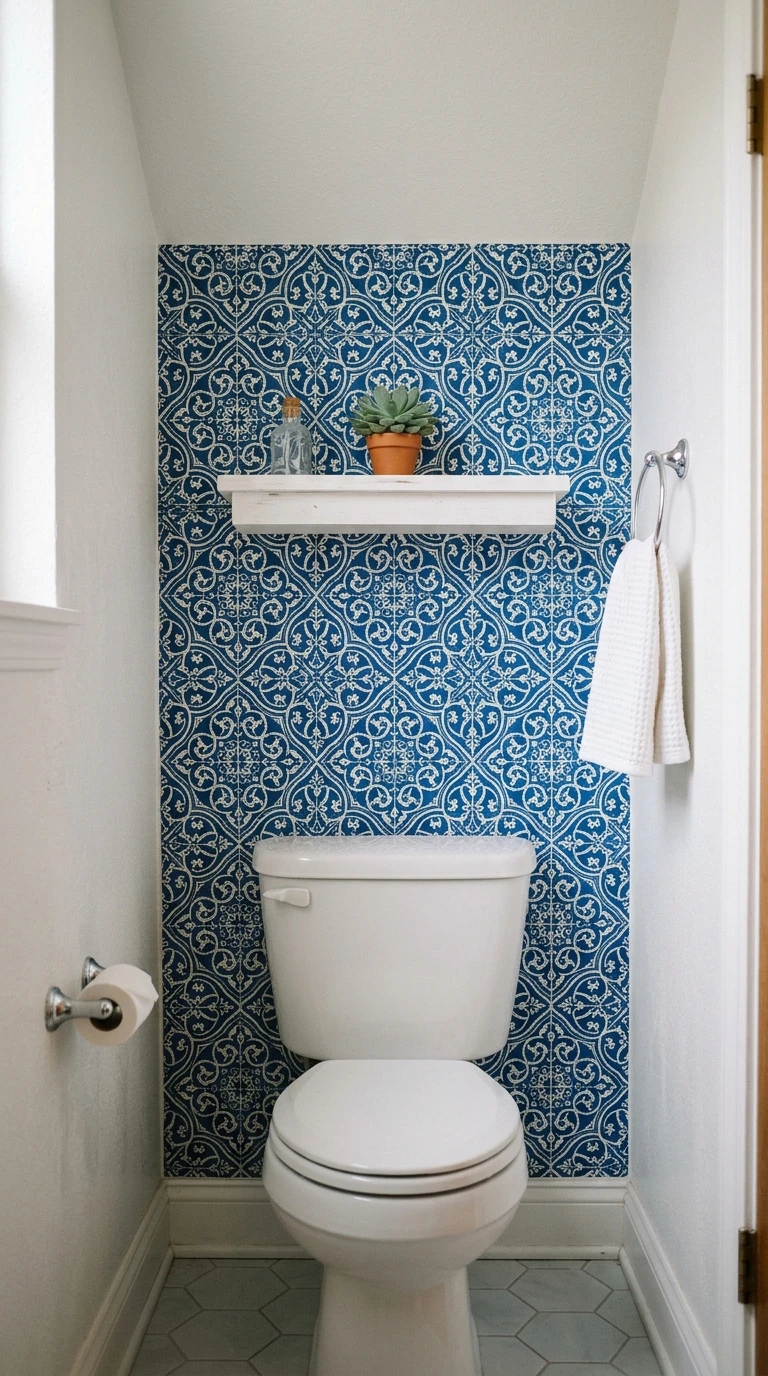
Removable peel-and-stick wallpaper has genuinely changed the decorating options for renters, and the bathroom is one of the rooms where it makes the most sense to use it. In a small bathroom, you are working with such a limited square footage of wall that even one roll of peel-and-stick can cover an entire accent wall, and the cost of one or two rolls is modest compared to the visual impact of going from a plain painted wall to a patterned one.
Current peel-and-stick wallpaper options include botanical prints, Moroccan-inspired tiles, subtle linen textures, bold geometric patterns, and everything in between. For a dry zone of the bathroom, away from the direct splash zone of the shower or sink, peel-and-stick performs reliably for two to three years without peeling or warping, especially if the surface is prepared by cleaning thoroughly and allowing to dry completely before application.
For renters who want something even simpler, individual wall decals in botanical, abstract, or typographic designs can be applied and removed without any residue on properly prepared walls. They do not have the visual impact of full wallpaper but they are completely reversible and can be repositioned multiple times during application, making them genuinely stress-free for anyone in a temporary living situation.
Designer Advice: Apply peel-and-stick wallpaper to a small section of your wall first and leave it for a week to test adhesion and moisture resistance before doing the full wall. Different wall paint types and finishes respond differently to adhesives, and a small test prevents a large disappointment.
15. Macrame Wall Hanging Made at Home
The scenario: You keep seeing macrame in bathroom design photos and you love the texture it adds. But buying handmade macrame feels expensive and making it feels intimidating.
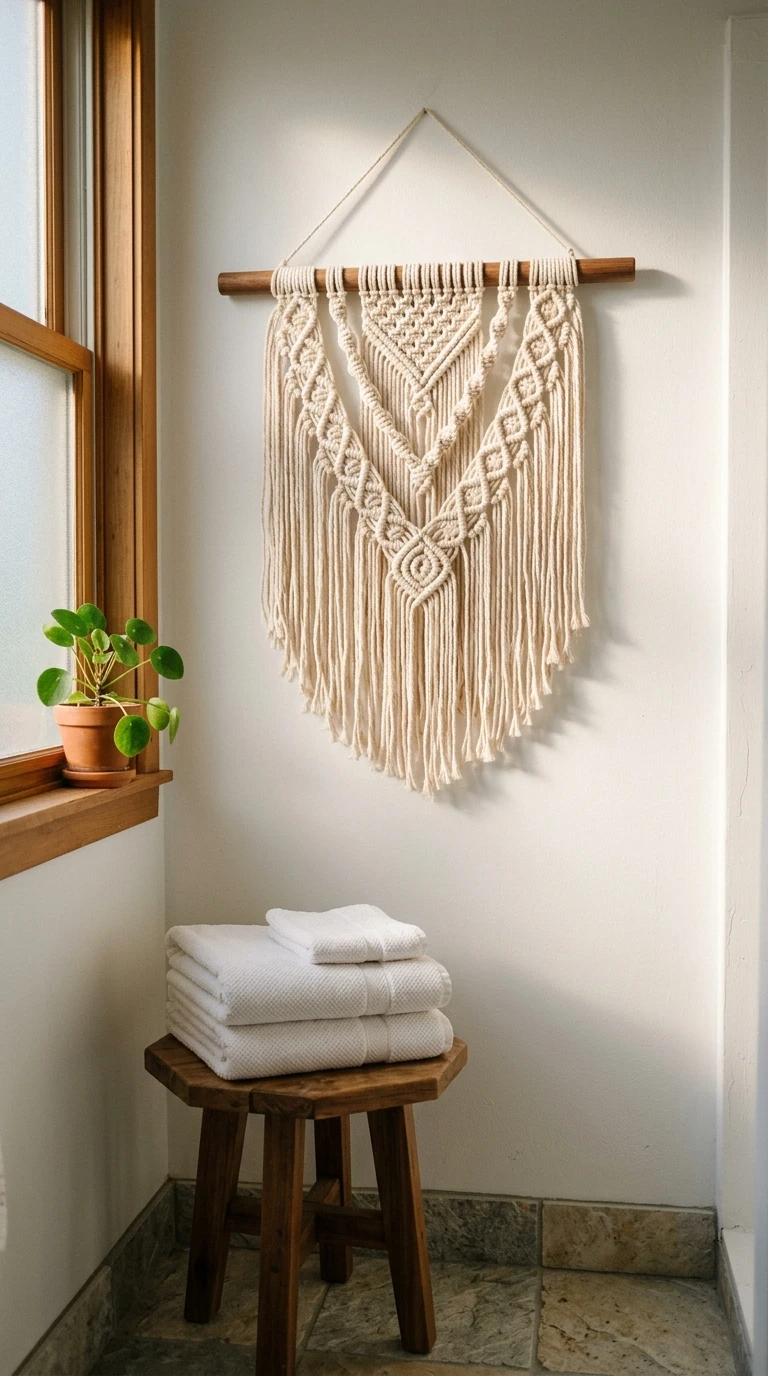
Basic macrame is genuinely one of the more accessible fiber arts, and a simple bathroom-sized wall hanging, something in the 12 to 16 inch wide range with 12 to 18 inches of hanging fringe, can be completed in a single evening by a complete beginner using only three knots: the lark’s head knot, the square knot, and the half-hitch. A skein of natural cotton macrame cord costs around $10 to $15 and is enough material for a piece that would retail for $60 to $100 in a home goods store.
The visual appeal of macrame in a bathroom context comes from its texture, its warmth, and its handmade quality. Even a simple design with basic knot patterns has a richness that no printed art can replicate because it is three-dimensional, tactile, and unique. Natural undyed cotton cord in an off-white or ecru tone coordinates with virtually every bathroom color scheme, from white and gray to terracotta and sage.
Mount the finished piece on a section of wooden dowel stained in a warm walnut tone, or on a branch collected from outdoors for an even more organic look. Hang it on the wall above the toilet, beside the mirror, or on any narrow vertical surface that needs something. The piece requires no frame, no hardware beyond a small nail, and no expertise to install.
Designer Advice: If the idea of making macrame from scratch feels like too much, take a plain purchased macrame piece and add your own dried botanical elements: small bunches of dried lavender, pampas grass stems, or seed pods tucked into the knots. It personalizes a generic piece and takes about ten minutes.
Wall Decor That Solves a Specific Small Bathroom Problem
These ideas are chosen not just for looks but because they also solve a real practical issue: making the room feel bigger, adding storage, improving lighting, or working in awkward spots.
16. Mirrored Wall Tiles to Multiply Light
The scenario: Your bathroom has almost no natural light and no real opportunity to add a window. It feels dim and cave-like at every time of day.
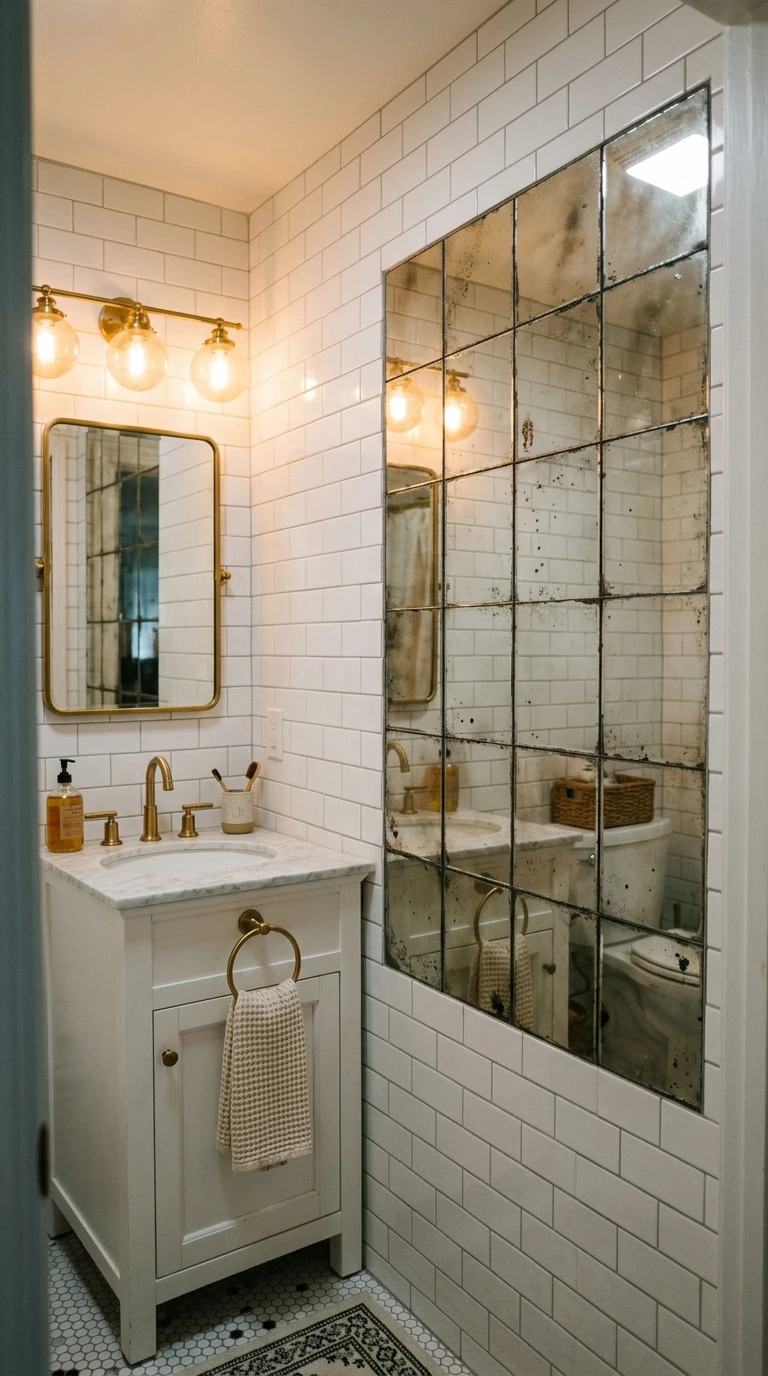
Mirrored wall tiles, or a panel of antique mirror glass mounted on the wall, are one of the most effective ways to introduce more light into a bathroom without touching the electrical system or adding a window. The reflective surface bounces whatever light exists, whether natural or artificial, around the room and creates the impression of a space that extends beyond its actual boundaries. In a small bathroom with no natural light, this effect is significant enough to genuinely change how the room feels to be in.
Antique mirror glass, which has a slightly aged, slightly smoky quality rather than a perfectly clear reflection, is warmer and more forgiving than standard mirror and looks more intentional as a wall feature. It is available in panels or tiles from specialty glass suppliers and online retailers. A panel of antique mirror mounted behind the toilet, or a grid of antique mirror tiles on the wall beside the vanity, reads as a deliberate design element rather than a purely functional addition.
For a budget-friendly version, peel-and-stick mirrored tiles are widely available and require no professional installation. They are most effective on a flat, smooth wall surface where they can adhere evenly. The reflective quality is slightly less luxurious than glass but significantly more impactful than a blank wall for the small investment required.
Designer Advice: Angle a mirrored wall panel slightly, just one to two degrees off perfectly vertical, so it reflects the ceiling and creates the impression of a taller room rather than reflecting a straight-on view of the opposite wall.
17. Vertical Shiplap or Tongue-and-Groove Paneling
The scenario: Your bathroom walls are in rough shape. The paint is chipping, there are old filler marks, and the surface looks tired. You want to cover the problem rather than fix it.
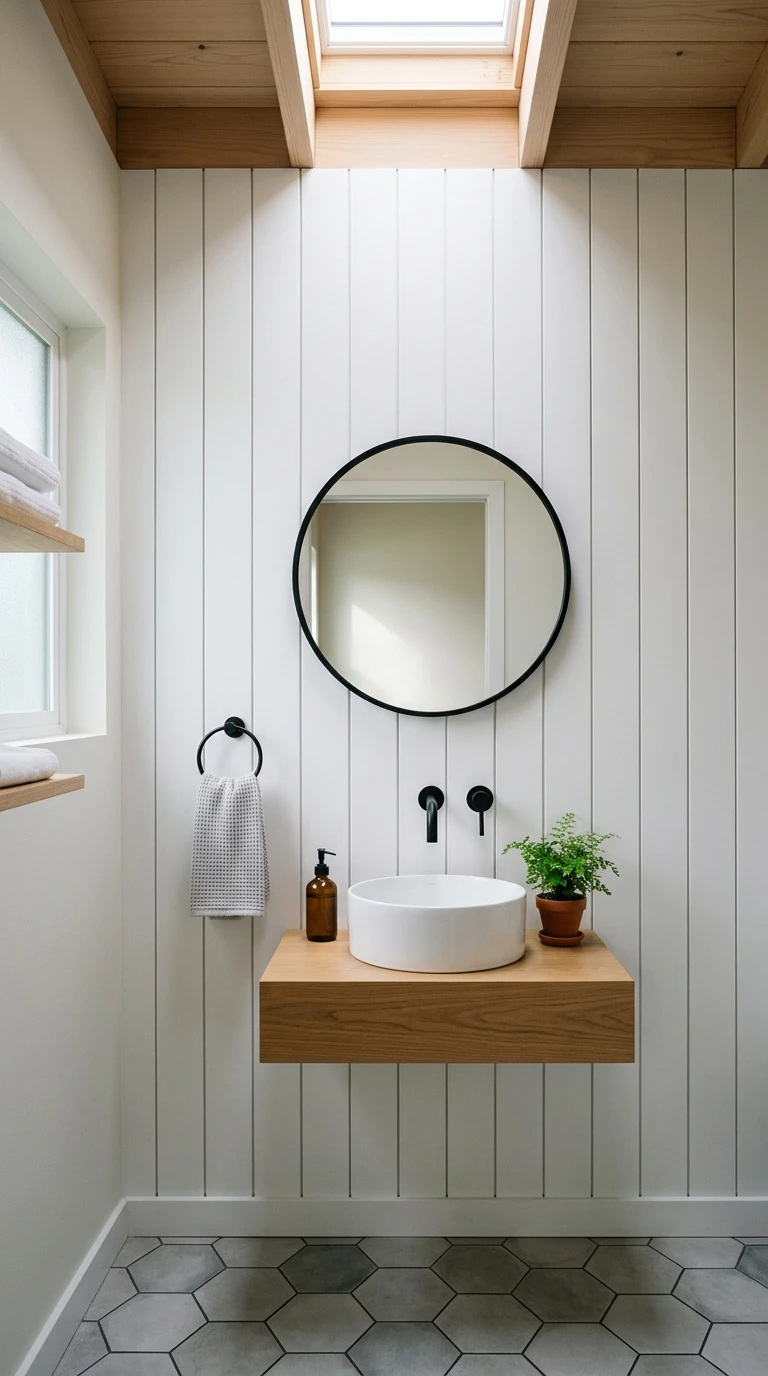
Vertical shiplap or tongue-and-groove wood paneling installed over existing walls is a practical solution to damaged or tired walls that simultaneously adds genuine architectural character. Installed vertically rather than in the more common horizontal orientation, the panels create strong upward-moving lines that make the ceiling feel higher and the room feel taller, which is one of the most useful visual effects you can create in a small bathroom.
Shiplap panels for bathroom use should be primed and sealed before installation to prevent warping and moisture damage, and painted in a water-resistant paint after installation. White shiplap in a small bathroom reads as crisp and fresh. Gray shiplap reads as more contemporary. Natural wood-tone shiplap, sealed with a matte polyurethane, reads as warm and Scandinavian. All three look significantly better than the damaged painted walls they are covering.
Installation on a dry zone wall, one that does not receive direct water splash, is manageable as a DIY project for anyone with basic carpentry skills. Use construction adhesive in addition to nails for a more secure hold, start from a perfectly level baseline, and check for level at every panel. A consistent reveal, the gap between each overlapping panel, is what separates a professional-looking result from a clumsy one.
Designer Advice: Paint the shiplap in the same color as the rest of the bathroom walls rather than a contrasting color. The tonal match keeps the paneling looking like an architectural detail rather than an added element, and the texture of the planks provides visual interest on its own without the contrast of a different color.
18. Wall-Mounted Sconces to Frame the Mirror
The scenario: You are tired of the single overhead light making everyone look terrible in your bathroom mirror. You want better light and something that looks more designed.
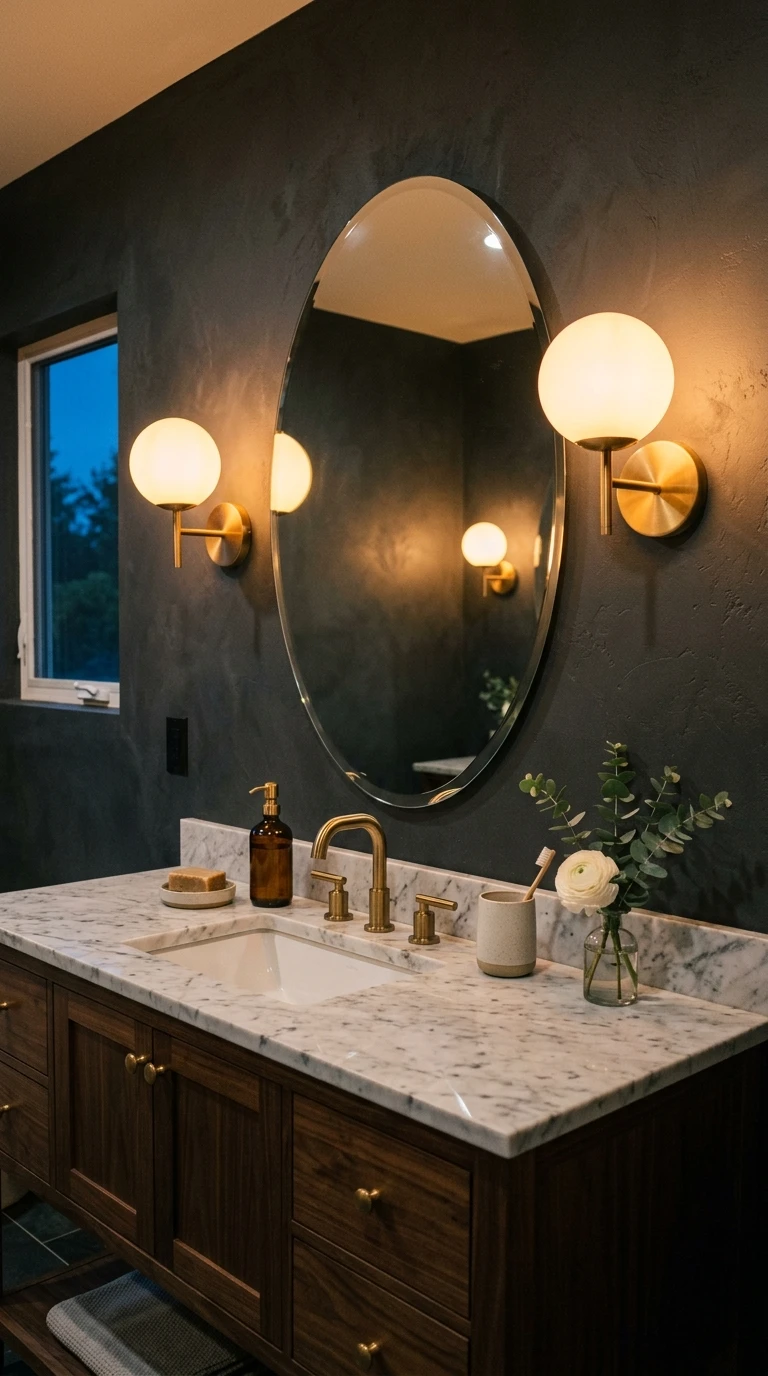
Wall-mounted sconces flanking a bathroom mirror serve double duty as both functional lighting and wall decor. They improve the quality of light at the vanity dramatically, because light coming from the sides of the face rather than overhead eliminates the harsh shadows that make overhead lighting unflattering. And a pair of well-chosen sconces in a warm metal finish or an interesting material adds a composed, hotel-quality quality to the vanity wall that a single overhead fixture simply cannot.
For a small bathroom vanity wall, look for sconces with a small footprint that extend outward rather than taking up significant wall space. Swing-arm sconces are particularly effective because they can be adjusted to direct light exactly where it is needed. Globe sconces in clear or amber glass cast a warm, diffused glow that is flattering at any time of day. Simple linear sconces in brass or matte black add a clean, contemporary line to the wall.
Hardwired sconces require an electrician for installation if there is no existing wiring in the sconce position. Plug-in sconces, which cord down to an outlet, are a much more accessible option that does not require any electrical work. Modern plug-in sconces are designed to hide or minimize the cord with a fabric sleeve, and the finished result is nearly indistinguishable from a hardwired installation at a fraction of the cost and complexity.
Designer Advice: Position sconces at face height when standing at the mirror, roughly 60 to 65 inches from the floor to the center of the sconce. This height provides the most flattering and functional light for daily grooming tasks.
19. A Narrow Floating Shelf Running the Full Wall Width
The scenario: You have no storage in your bathroom and no surface space. The walls are your only option but you do not want to sacrifice visual real estate entirely to function.
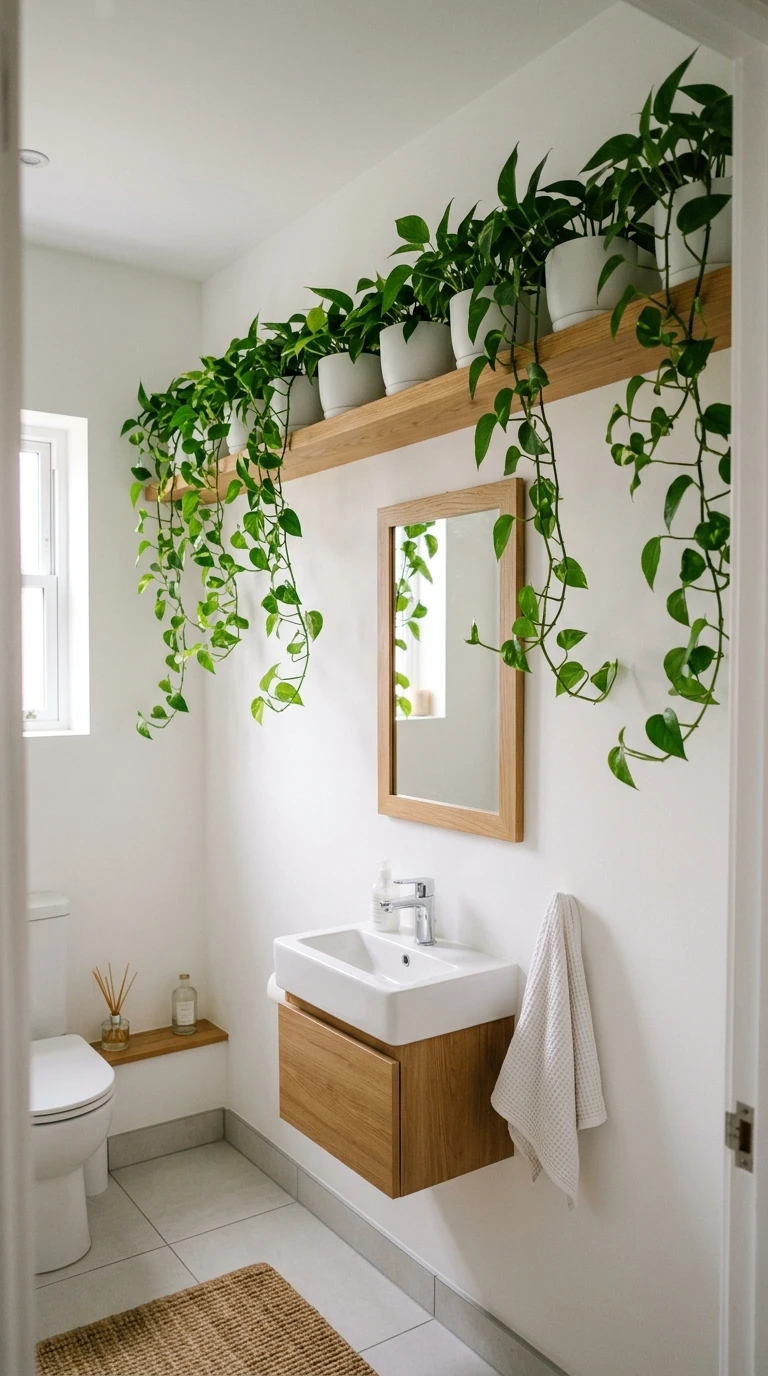
A narrow floating shelf that runs the full width of one bathroom wall, installed at roughly eye level or slightly above, solves a storage problem while simultaneously providing a surface for decorative objects and functioning as a strong horizontal design element in the room. The full-width span of the shelf is what makes it feel architectural rather than tacked-on. A shelf that spans the entire wall reads as a design feature. A shelf that floats in the middle of a wall reads as an afterthought.
Keep the shelf depth modest, 4 to 6 inches, so it does not project too far into the room. A deeper shelf in a small bathroom can feel obtrusive and make the space feel narrower. The narrow depth is actually an asset for styling, as it limits what you can put on it and therefore forces an edited, intentional arrangement rather than a catch-all clutter surface. Style it with a row of uniform items: matching ceramic jars, a line of small plants in identical pots, a collection of glass bottles, or alternating functional and decorative objects.
Install the shelf on the wall that your eye travels along naturally when you are in the bathroom, typically the wall you face when seated on the toilet or the wall beside the vanity. A level installation is non-negotiable. Even a slightly tilted shelf reads as wrong immediately and no amount of beautiful styling will fix the impression that something is off.
Designer Advice: Install the shelf slightly higher than feels natural, at 68 to 72 inches from the floor rather than the standard 60 to 64 inches. The higher position draws the eye up and reinforces a sense of height, and objects displayed at this level look more like art and less like bathroom products.
20. Hanging Plants on the Wall to Bring Life In
The scenario: Your bathroom has some natural light from a window or skylight but the walls are completely bare and the room feels lifeless despite the light.
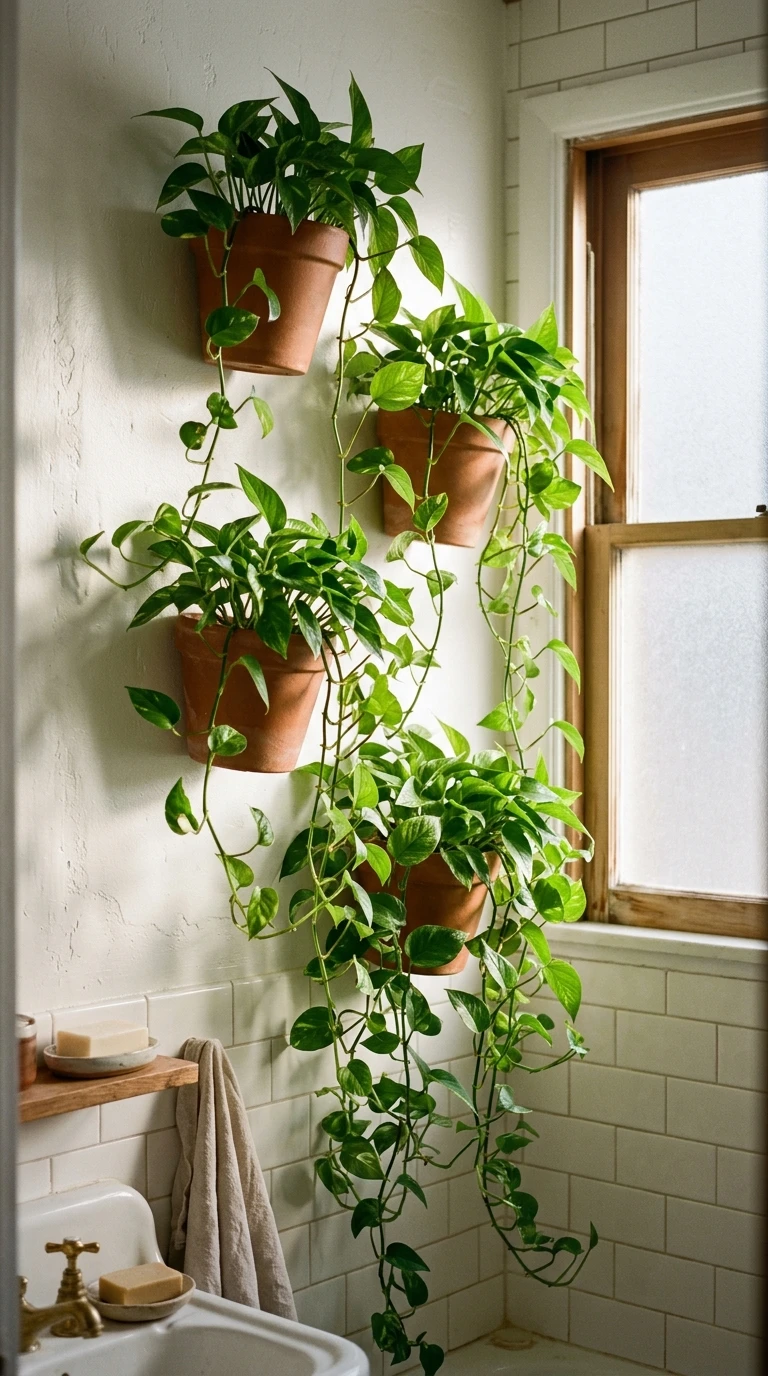
Wall-mounted planters and hanging plants are one of the most genuinely impactful things you can add to a small bathroom that receives natural light. Living plants on the walls do something that no piece of art or shelf can do: they change daily, grow noticeably over weeks, and bring a sense of life and movement into a room that is otherwise static. In a bathroom with good light, a trailing pothos, a string of pearls, a small fern, or a collection of air plants mounted on a wooden display board can completely change the atmosphere of the room.
For walls, look for wall-mounted ceramic or terracotta planters with a flat back designed to hang on a nail or hook. Small wall pockets in woven rattan or macrame that hold a small pot are another option that adds texture as well as the plant itself. Air plants mounted on driftwood, cork, or a small wooden plank require no soil and minimal maintenance, making them one of the lowest-commitment living wall options available.
The most bathroom-friendly plants are those that thrive in humidity and tolerate variable light. Pothos and philodendron are almost indestructible in bathroom conditions. Boston ferns love the humidity. Spider plants are resilient and trail beautifully from a wall planter. Air plants require misting two or three times per week but otherwise ask for almost nothing and are perfectly suited to the humid environment of a bathroom.
Designer Advice: Mount three or four small wall planters in a loose vertical arrangement rather than a single large one. The cluster of plants at varying heights reads more like a living gallery wall than a single plant hanging alone, and the variation in height and species creates more visual interest.
21. Textured Plaster or Limewash Paint for Depth Without Decor
The scenario: You do not want to hang anything. You do not want shelves. You just want the walls themselves to look interesting and rich, as if they were always that way.
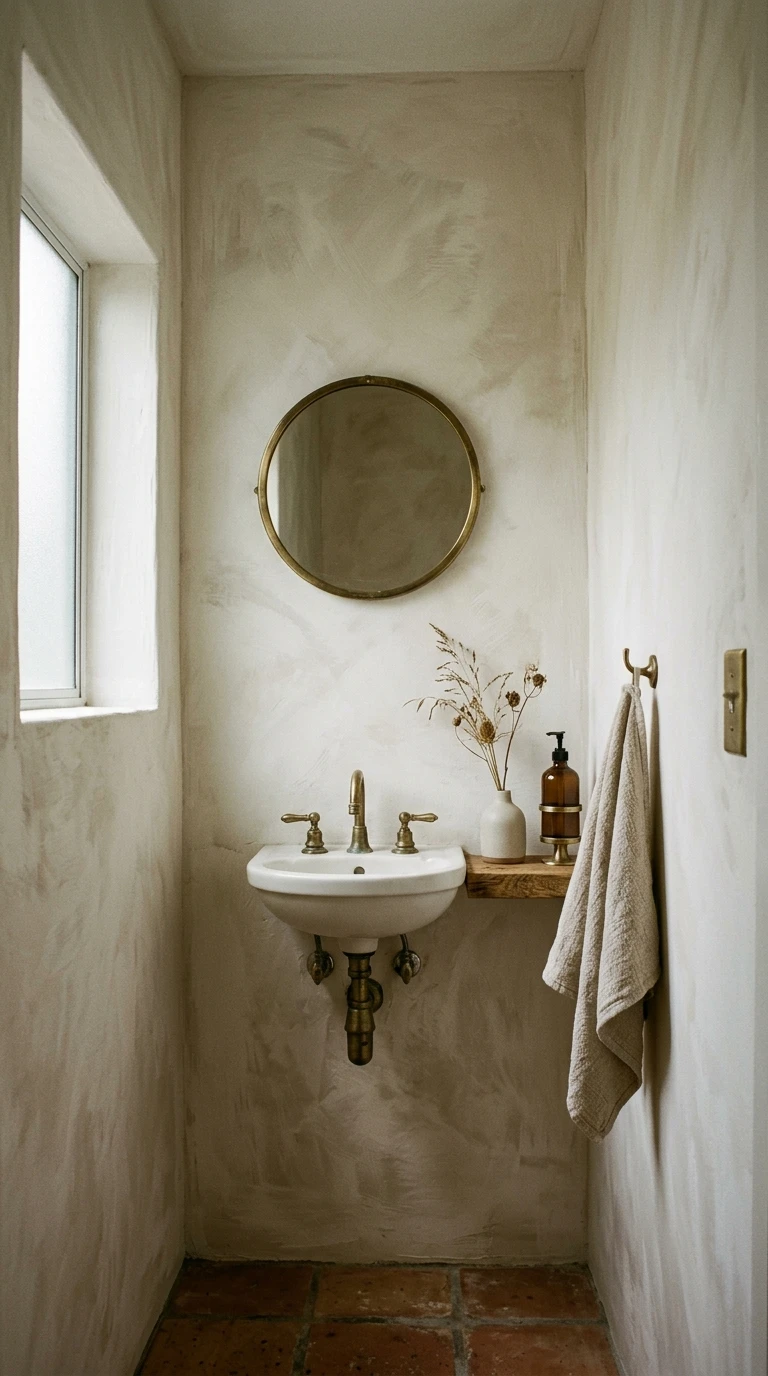
Textured plaster or limewash paint applied to the walls of a small bathroom creates a surface that has depth, variation, and genuine visual interest without requiring anything to be hung on it. The walls themselves become the decor. Limewash paint, which creates a soft, slightly cloudy, layered effect through its calcium-based formula, has a European aged-plaster quality that photographs beautifully and reads as expensive and artisanal in person. Applied in a warm white, a soft clay, or a dusty sage, it makes a small bathroom look like it belongs in a Tuscan farmhouse or a sophisticated boutique hotel.
Limewash paint is applied with a natural fiber brush using overlapping, irregular strokes rather than the systematic, consistent technique used for standard paint. The irregular application is the point: variations in thickness and coverage create the layered, lived-in quality that makes limewash distinctive. Most quality limewash paints are available at specialty paint stores and large home improvement retailers, and several brands offer bathroom-appropriate formulas with added moisture resistance.
Venetian plaster, applied with a trowel in thin layers and burnished smooth between coats, is the more labor-intensive and expensive cousin of limewash but creates an even richer result. It is polished to a smooth, slightly glossy finish that reflects light softly and changes quality throughout the day as the light shifts. In a small bathroom, even one wall finished in Venetian plaster becomes an architectural feature that elevates every other element in the room.
Designer Advice: Apply limewash or plaster to all four walls rather than just one accent wall. The technique reads most authentically when it wraps the whole room, and in a small bathroom, four textured walls feel cocoon-like and atmospheric rather than overwhelming.
Conclusion
The wall is the one surface in a small bathroom that you interact with entirely through your eyes rather than through function. You do not use it, you do not store things on it, and you do not clean yourself with it. That makes it purely about experience, about what it feels like to be in the room. And that is exactly why it deserves more attention than most people give it.
The 21 ideas in this article span a wide range of styles, budgets, and approaches. Some are permanent architectural decisions and some can be changed in an afternoon. Some cost almost nothing and some require a small investment. What they share is that every one of them does something real for the room: adds warmth, creates depth, solves a problem, or brings a quality that makes the bathroom genuinely more pleasant to be in.
Start with the section that resonated most with your bathroom and your taste. Pick one idea and do it properly rather than attempting three half-heartedly. A single well-executed wall decision, one beautiful print hung at the right height, one carefully styled ledge, one bold painted arch, will do more for your bathroom than a dozen ideas implemented without conviction. Commit to the one that excites you most, and the rest of the room will start to look better by association.
Frequently Asked Questions
What wall decor works best in a very small bathroom with limited wall space?
In a bathroom with very limited wall space, vertical solutions work best because they use height rather than width. A tall, narrow floating shelf, a vertical cluster of small frames, a column of wall-mounted plants, or a painted arch that draws the eye upward all make strong design statements without requiring a wide expanse of uninterrupted wall. The key is choosing one focused decor element rather than multiple small things competing for space.
Is it safe to hang art in a bathroom with high humidity?
Yes, with the right precautions. The most important factor is ventilation: a bathroom with a working exhaust fan or a window that opens regularly is safe for most wall art. Use UV-protective glass in frames to protect prints from moisture and light. Avoid paper-mounted art without a sealed frame. Canvas prints, metal prints, and prints behind glass all handle bathroom humidity well. Natural fiber wall hangings are also surprisingly moisture-tolerant in a well-ventilated bathroom.
How do I make a small bathroom look bigger with wall decor?
The most effective approaches are: hanging mirrors or reflective surfaces to bounce light and create depth; using vertical elements like tall narrow frames, vertical shiplap, or floor-to-ceiling curtains to suggest height; choosing a tonal color match between wall color and large decor elements to eliminate hard visual boundaries; and avoiding too many small objects scattered across the walls, which fragments the space visually. One or two confident choices are always more effective than many small ones.
What is the best height to hang art in a bathroom?
For a standard bathroom, hang art so the center of the piece sits at roughly 57 to 60 inches from the floor, which is the standard gallery hanging height and roughly eye level for most adults in a standing position. In a small bathroom where you want to create the impression of height, hang art slightly higher, at 62 to 65 inches to center, which draws the eye upward. Above the toilet specifically, aim for the center of the piece to sit about 6 to 8 inches above the tank lid.
Can I use regular paint in a bathroom or do I need a special bathroom paint?
In a bathroom with good ventilation, high-quality standard paint in a satin or semi-gloss finish performs well and resists moisture adequately. Matte finishes are not recommended in a bathroom because they are harder to clean and more prone to mildew in consistently humid conditions. If your bathroom has poor ventilation or is frequently very steamy, bathroom-specific paint formulas with added mildew resistance are worth the small additional cost, particularly for the walls closest to the shower.
What wall decor ideas work for renters who cannot make permanent changes?
Several ideas in this article are renter-friendly: peel-and-stick wallpaper on a dry accent wall, removable wall decals, command strip-mounted frames and small shelves, macrame or woven hangings on a single nail, and wall-mounted planters with removable hooks. Painted shapes and arches are technically reversible with a coat of paint but require landlord permission in most rental agreements. The peel-and-stick and command strip options are the most genuinely no-commitment choices.